
Tech Talk: E13 Cranks repair and maintenance

Already replaced: E13 crank at Dan's FatBoy
Hier gehts zur Deutschen Version!
Visiting last Eurobike we realized that also in 2016 many companies will equip their FATBikes with E13 FATBike cranks. Well, let's put it that way: E13 cranks to our experience are blessing and curse. Blessing as they are leightweight and perfectly sneak onto your FATBike (perfect chainline on 190mm rear end and low profile Q-factor). On the other hand the E13 cranks are not what you will call an engineering masterpiece.
Frankly spoken: light in weight but heavy in maintenance. But not every FATRider is willing or able to swap worn cranks – so time for us to step in help you to protect your assets!
What's the issue?
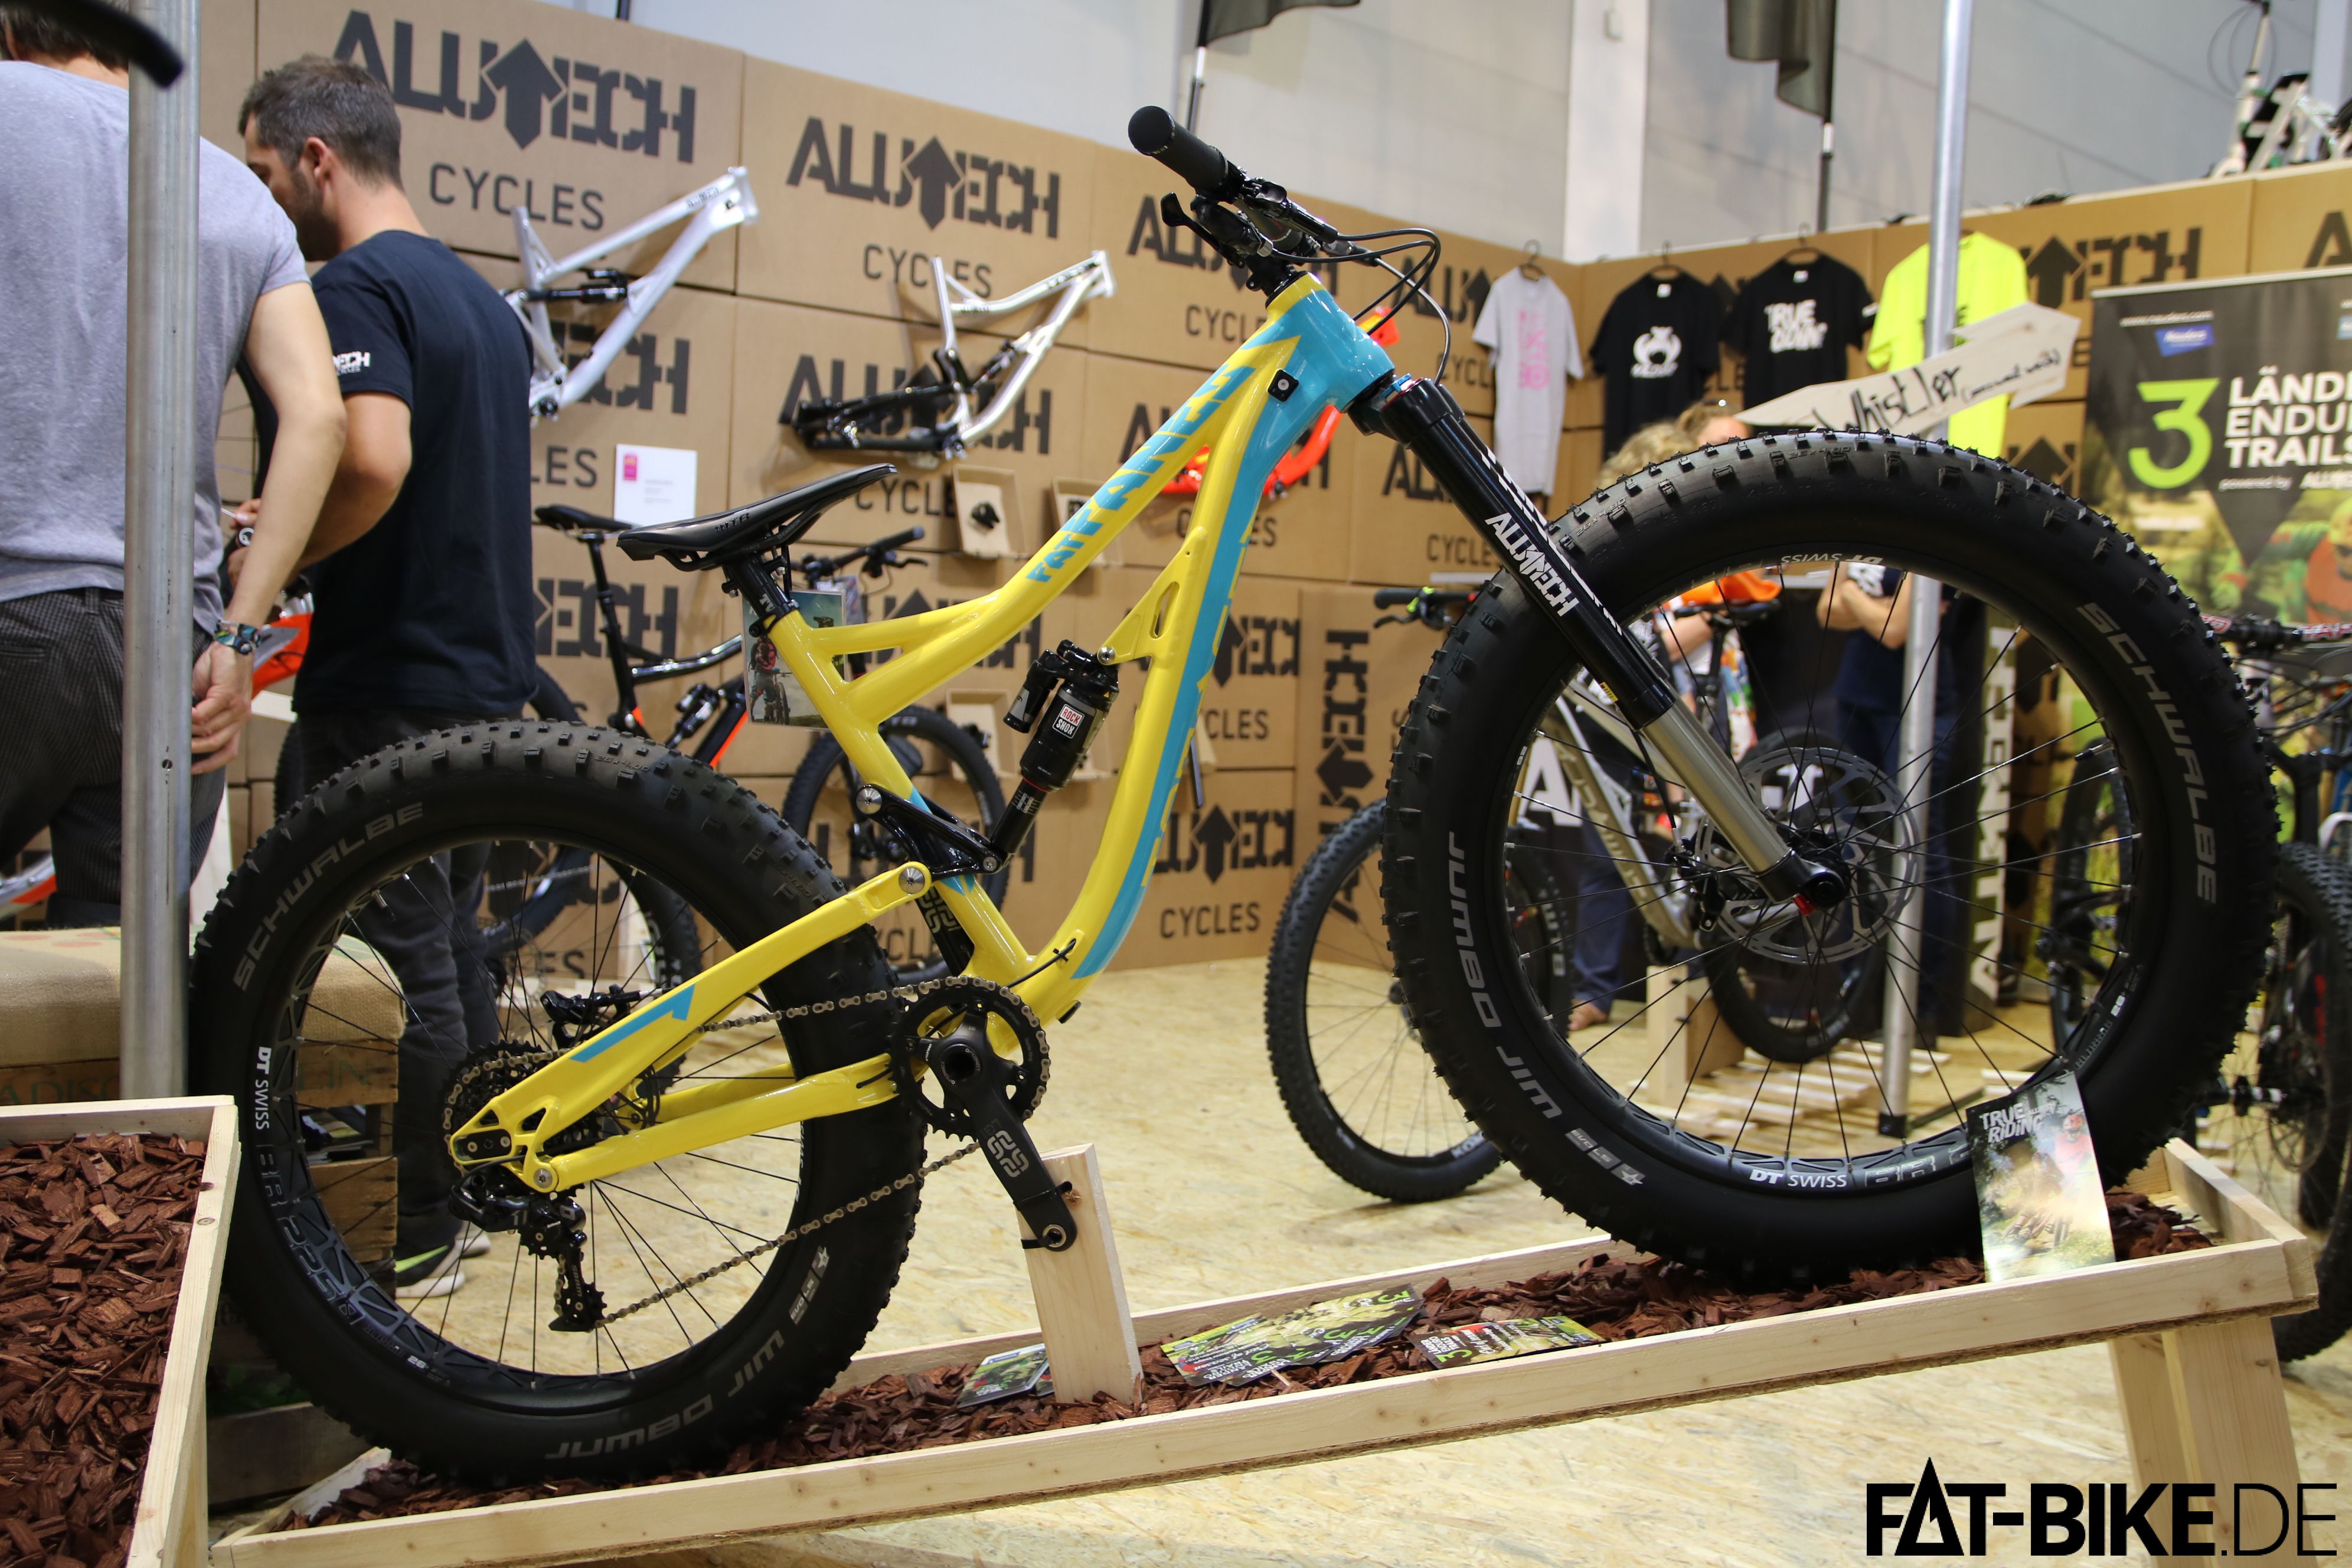
Dream machine with E13: Alutech FAT Fanes
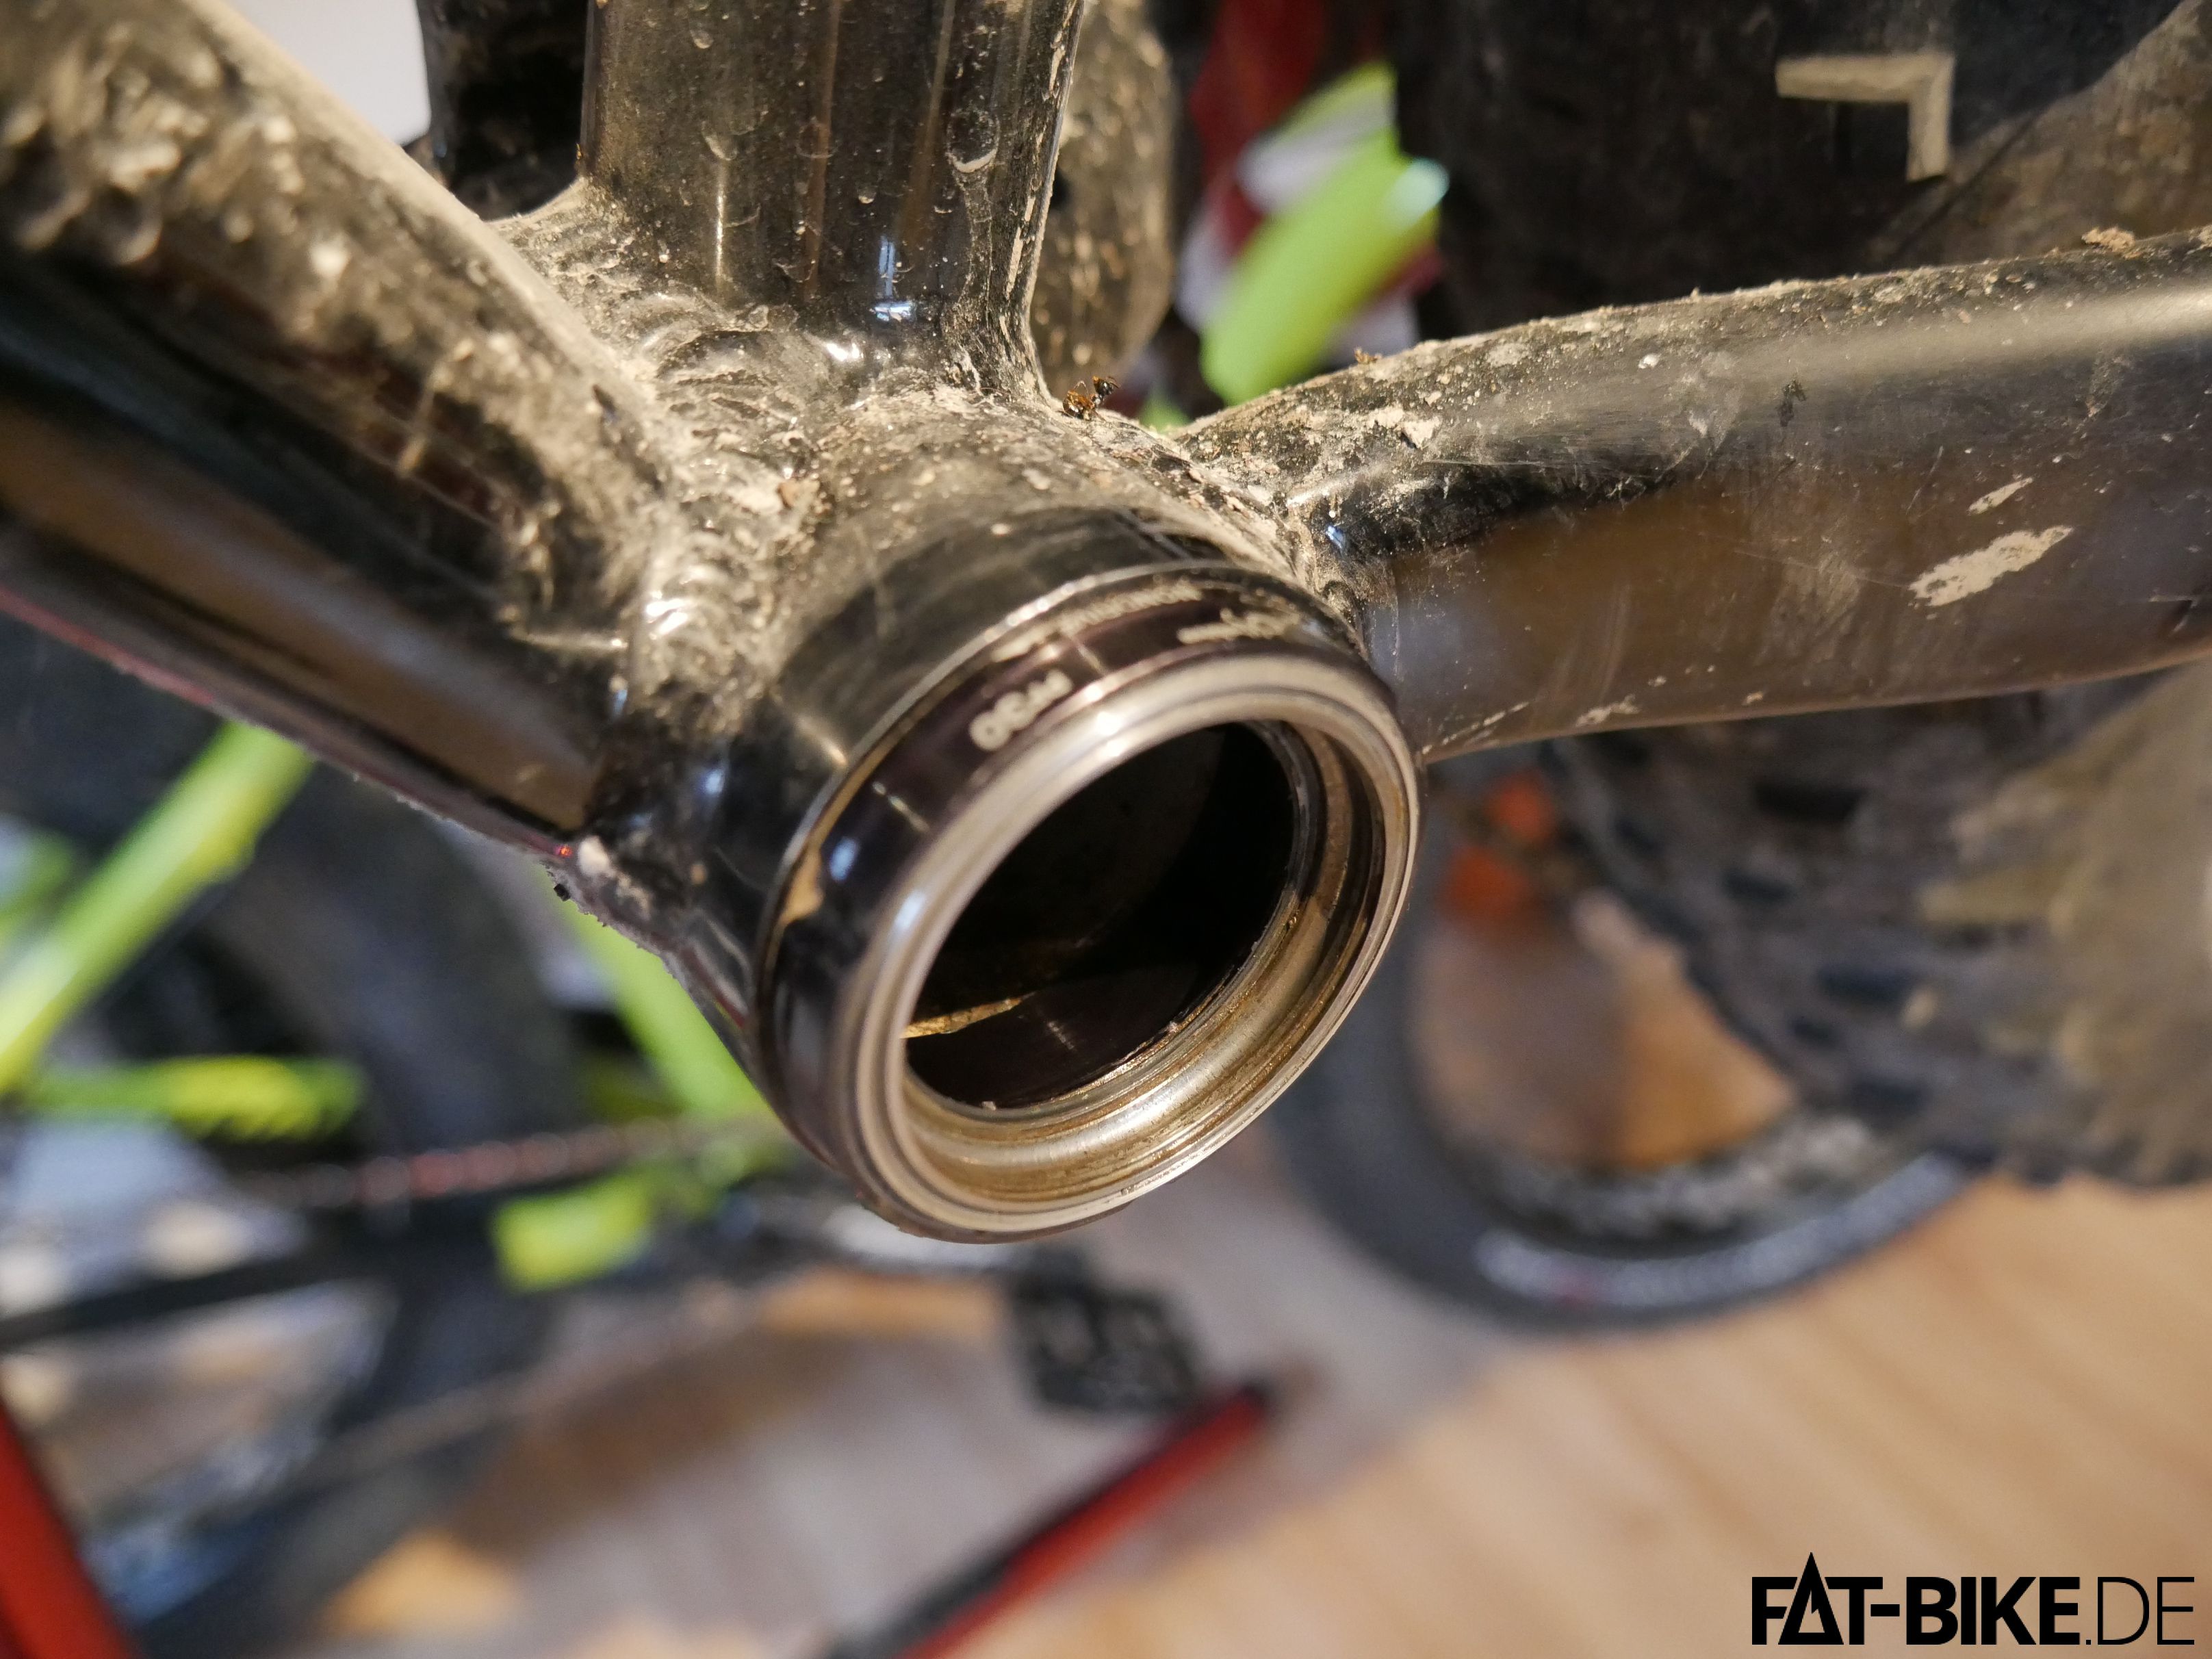
There are a couple… E13 uses standard ball bearings instead of sealed (and to be honest way standard!) groove ball bearings. This is particularly bad as there is no tube or sleeve that connects the bottom bracket shells forming a cartridge. This would protect the inner side of ball bearings against water and debris trickling in from the seat post. So this debris (and rust…) helps the bearing balls to grind into the bearing surface.
Speaking about bearing balls: they are held in position by simple plastic cages which are very likely to break and crumble during every day use – again fostered by rust and dirt.
So yepp, there are some good reasons to take care of your E13 bottom bracket and cranks. Especially in case you want to keep those cranks on your FATBike for a while, we highly recommend you to perform a proper maintenance at least once a year – and if you like wet and muddy rides: do it more often!
So time to start your E13 cranks repair – it's simple!
Step by step: what to do?
Find here a super detailed step-by-step guide how to dismantle and rebuild your E13 bottom bracket.
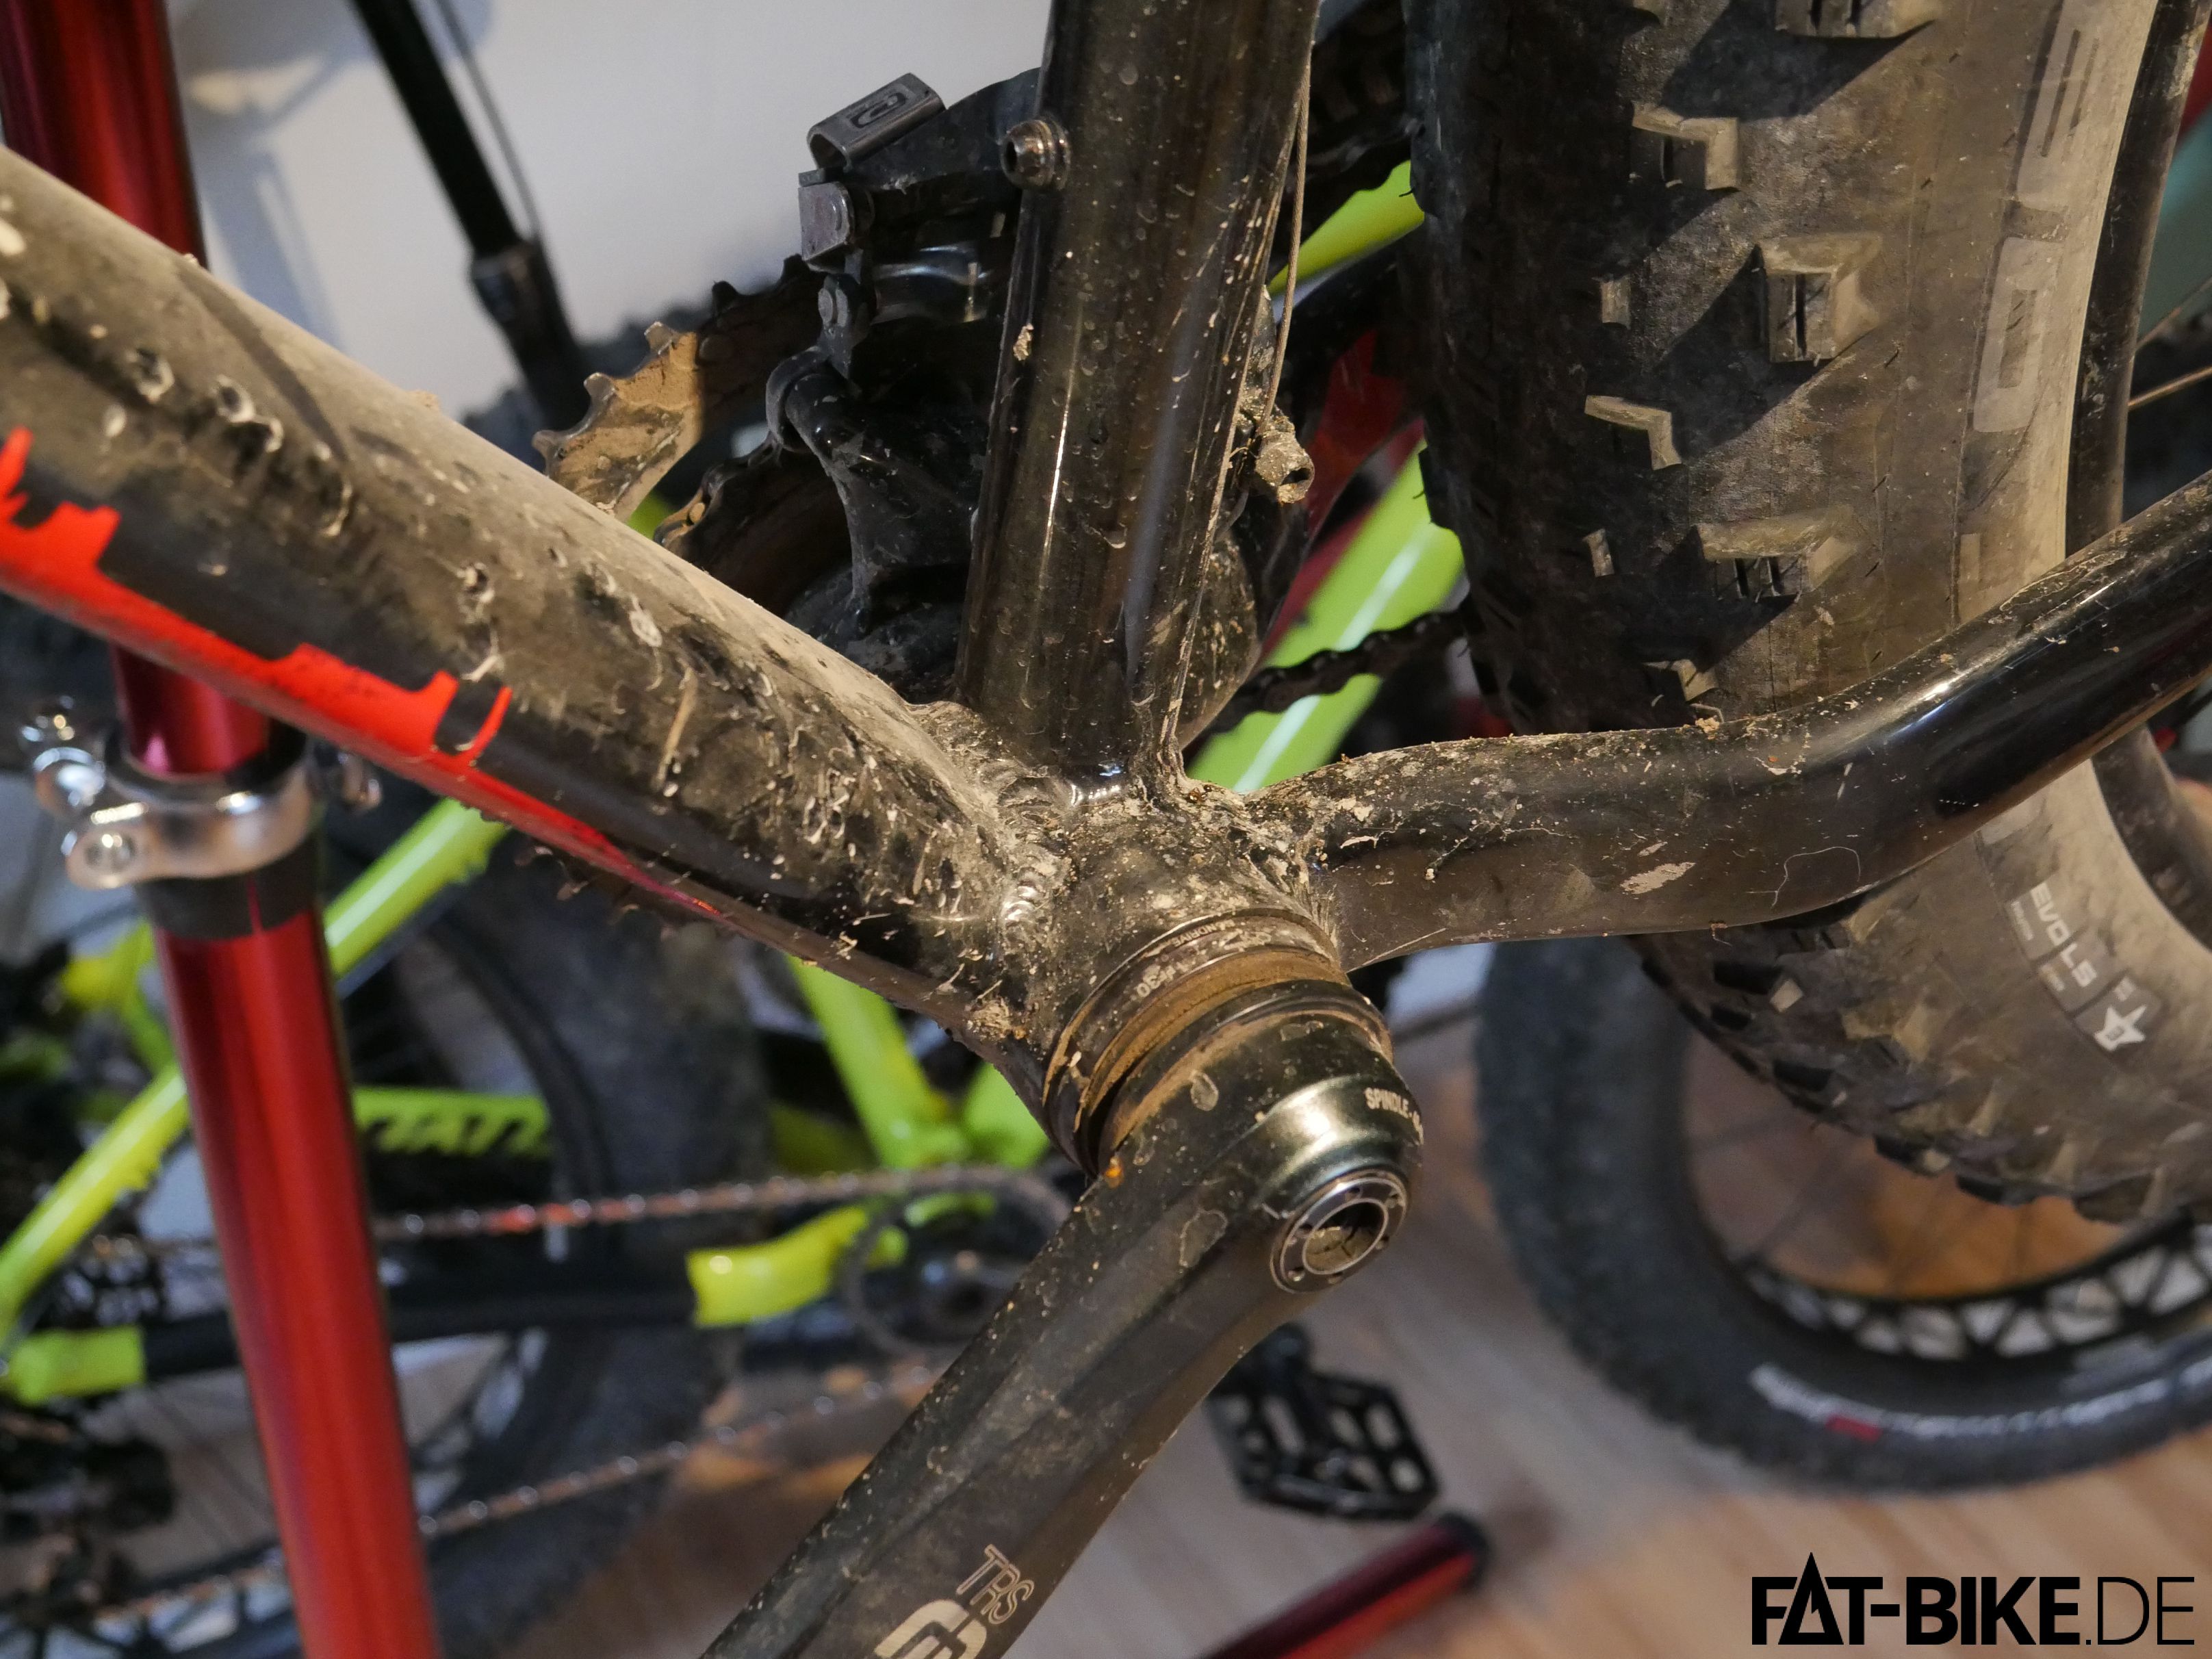
Step 1: know your enemy!
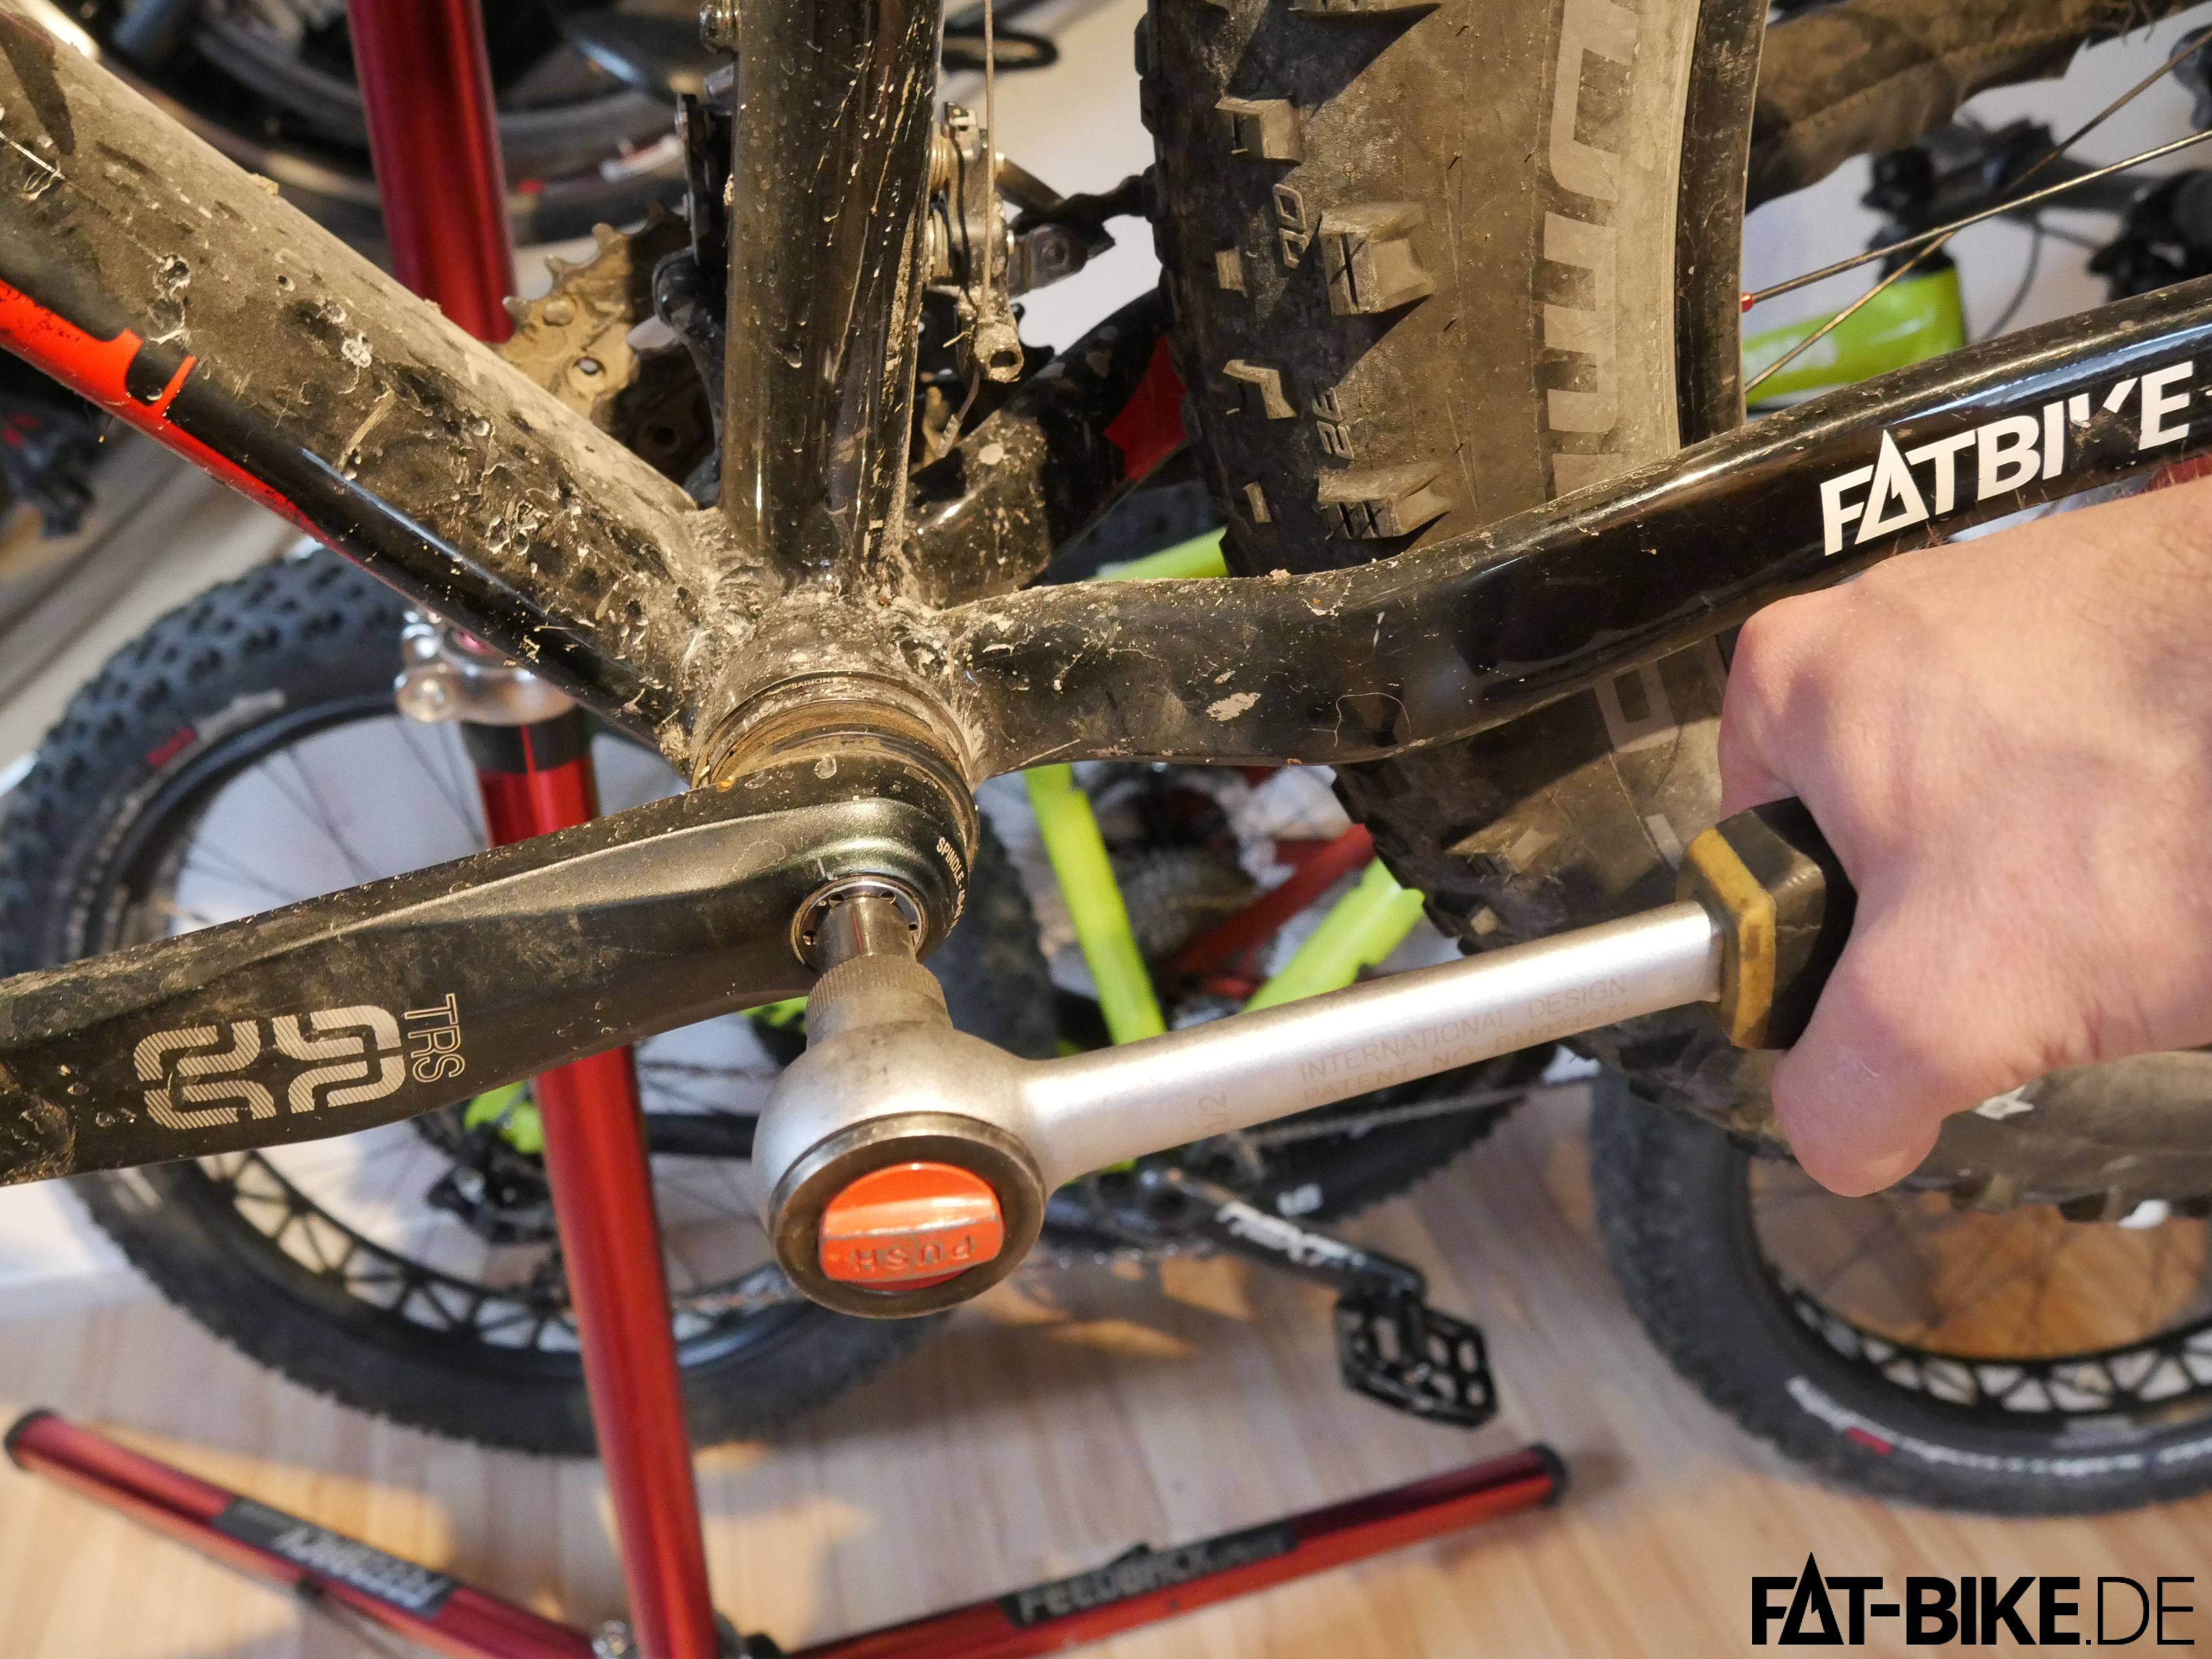
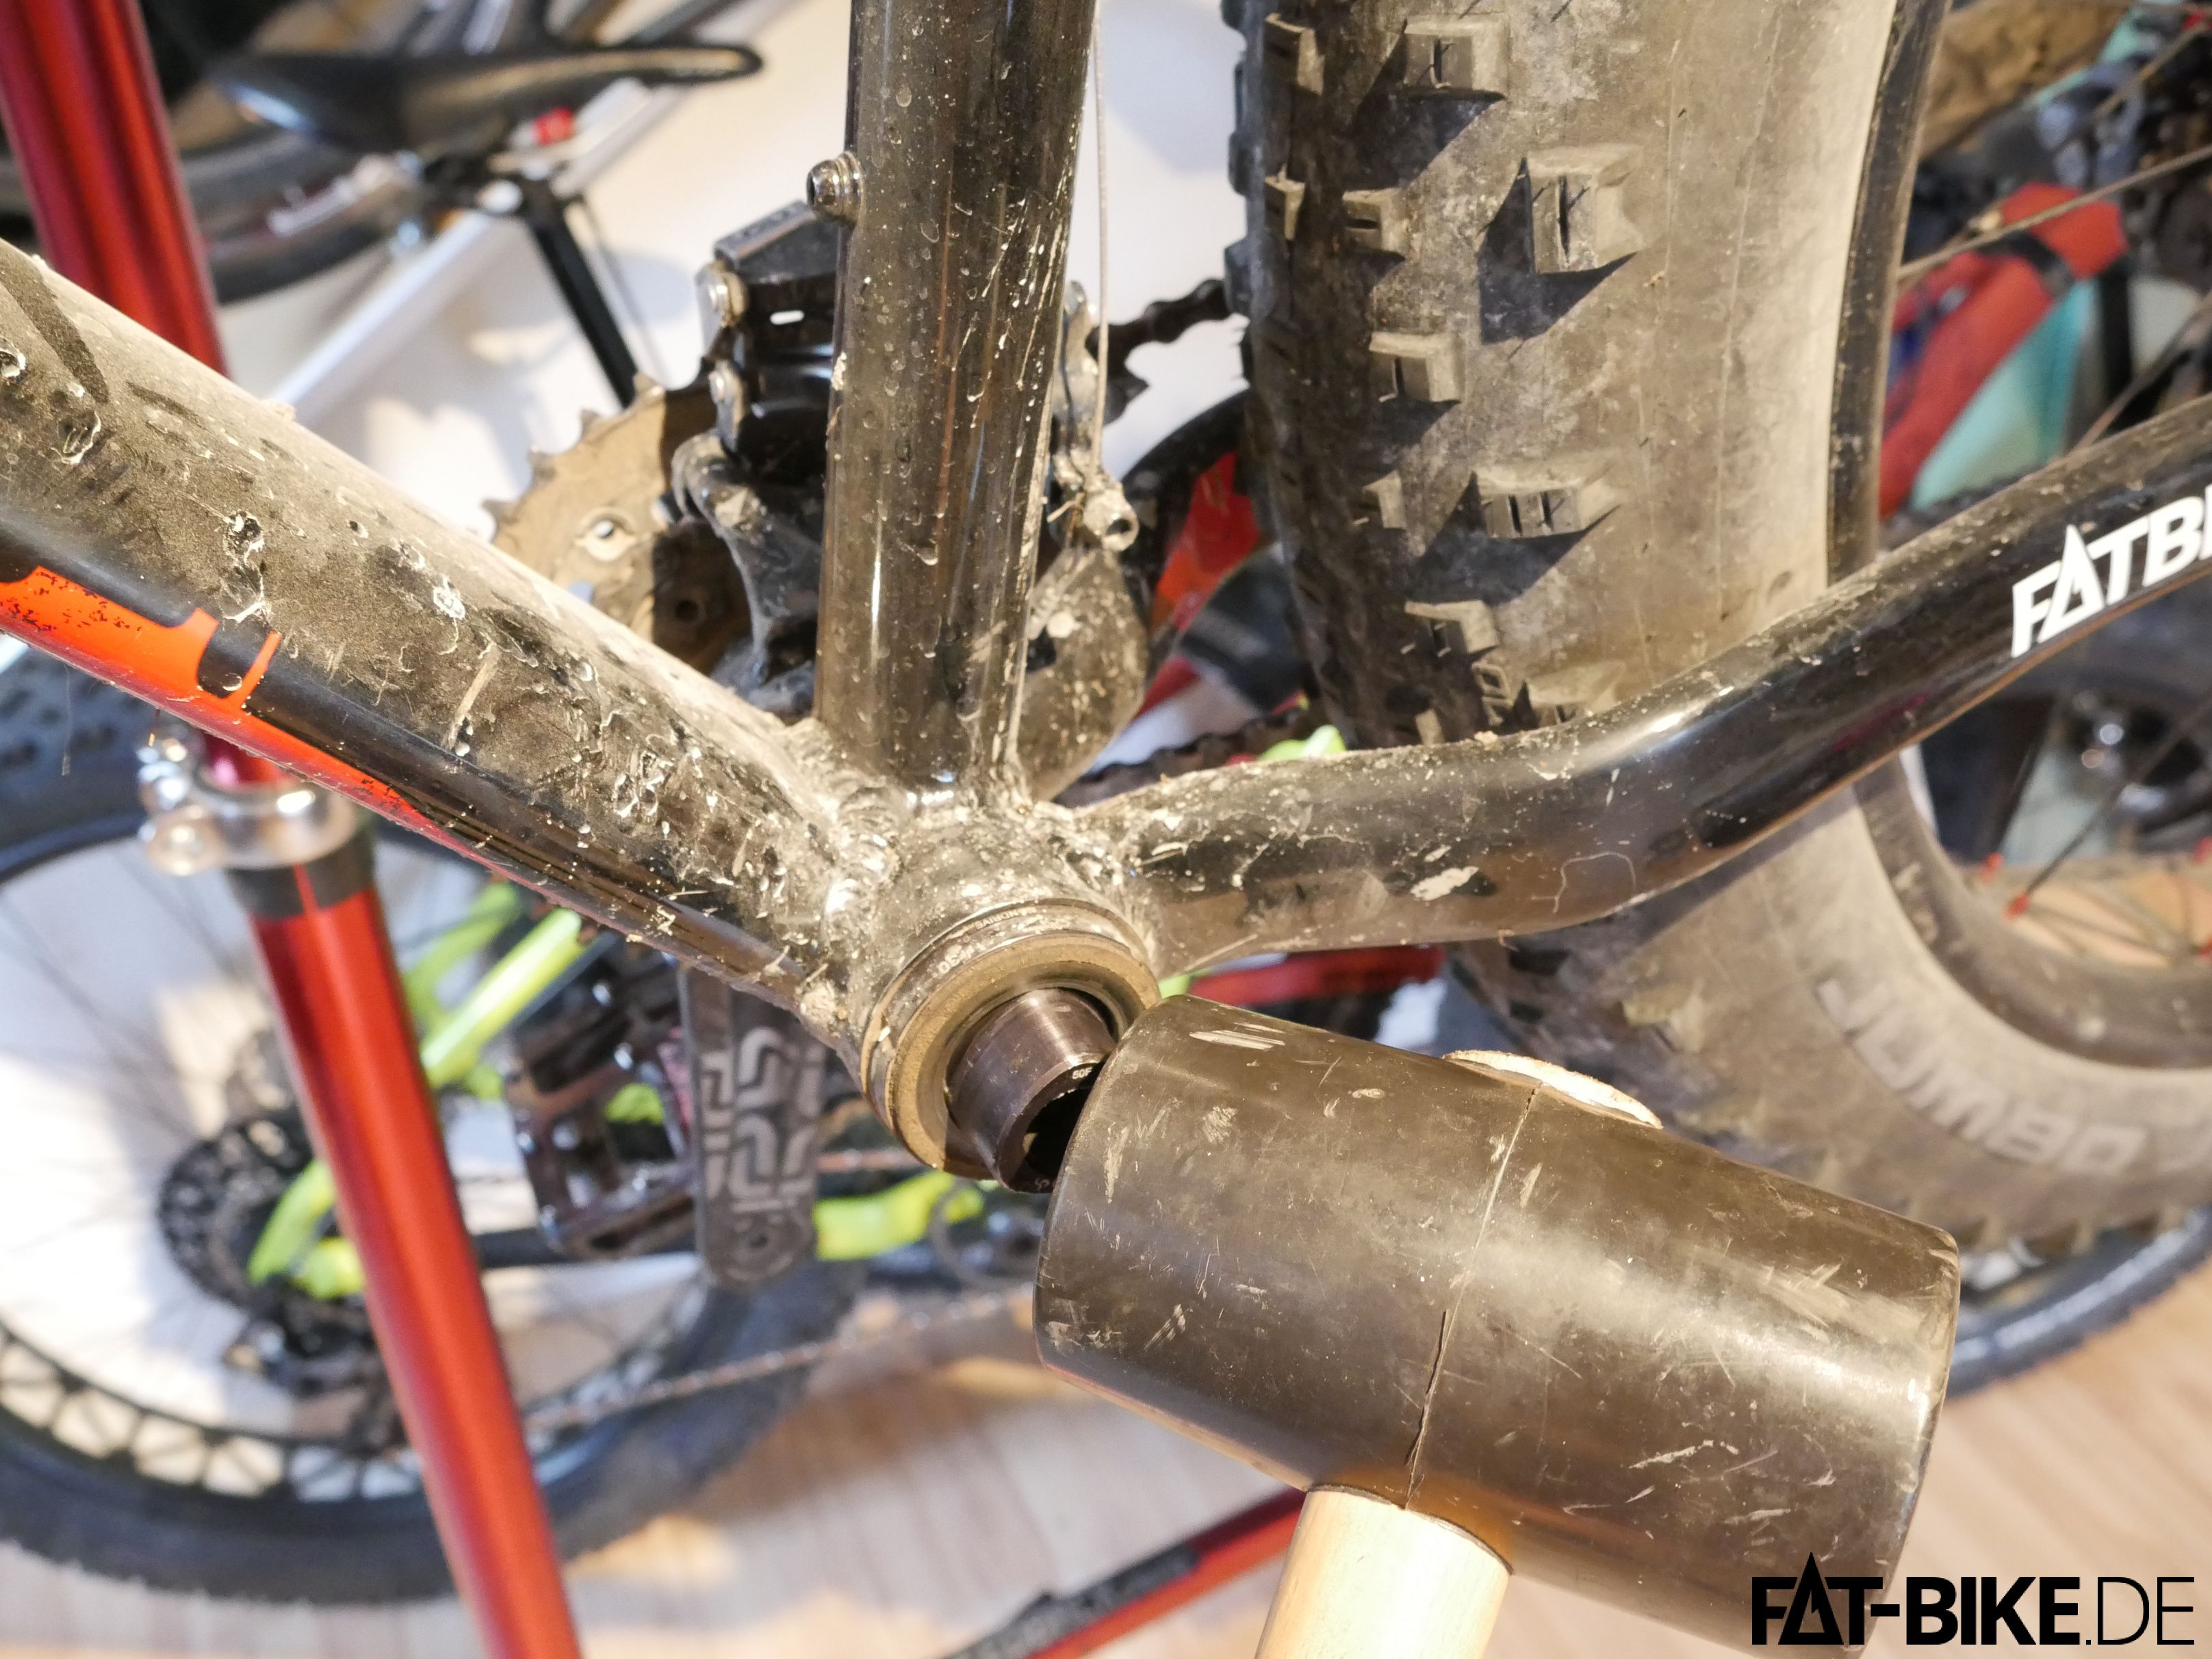
Step 2: pull off the left crank using an 8mm hex wrench and lots of force. Thankfully E13 has equipped their FATBike cranks with an integrated puller screw. Rotate counter clockwise!
Step 3: remove the crank and put it aside.
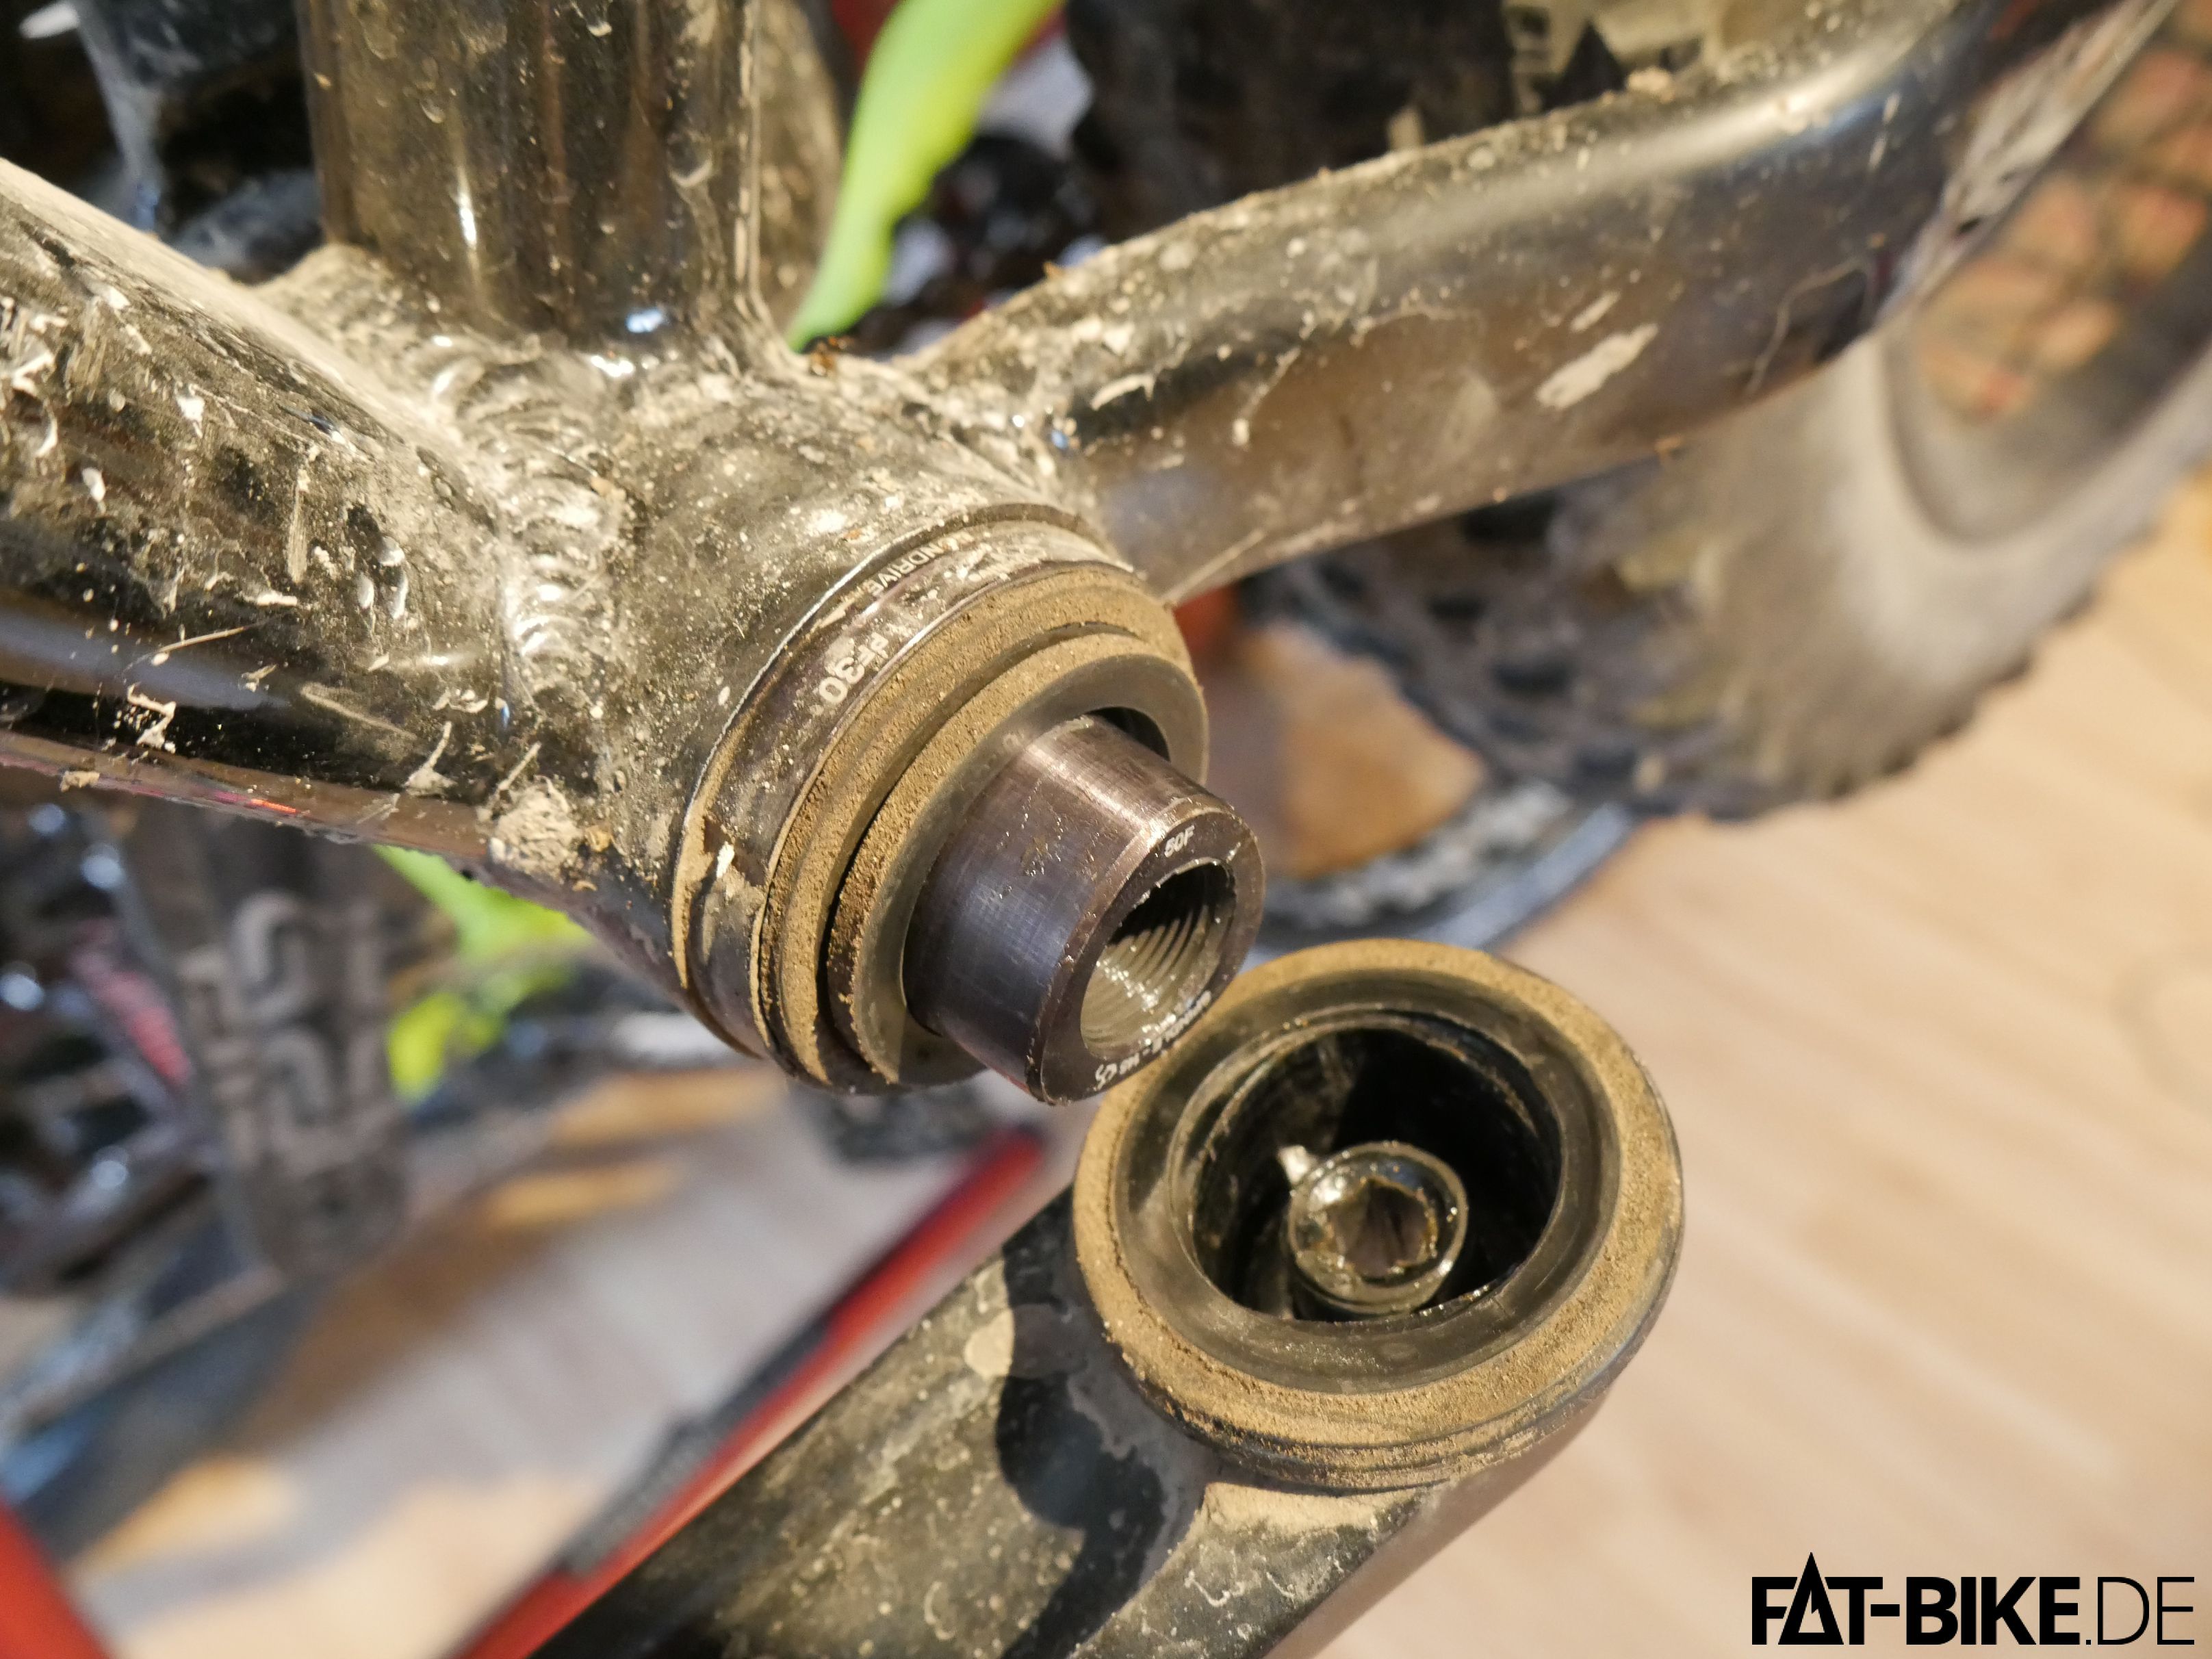
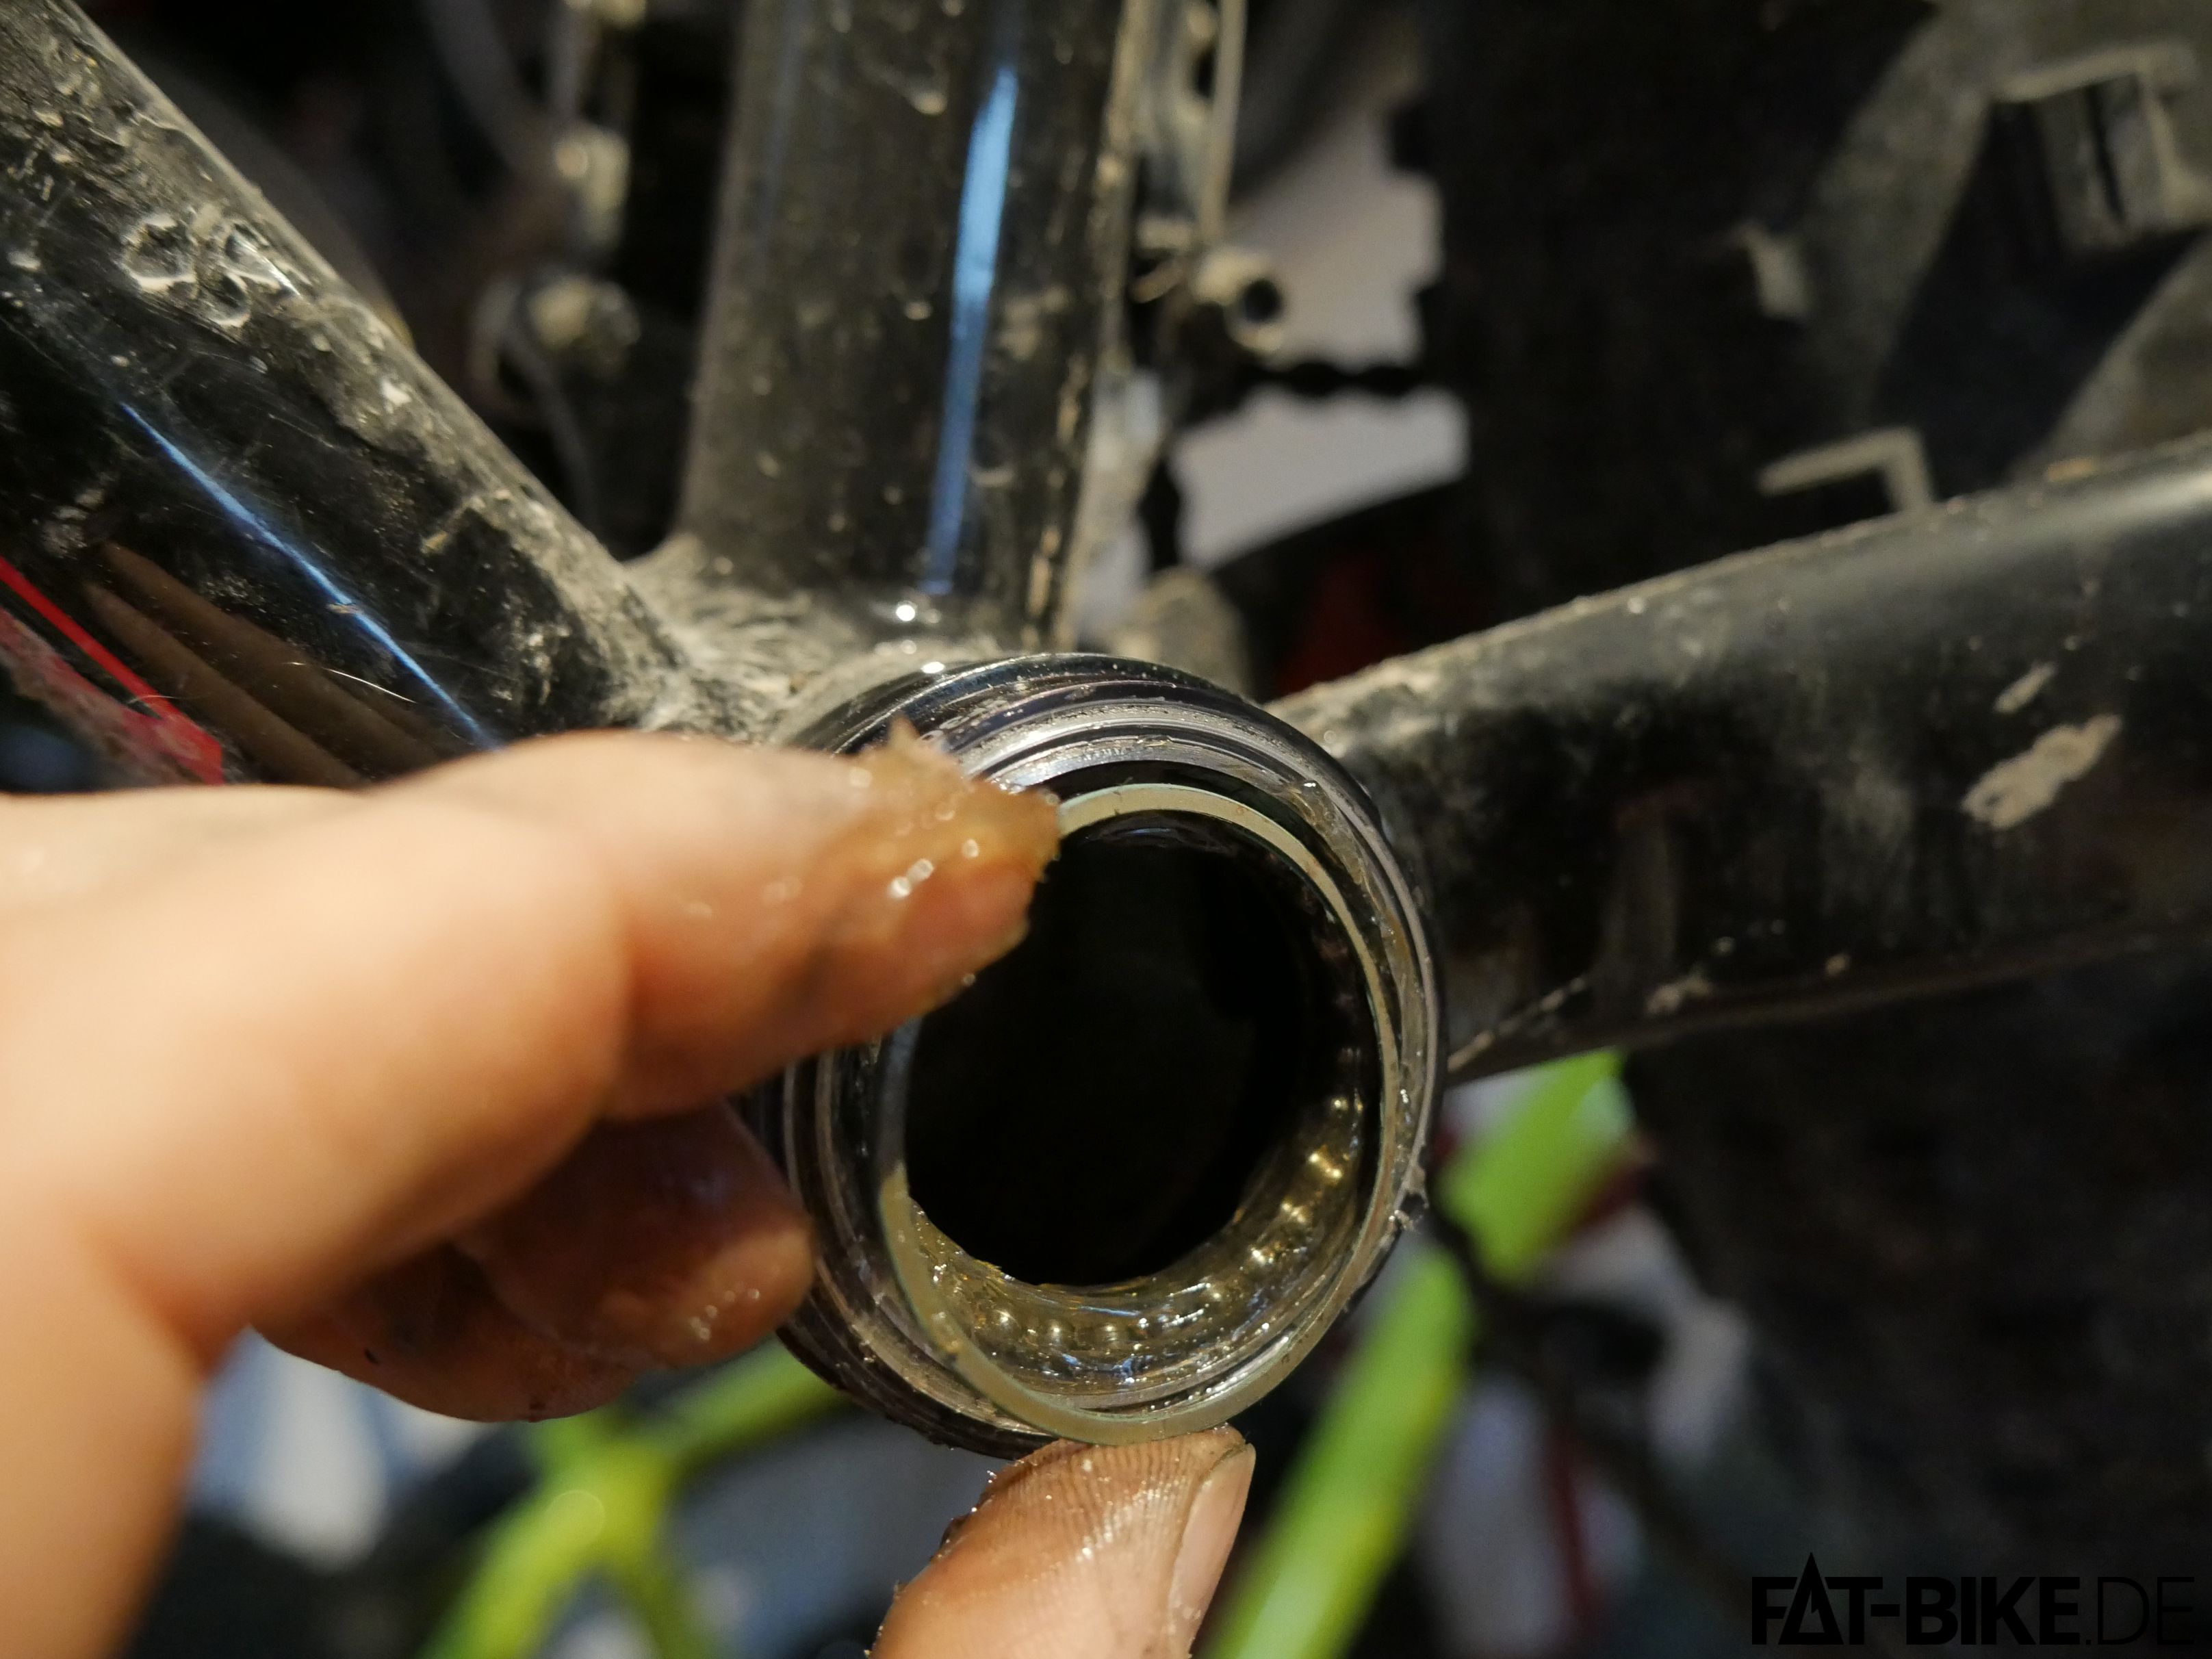
Step 4: use a rubber hammer to gently force the spindle out of position. If this is the first time you remove the spindle be preared that on drive side the crank side bearing surface (or better: it's holder) might be stuck to the spindle. In this case pieces of a crumbled ball bearing might fall out – make sure you catch the balls and pieces in that case!
Step 5: take off the chain and remove the spindle from the bottom bracket carefully. Take care of any loose pieces coming from the inside.
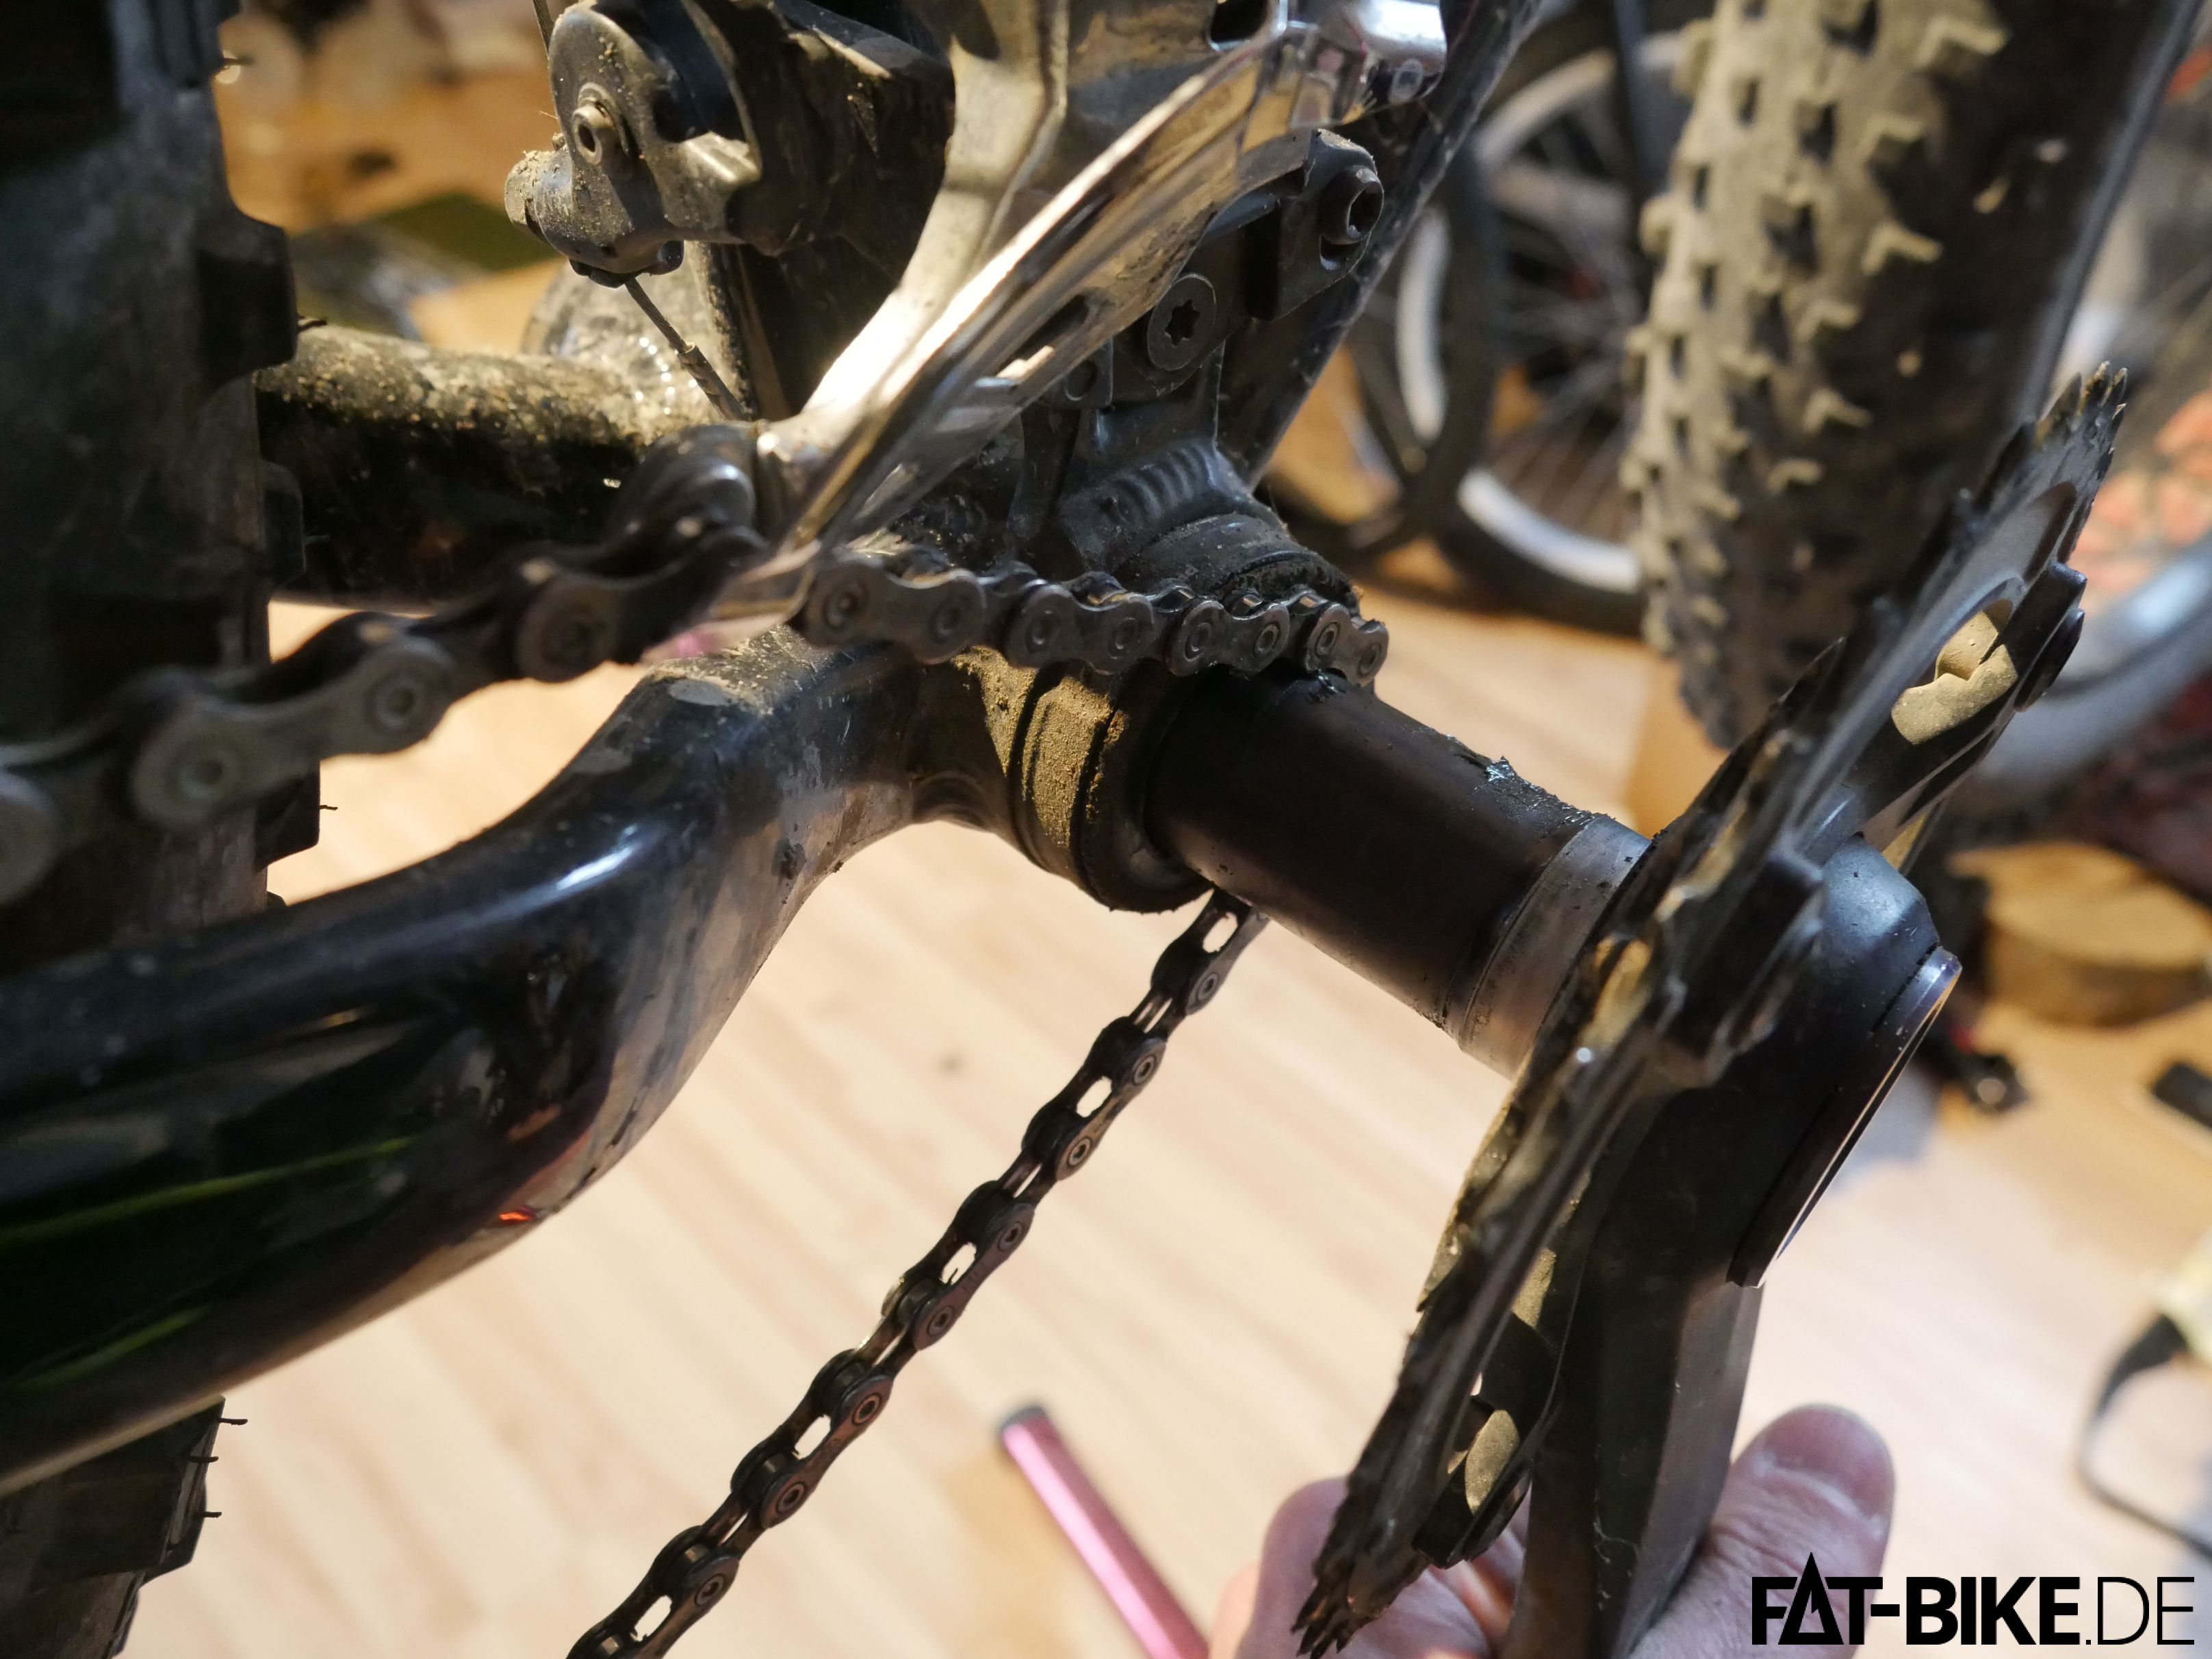
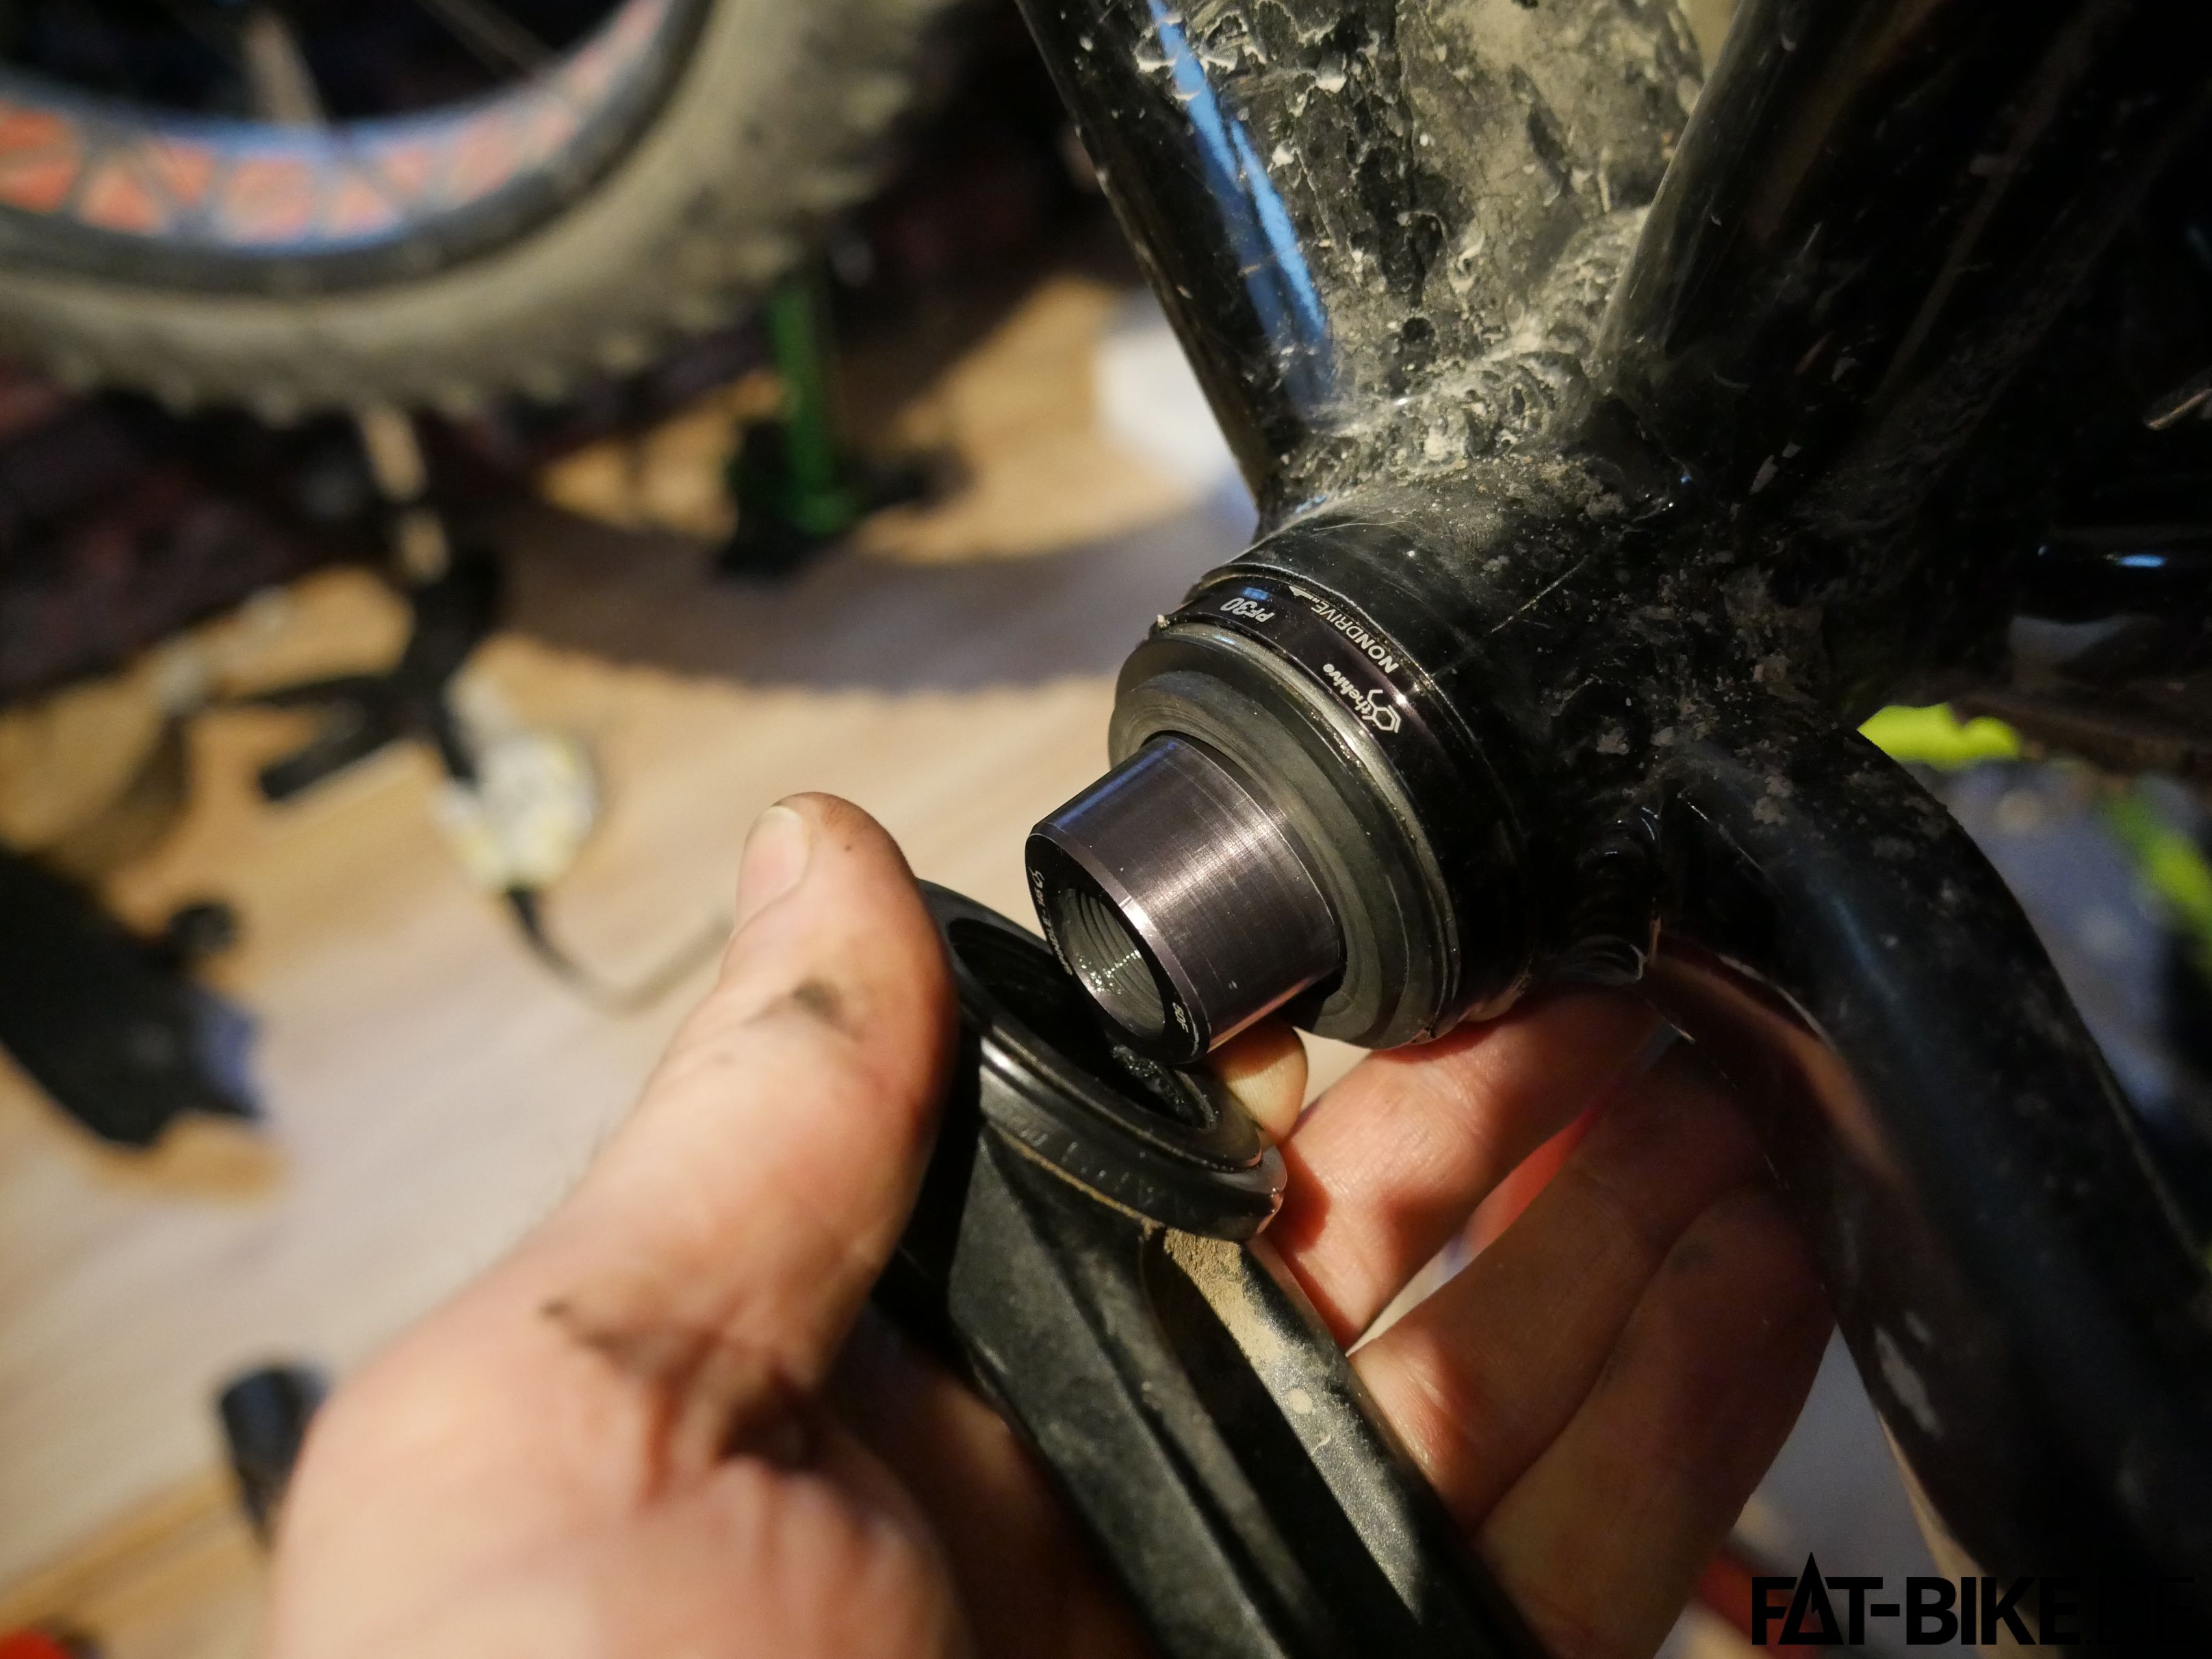
Step 6: remove the outer bearing surface with it's plastic holder. On drive side as said this might be stuck on the spindle. If so, use a wide screw driver or similar to carefull pry it off and remove it. This may take a while and stress your patience. But take your time – in order to avoid clicking noises it's worth it. So, from here we focus on non drive side. Any maintenance work will be similar on drive side.

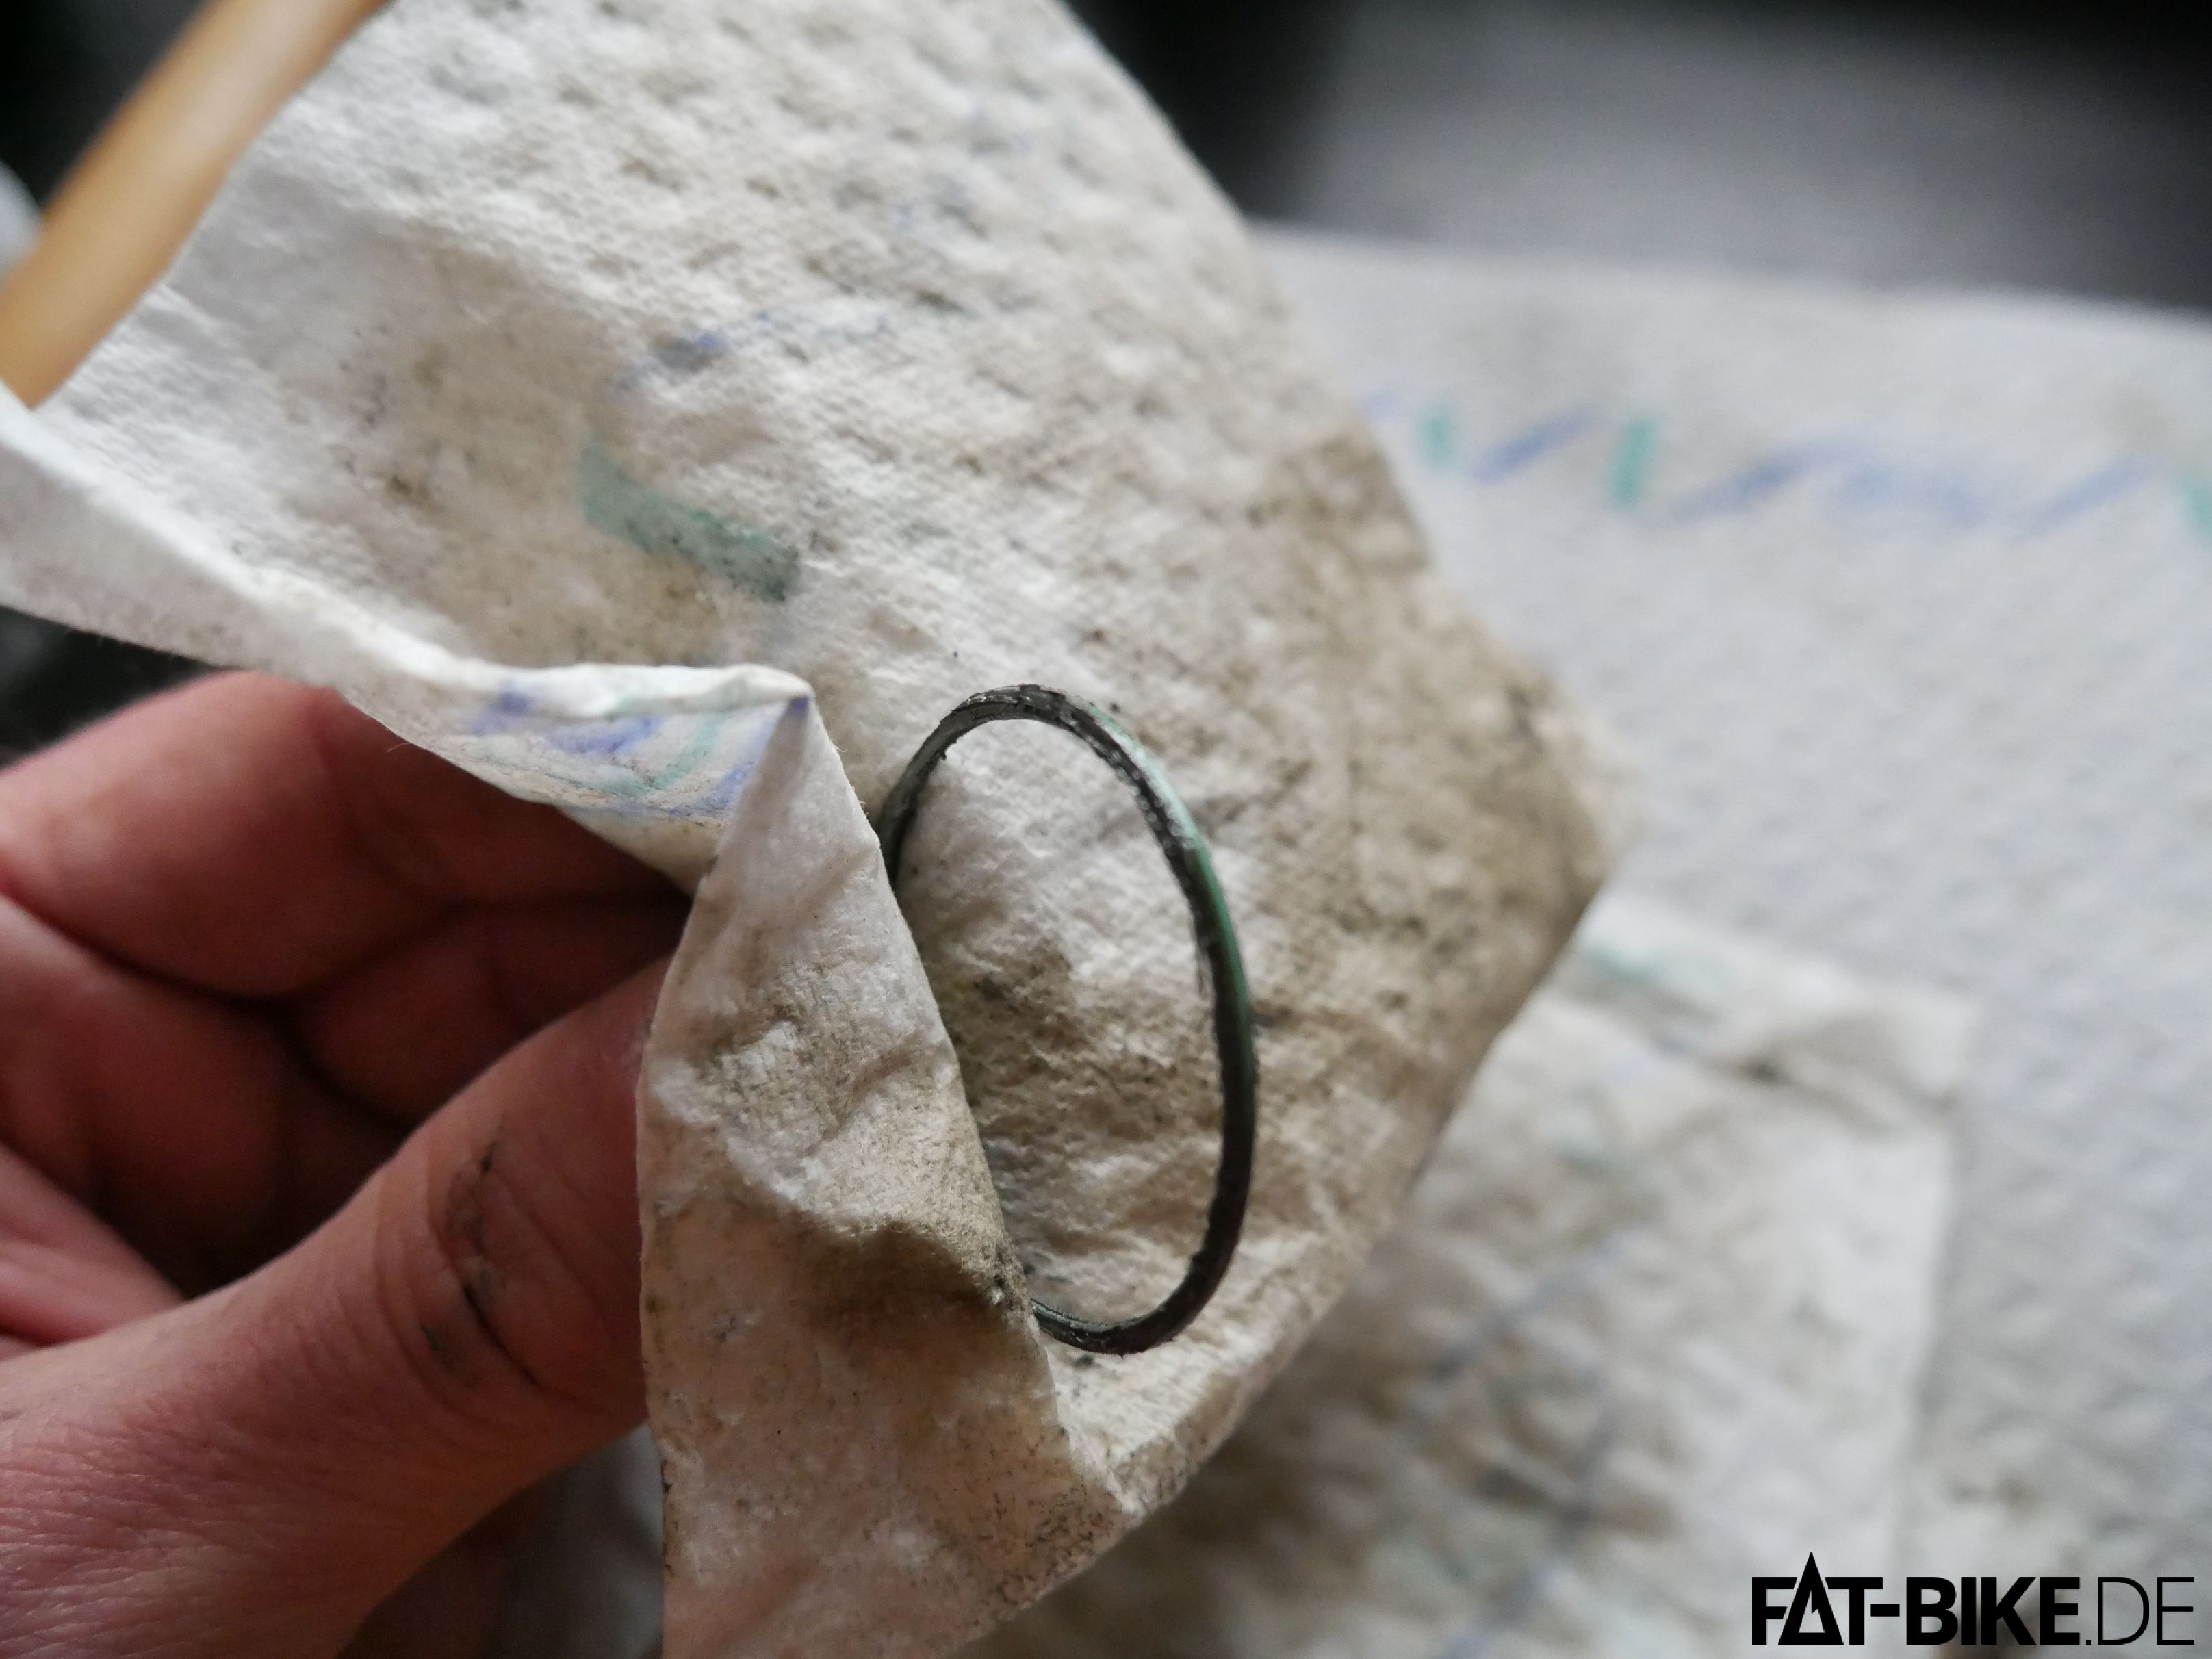
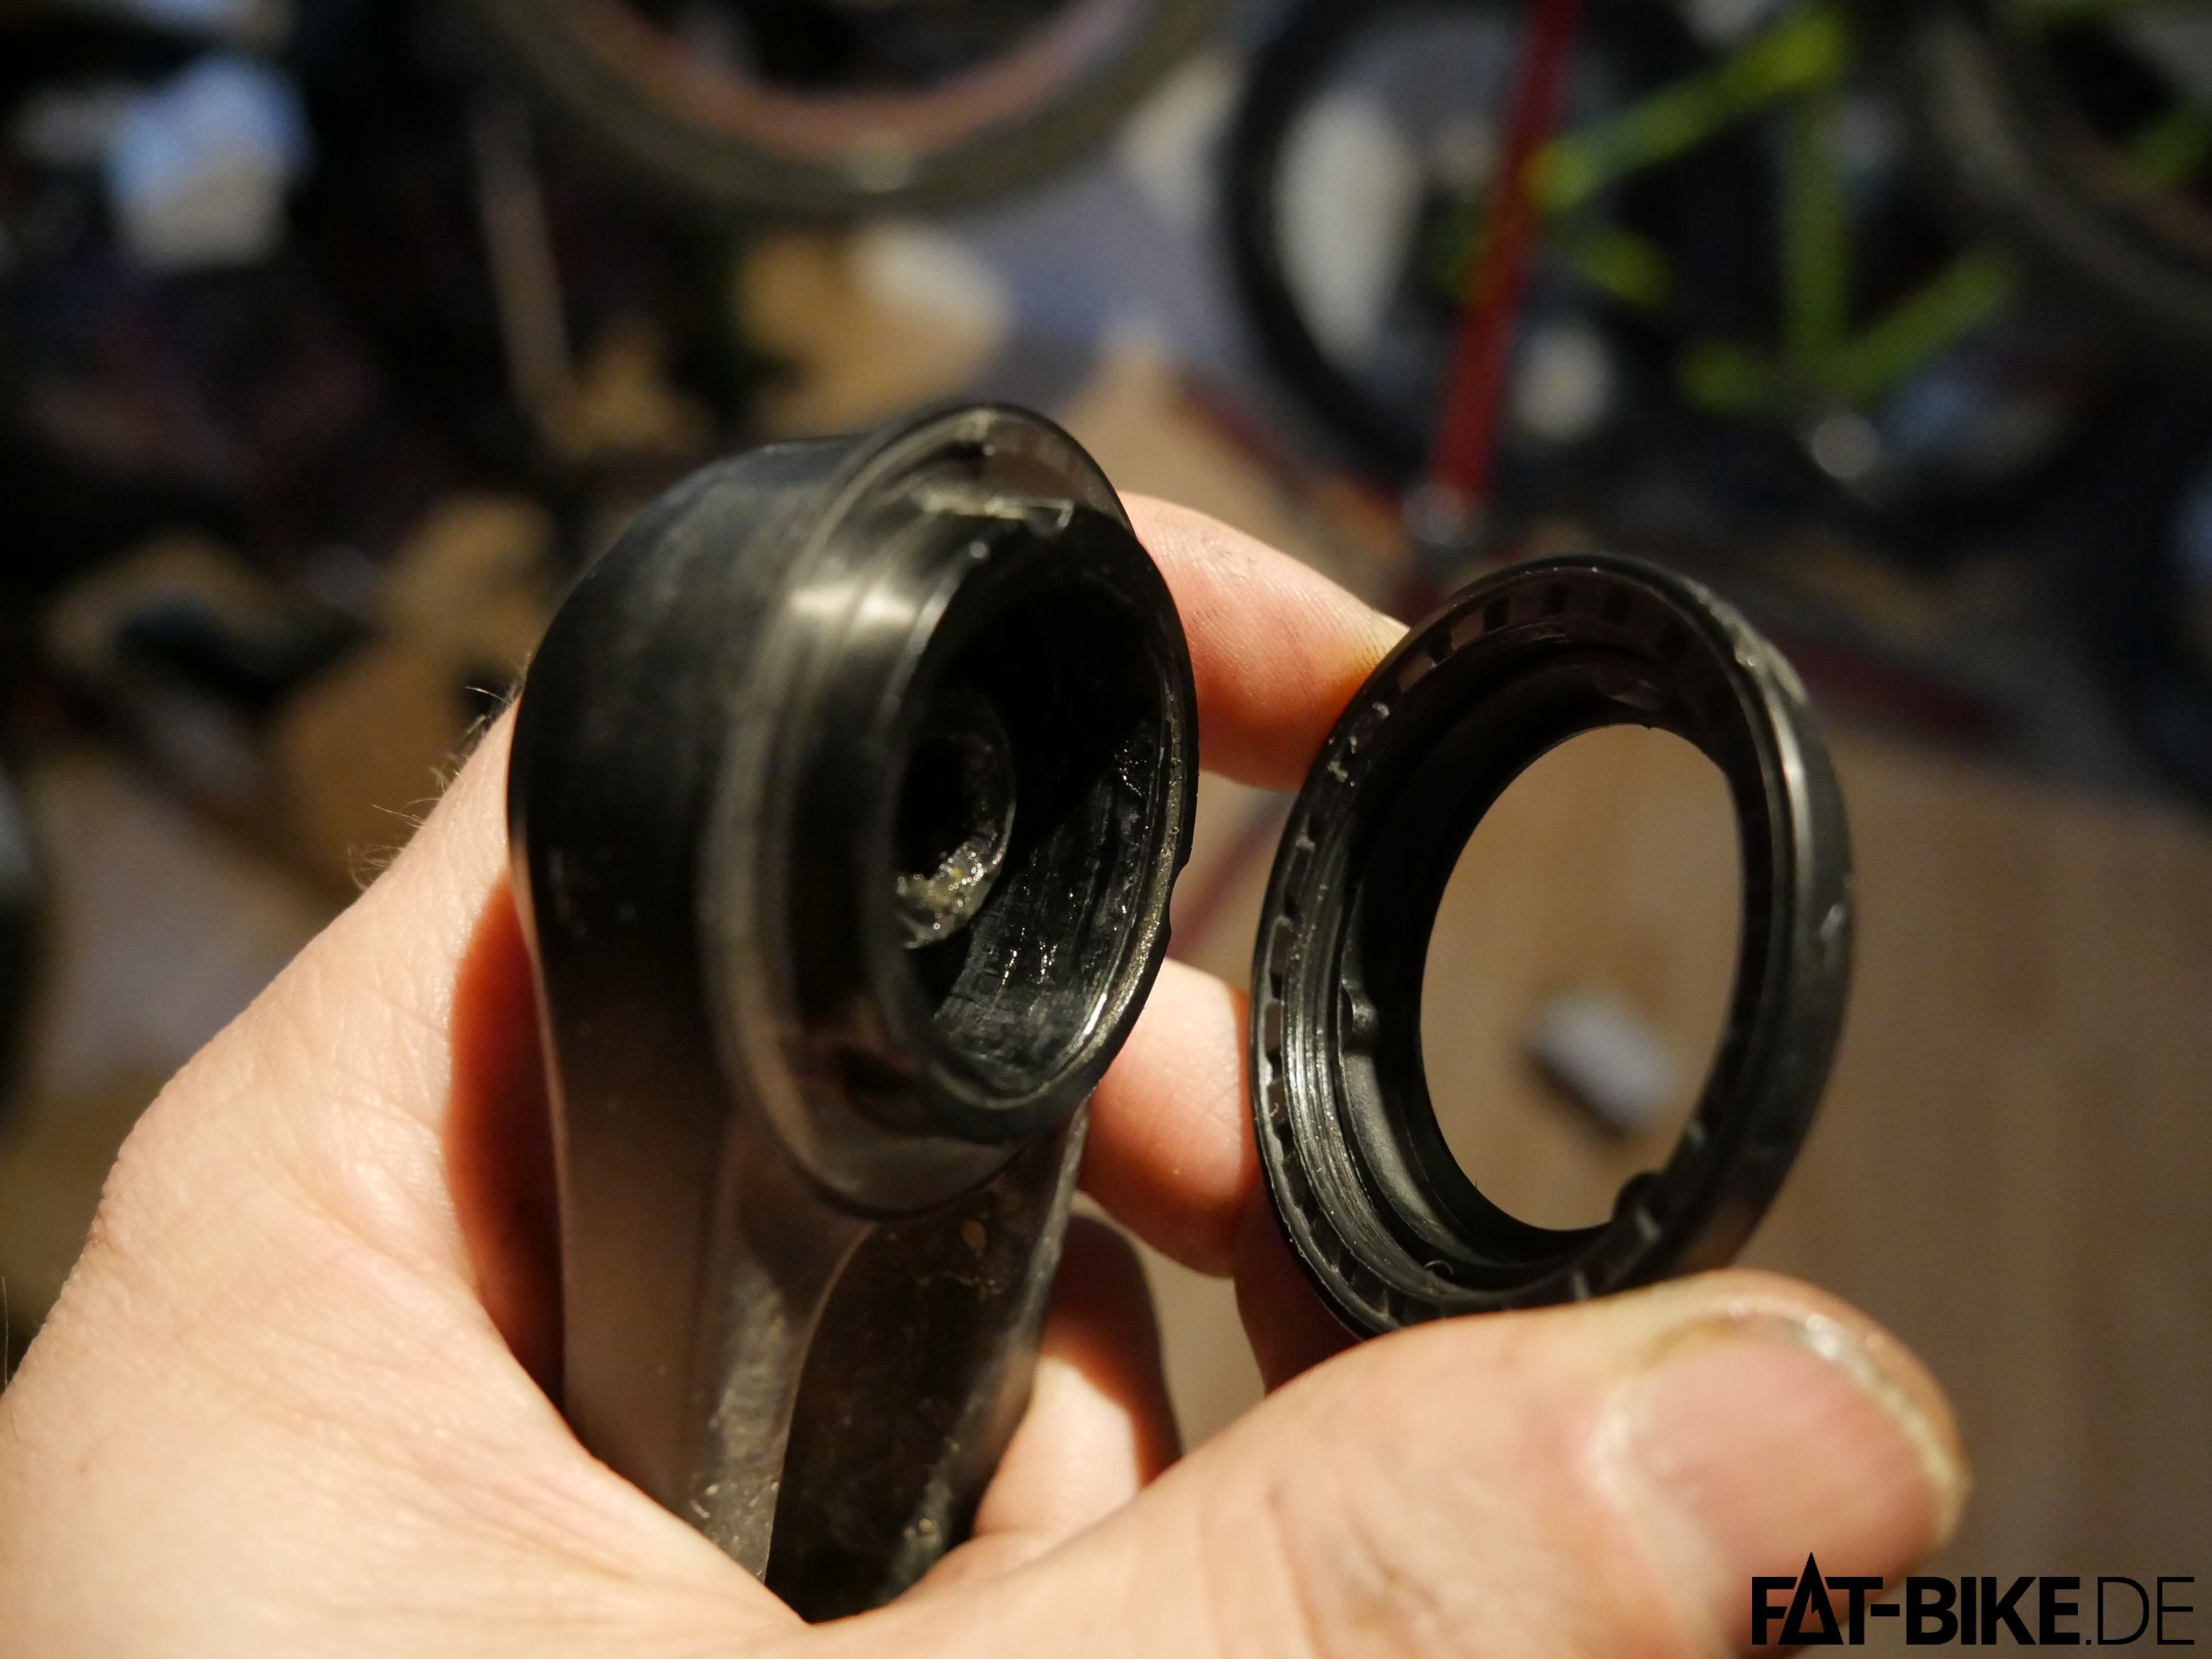
Step 7: remove the seal. Carefully – it has a metal core and is prone to be bent!
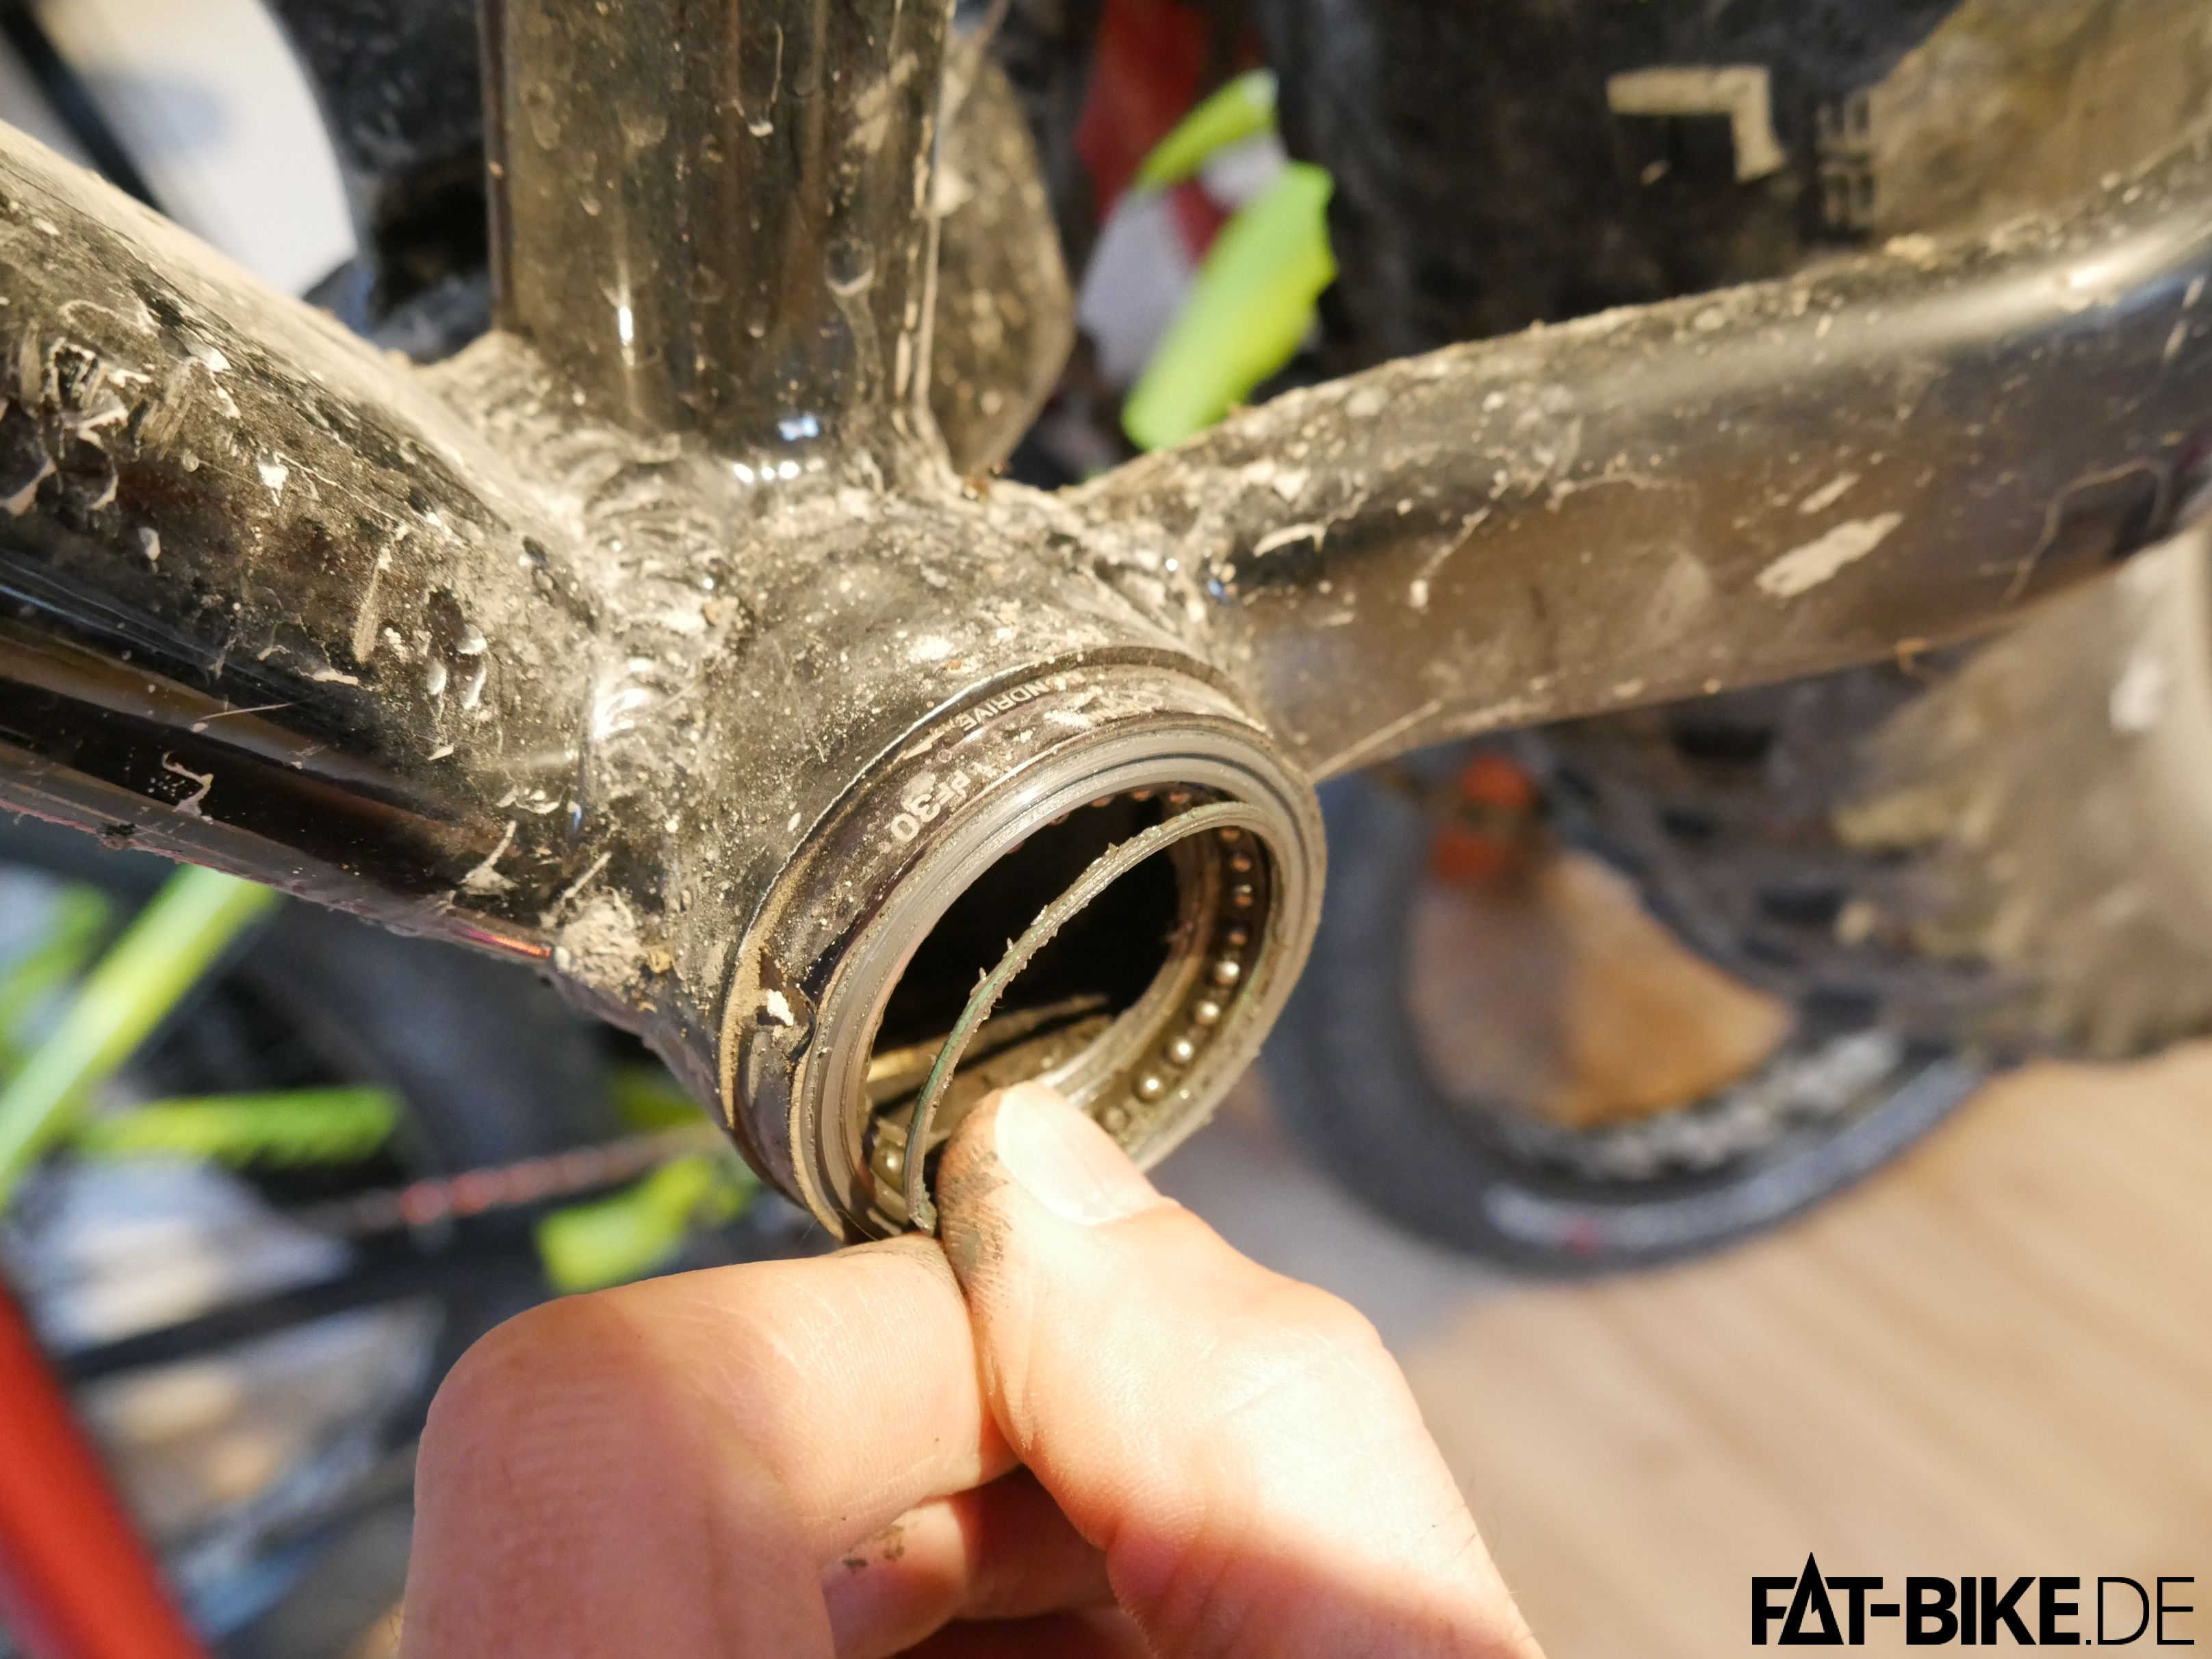
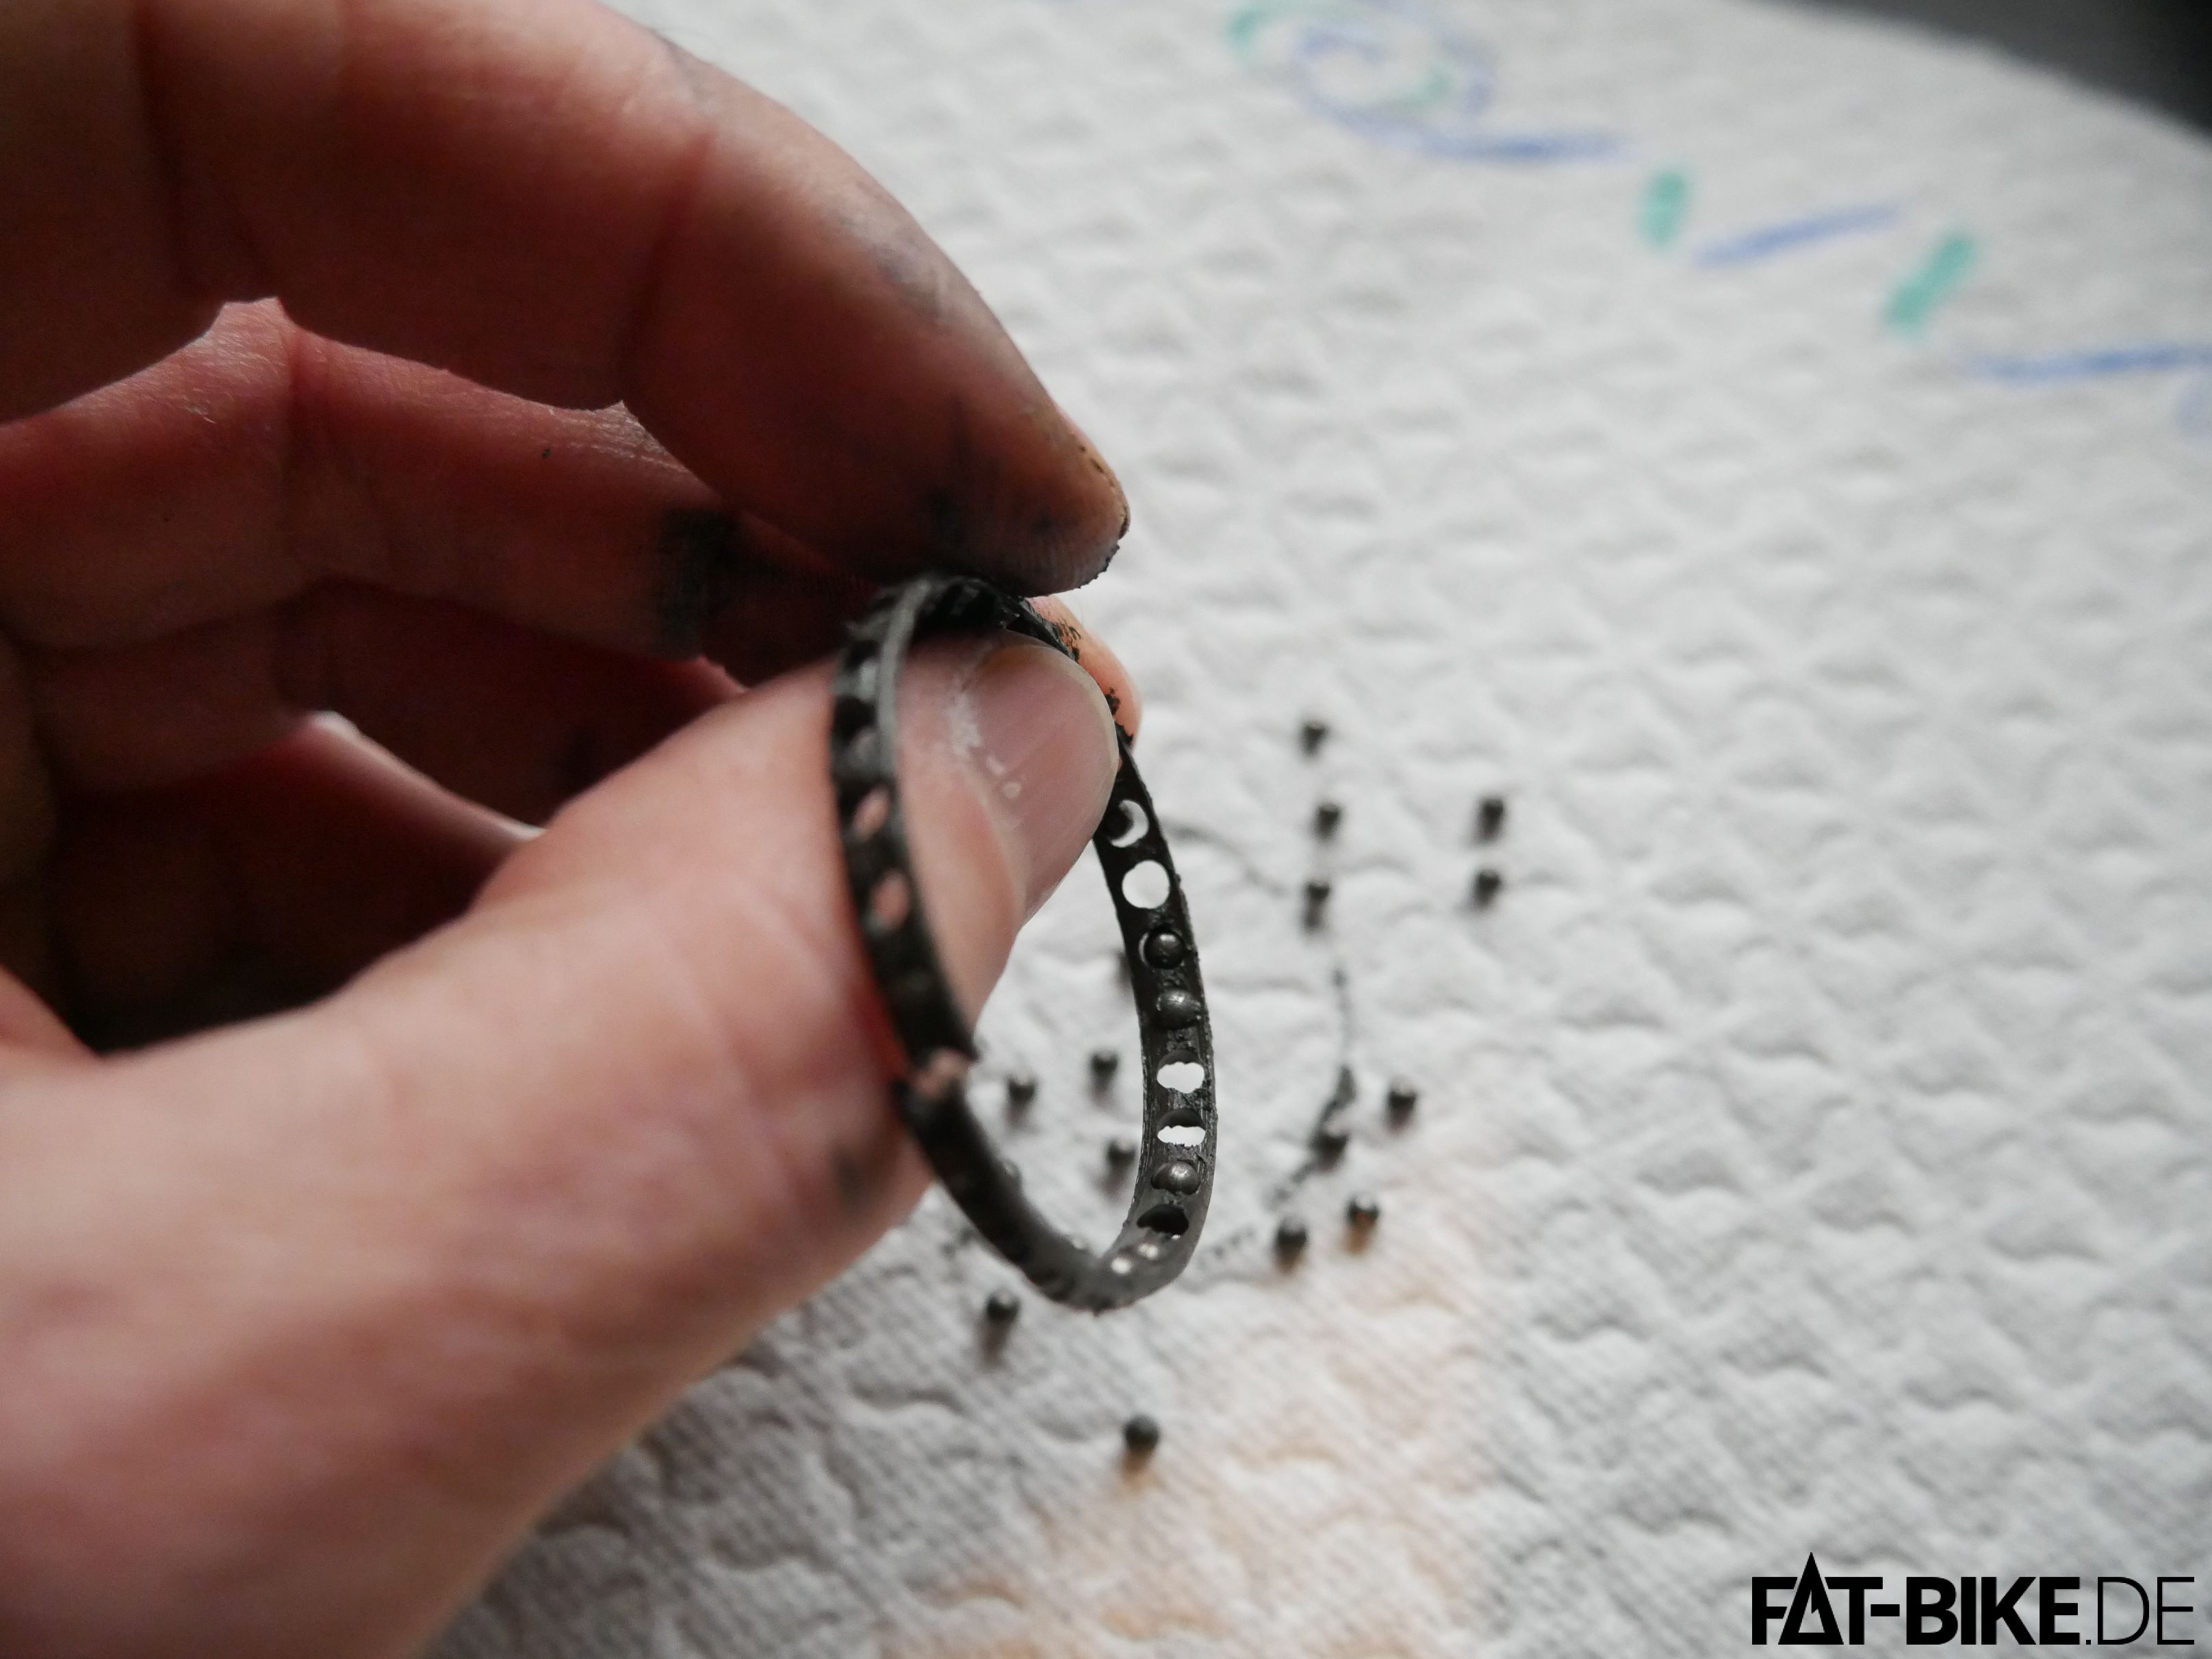
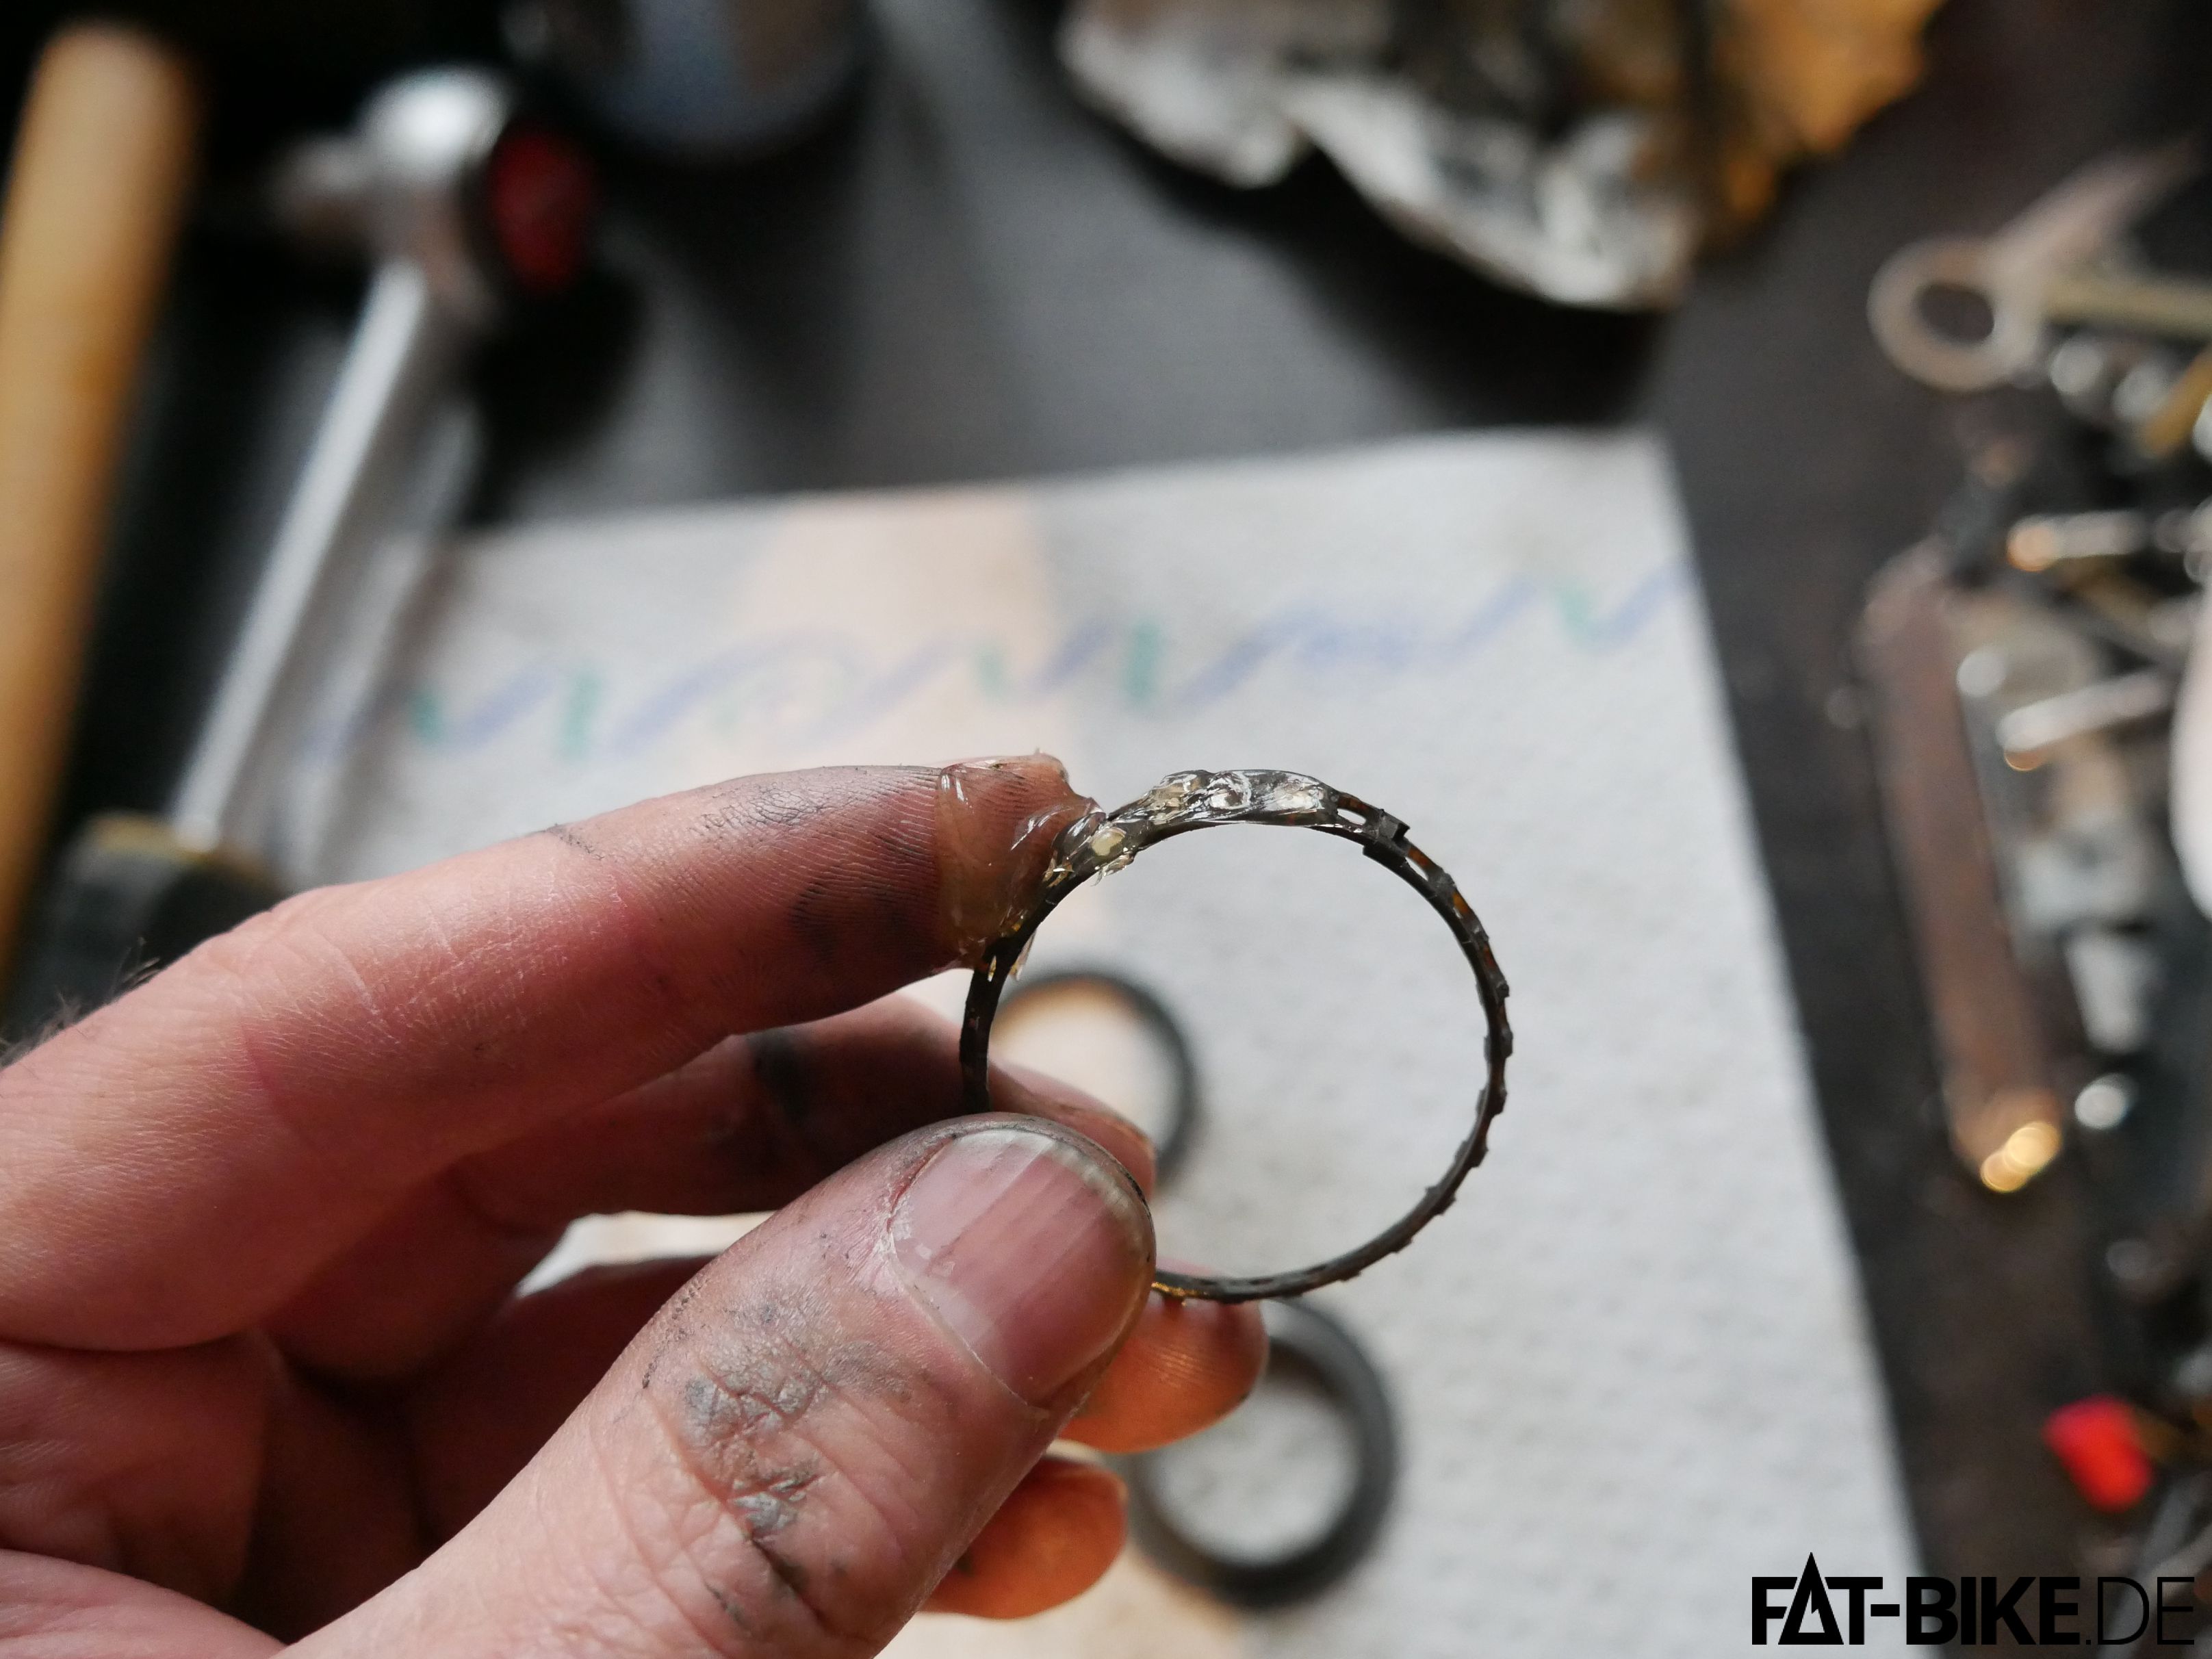
Step 8: Take off the bearing. Be aware that the plastic holder ring may have multiple cracks! Try to remove every piece and recall it's location. This may become a nasty puzzle…
Mine has only one crack on the very top. Drive side was broken twice.
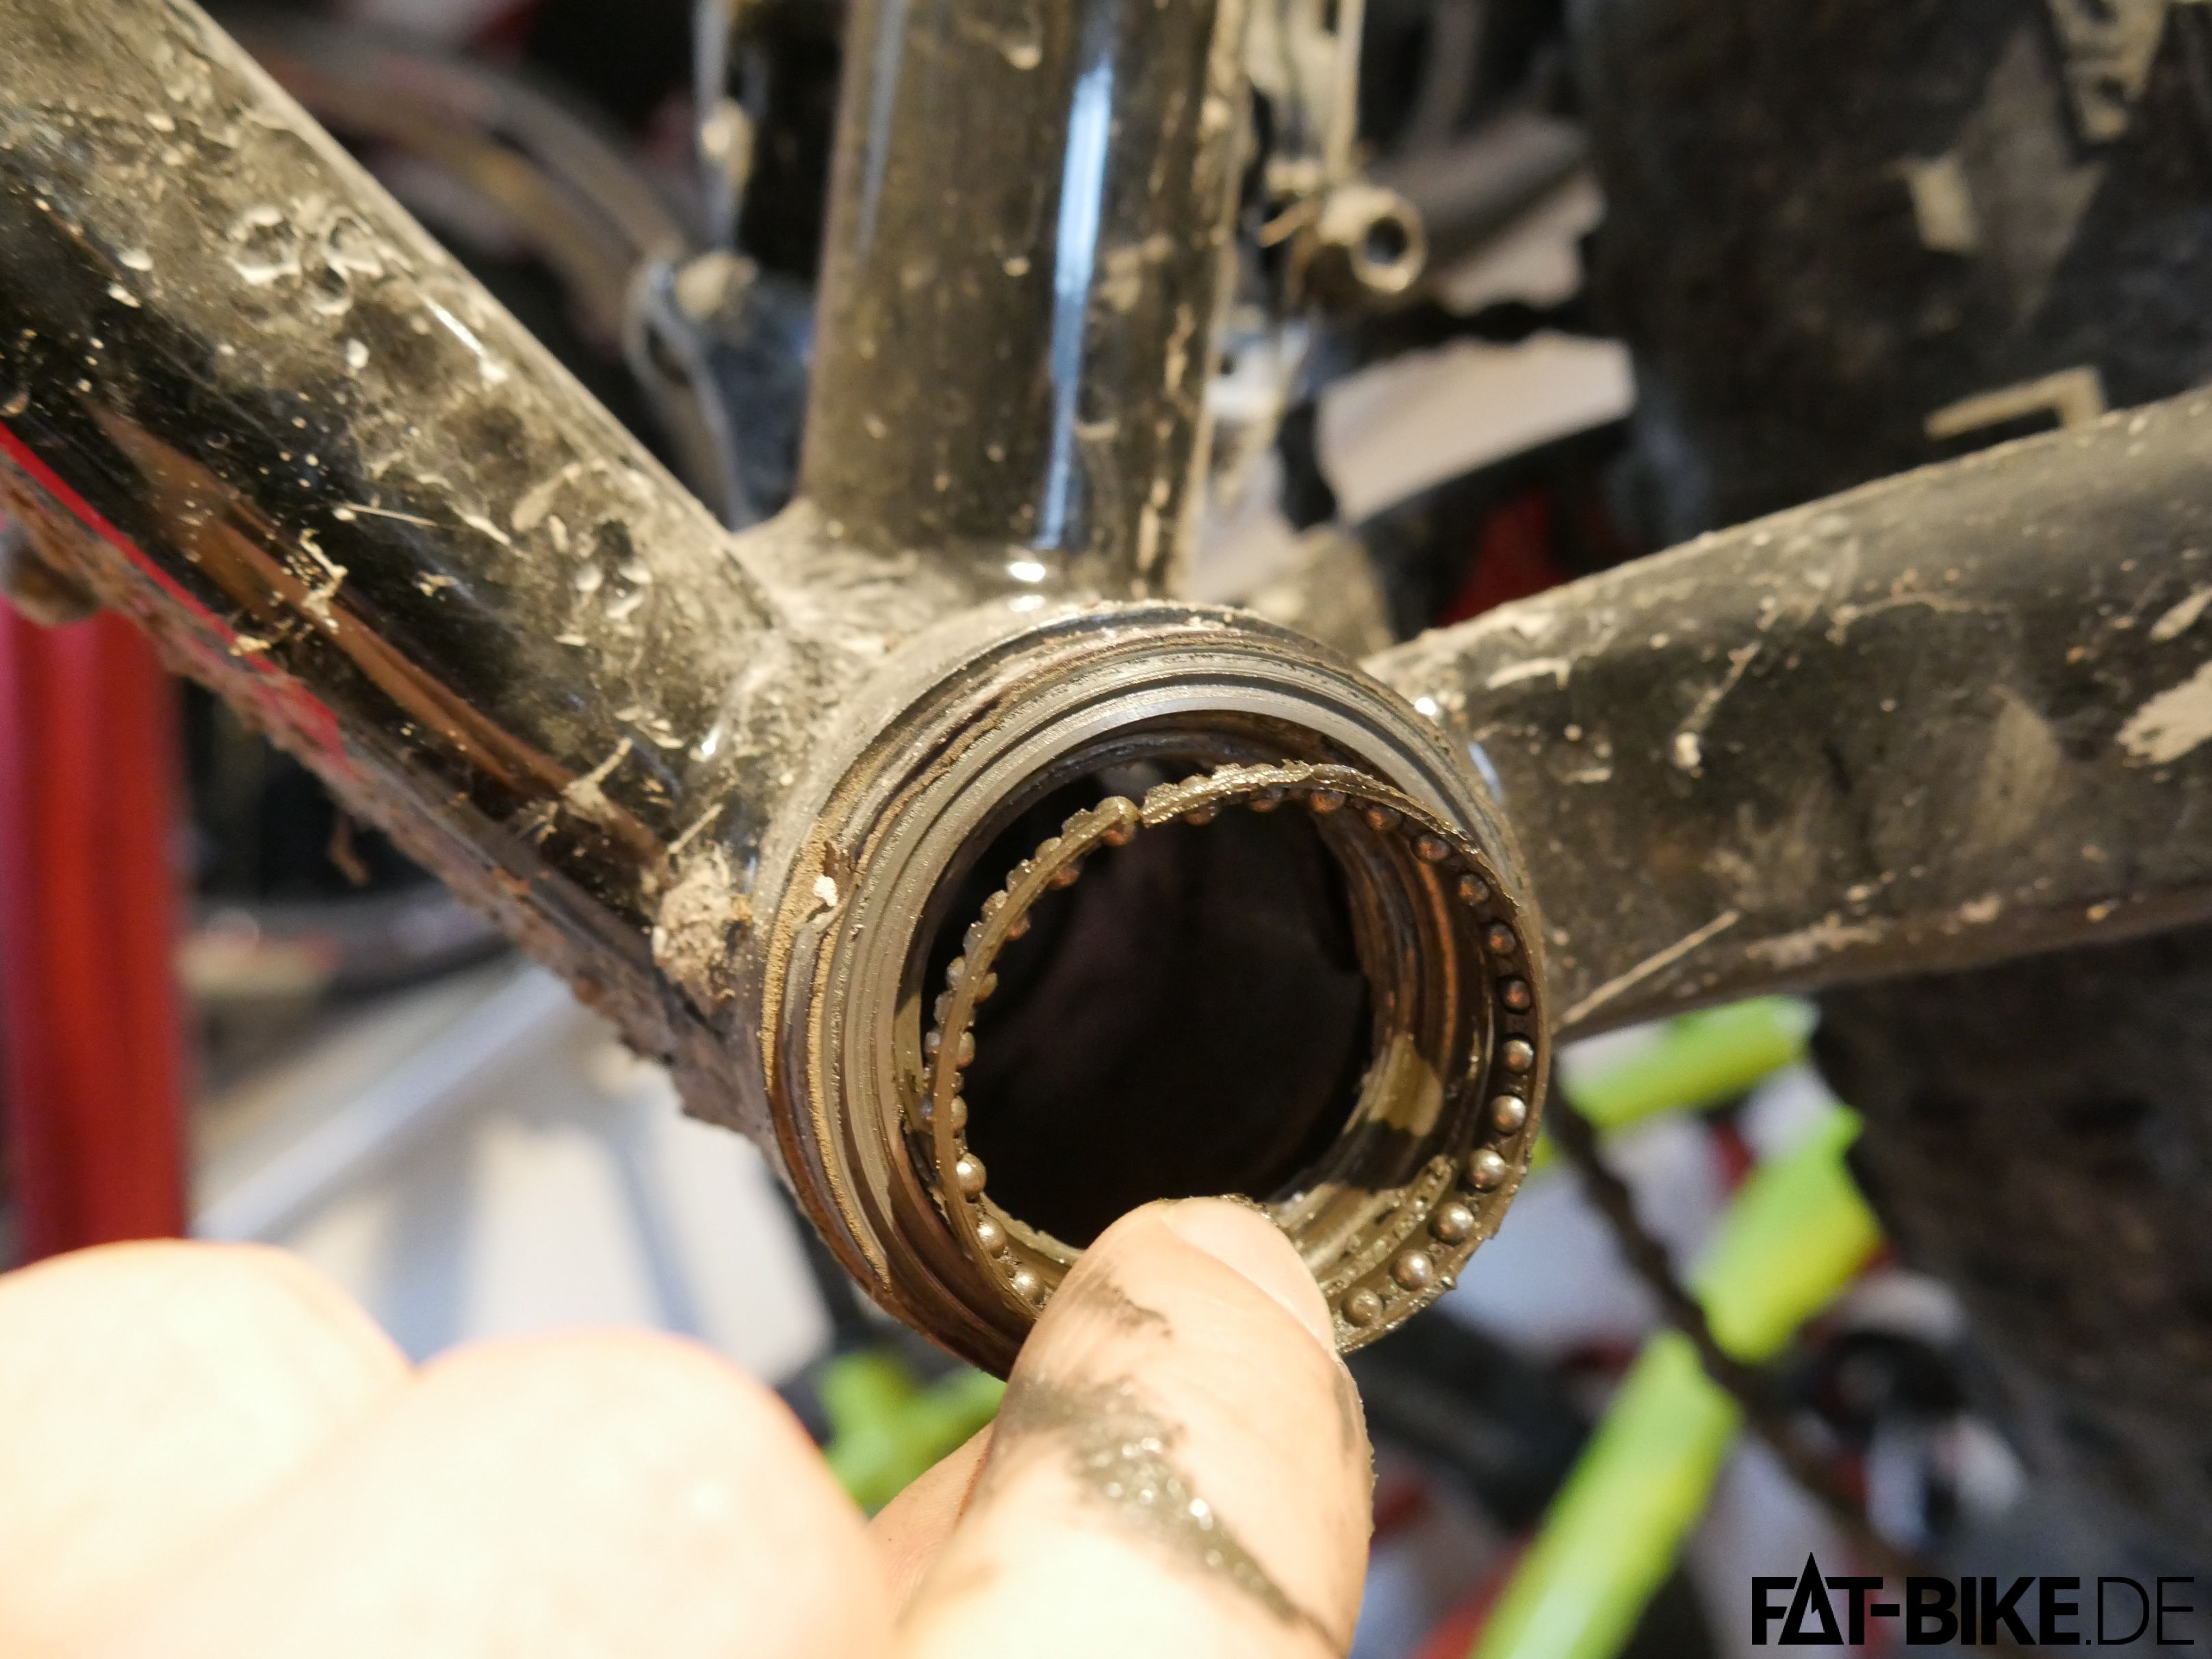
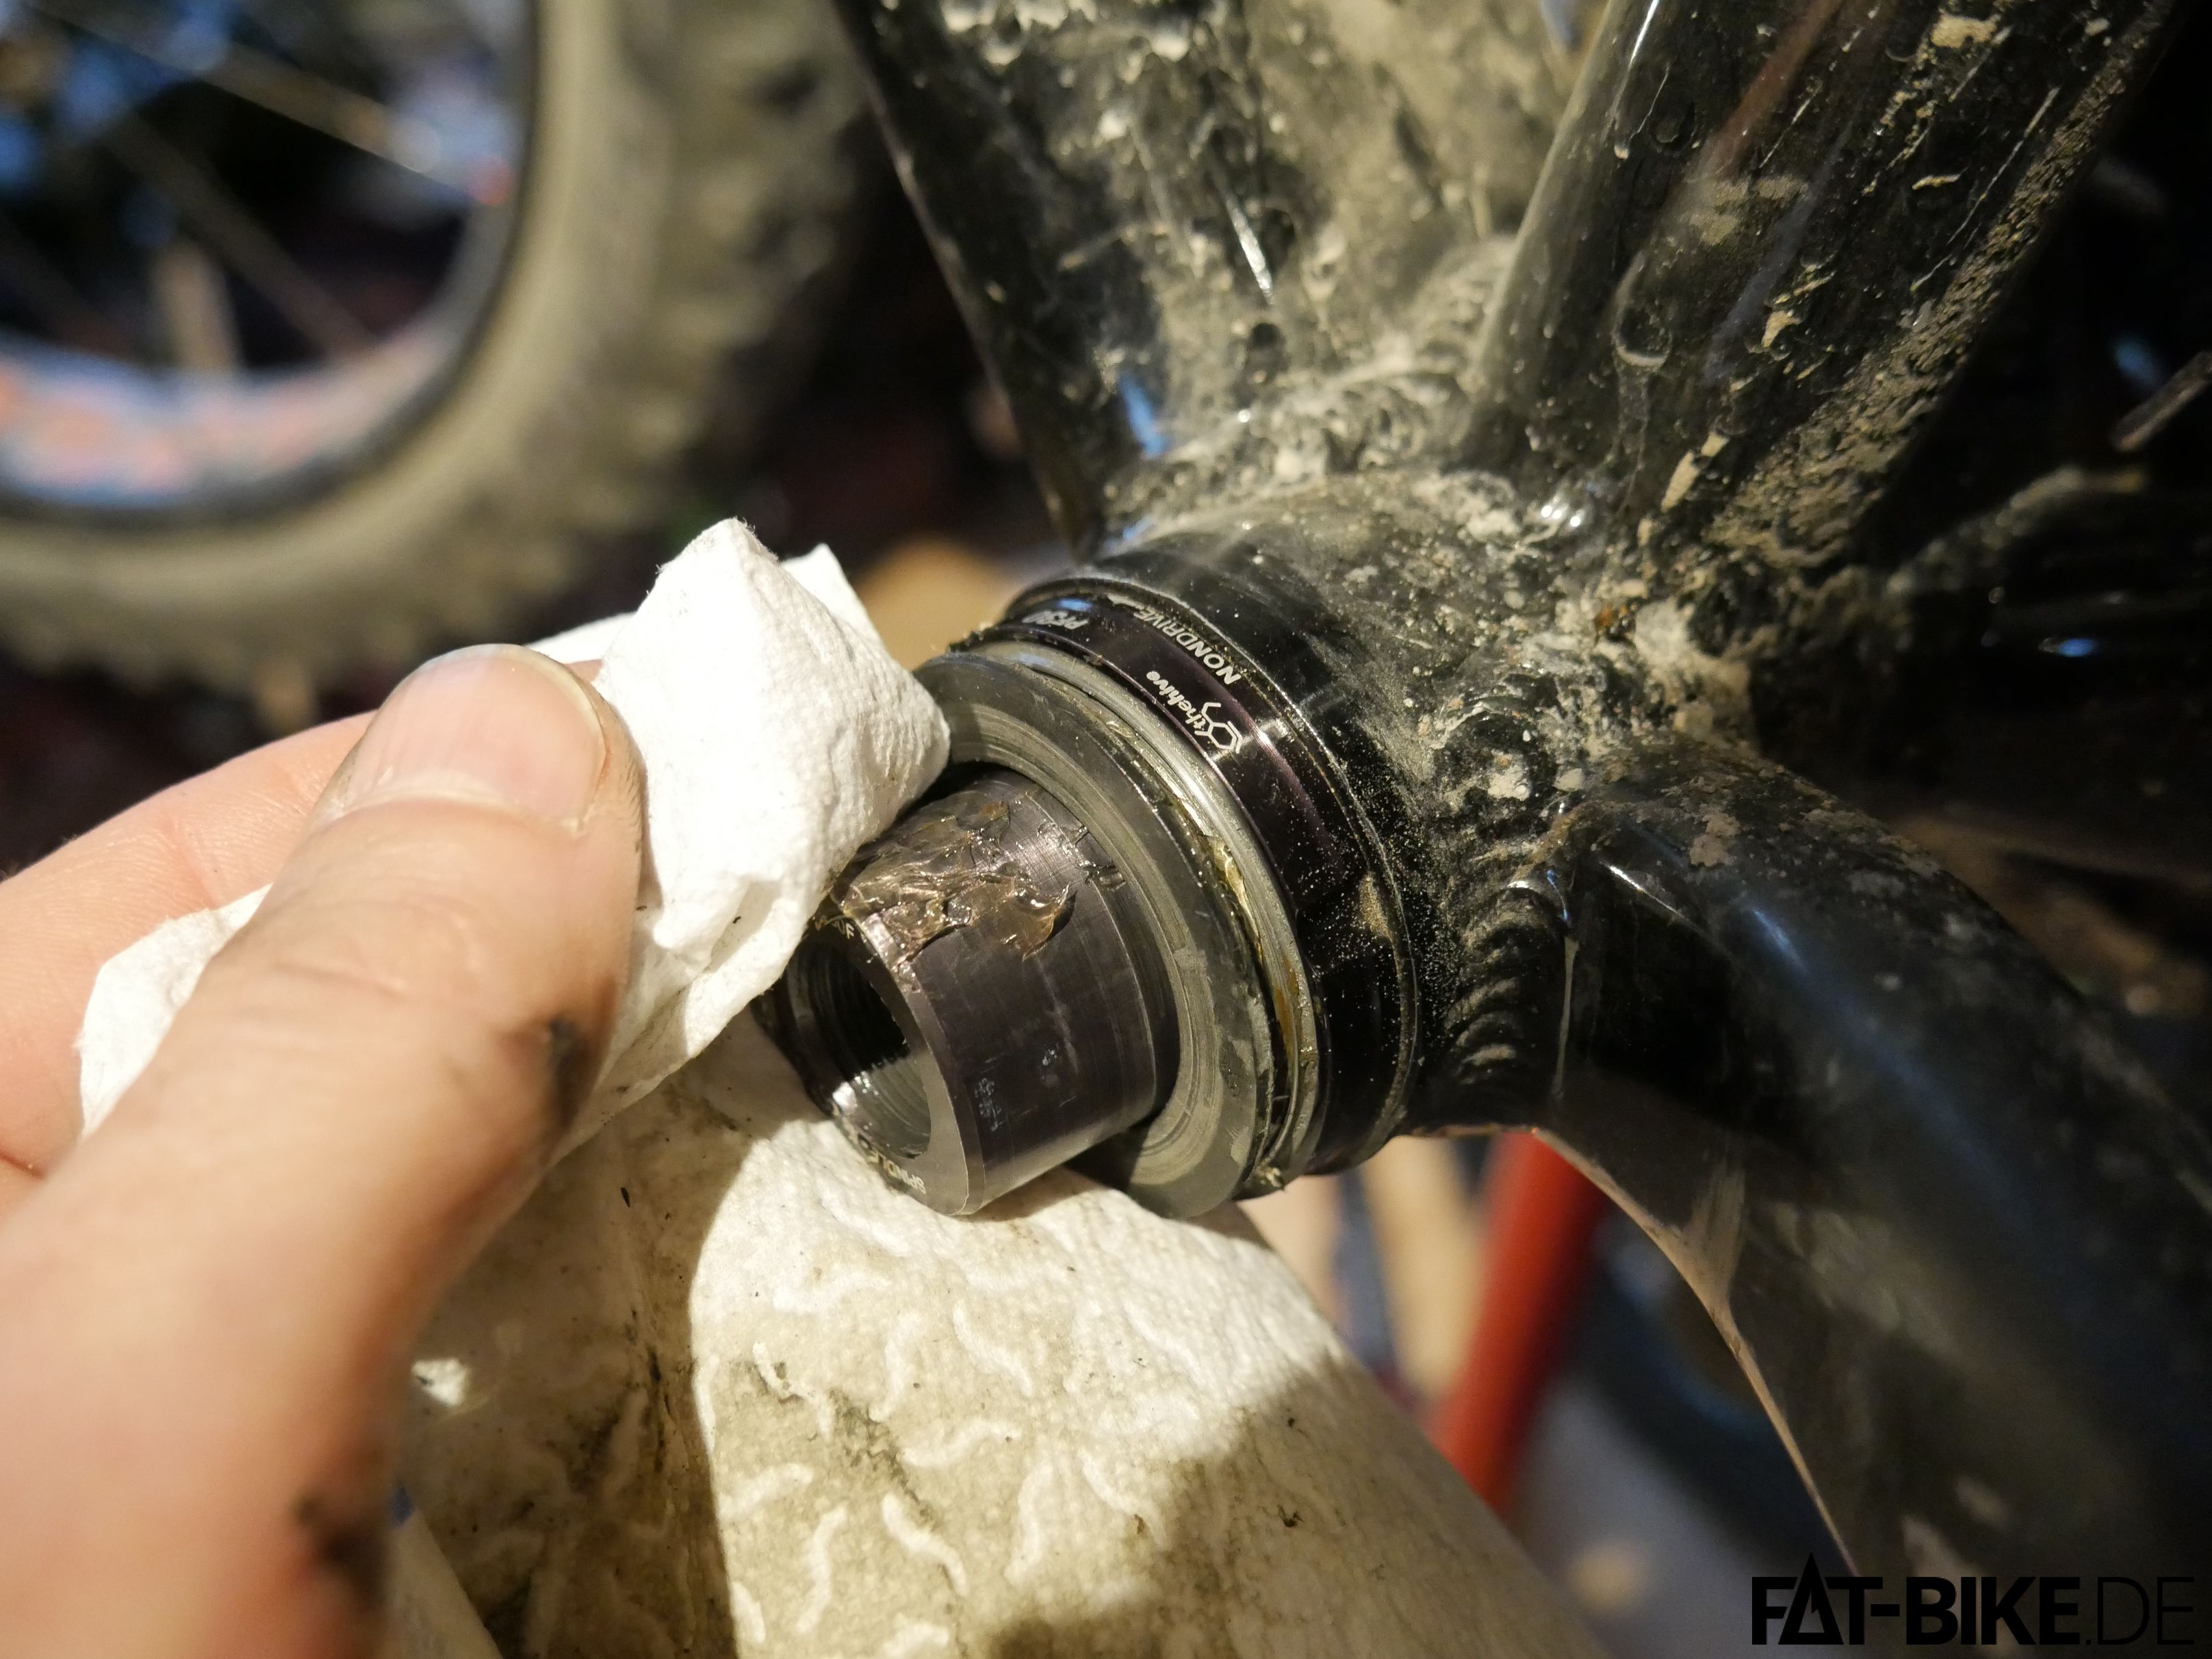
Step 9: Clean the BB housing and the bearing surface. We recommend to use brake cleaner.

That's how it should look like. You can also see the worn, rough surface…
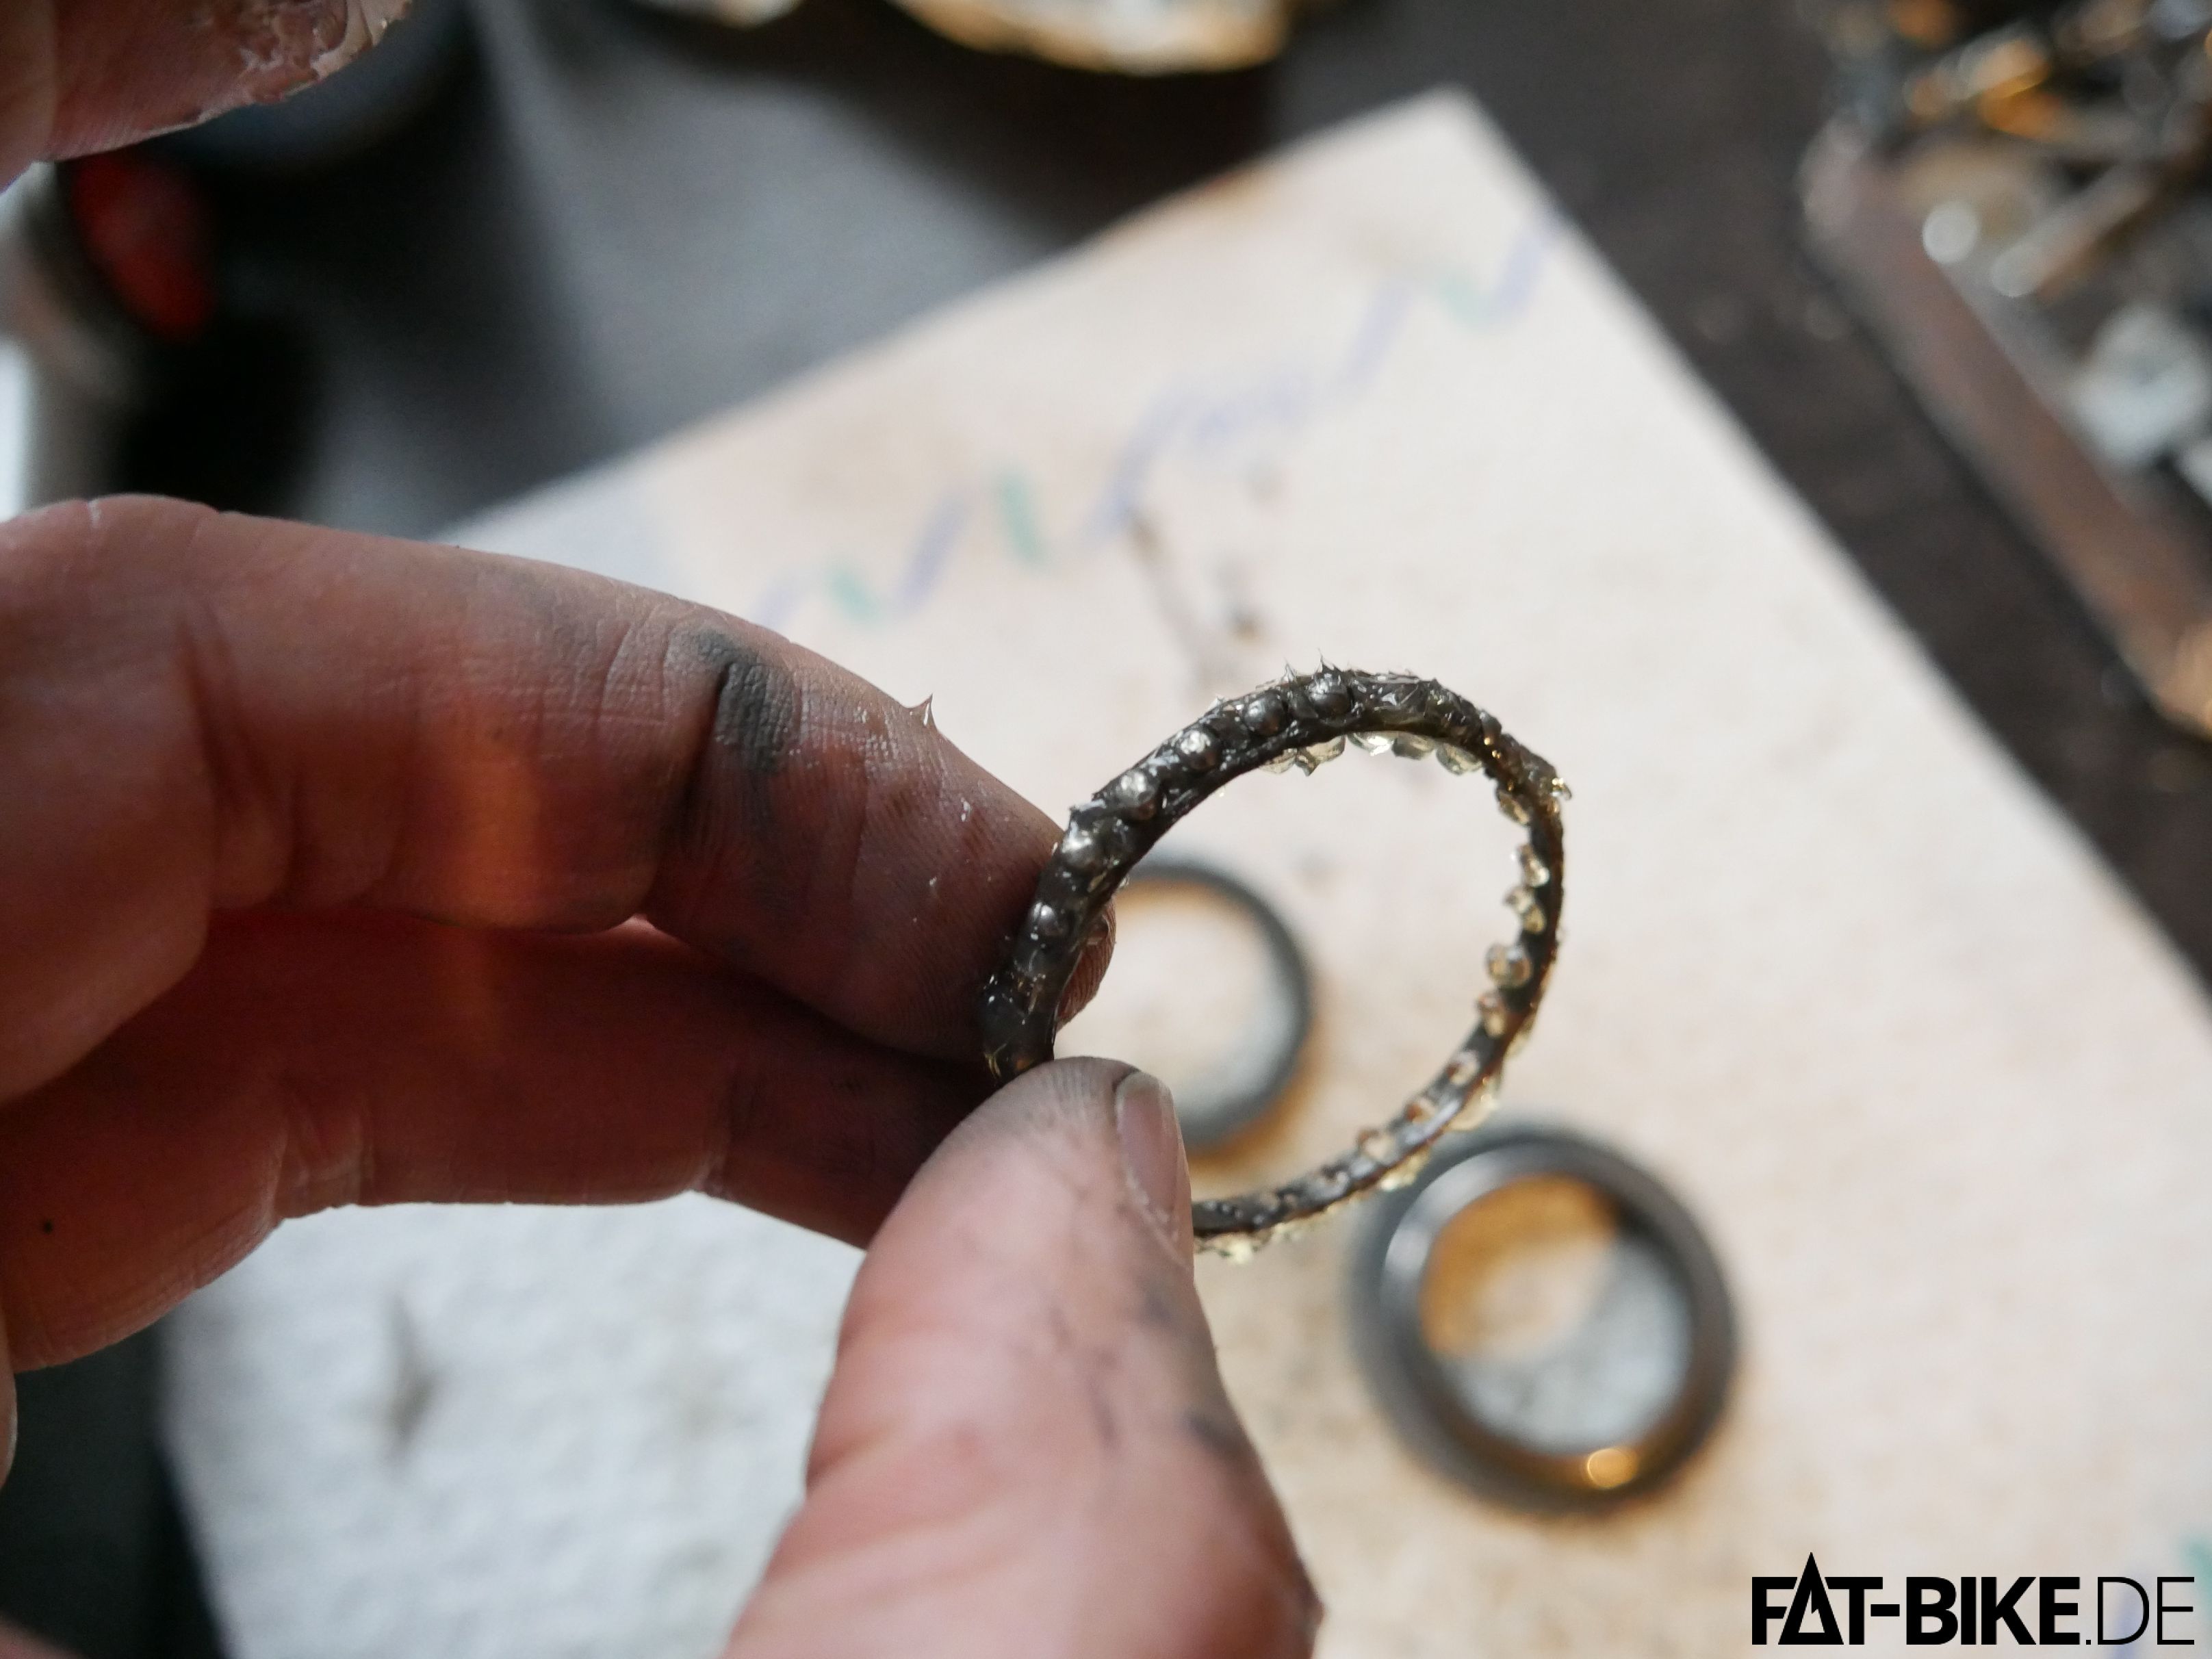
Step 10: remove the balls from their holder. Be extremely careful during the next steps, otherwise you might damage the whimpy plastic holder.
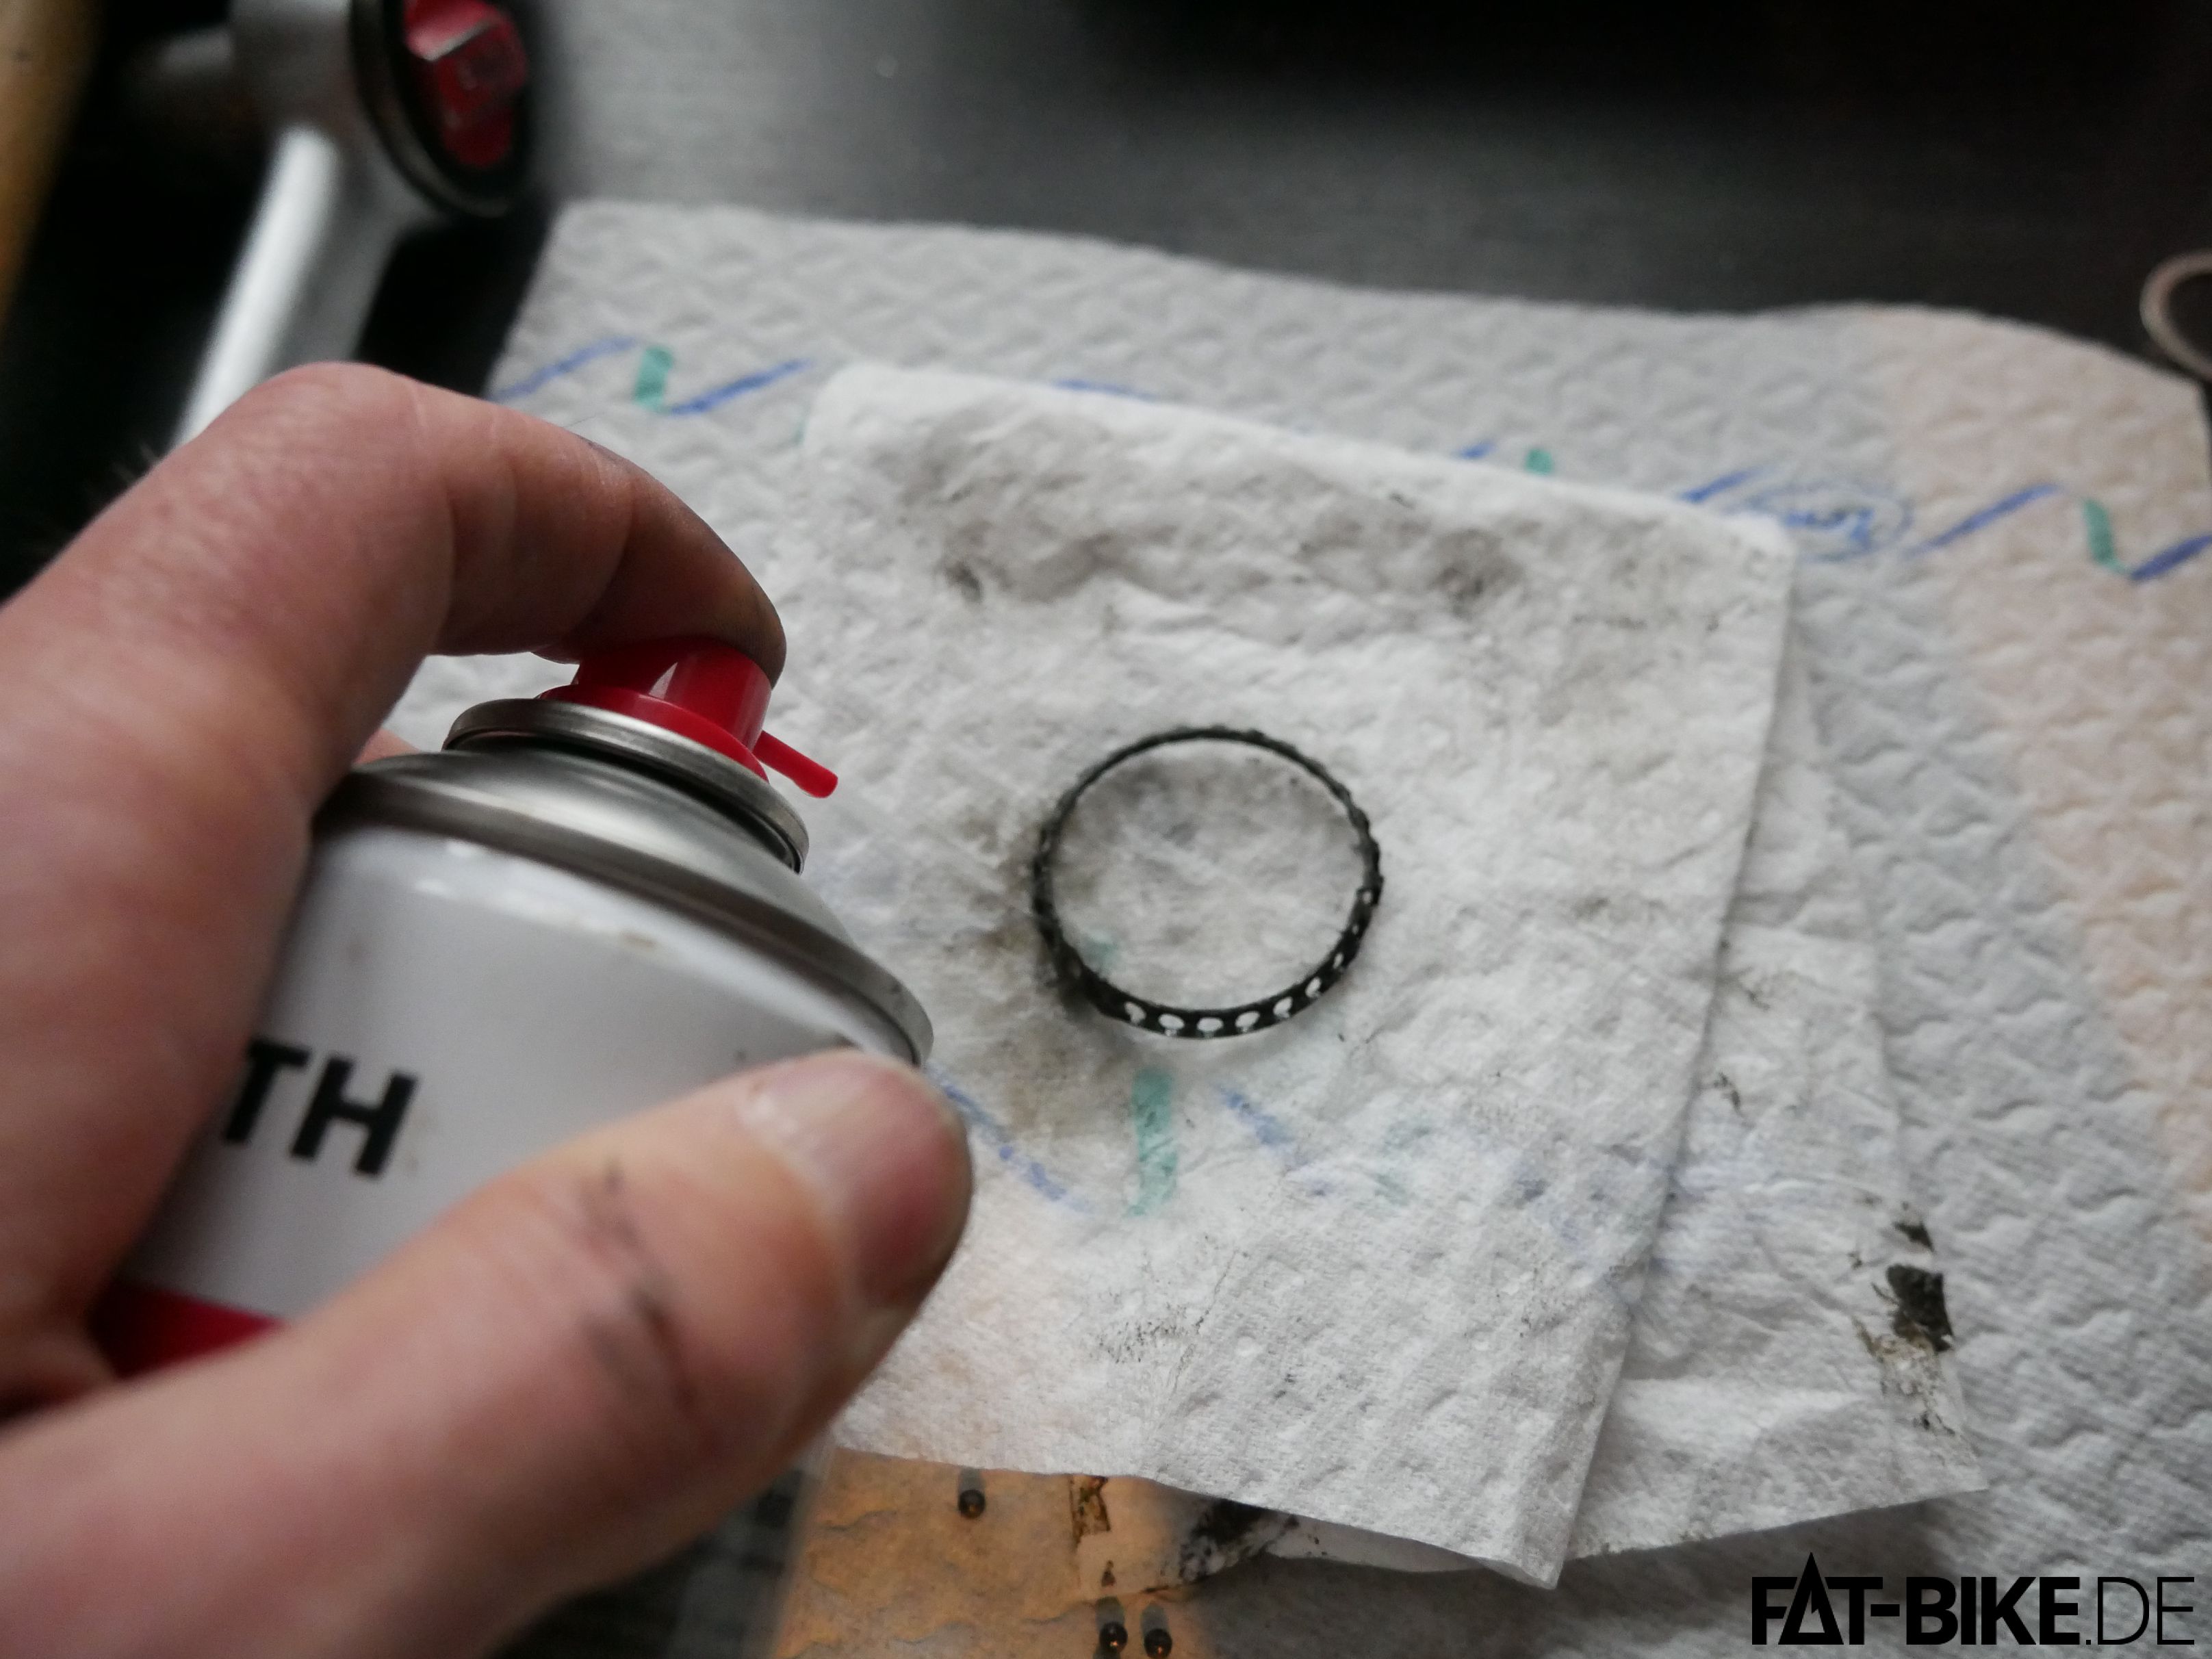
Step 11: clean the holder. Due to it's sensitivity we recommend brake cleaner instead of using cloth.
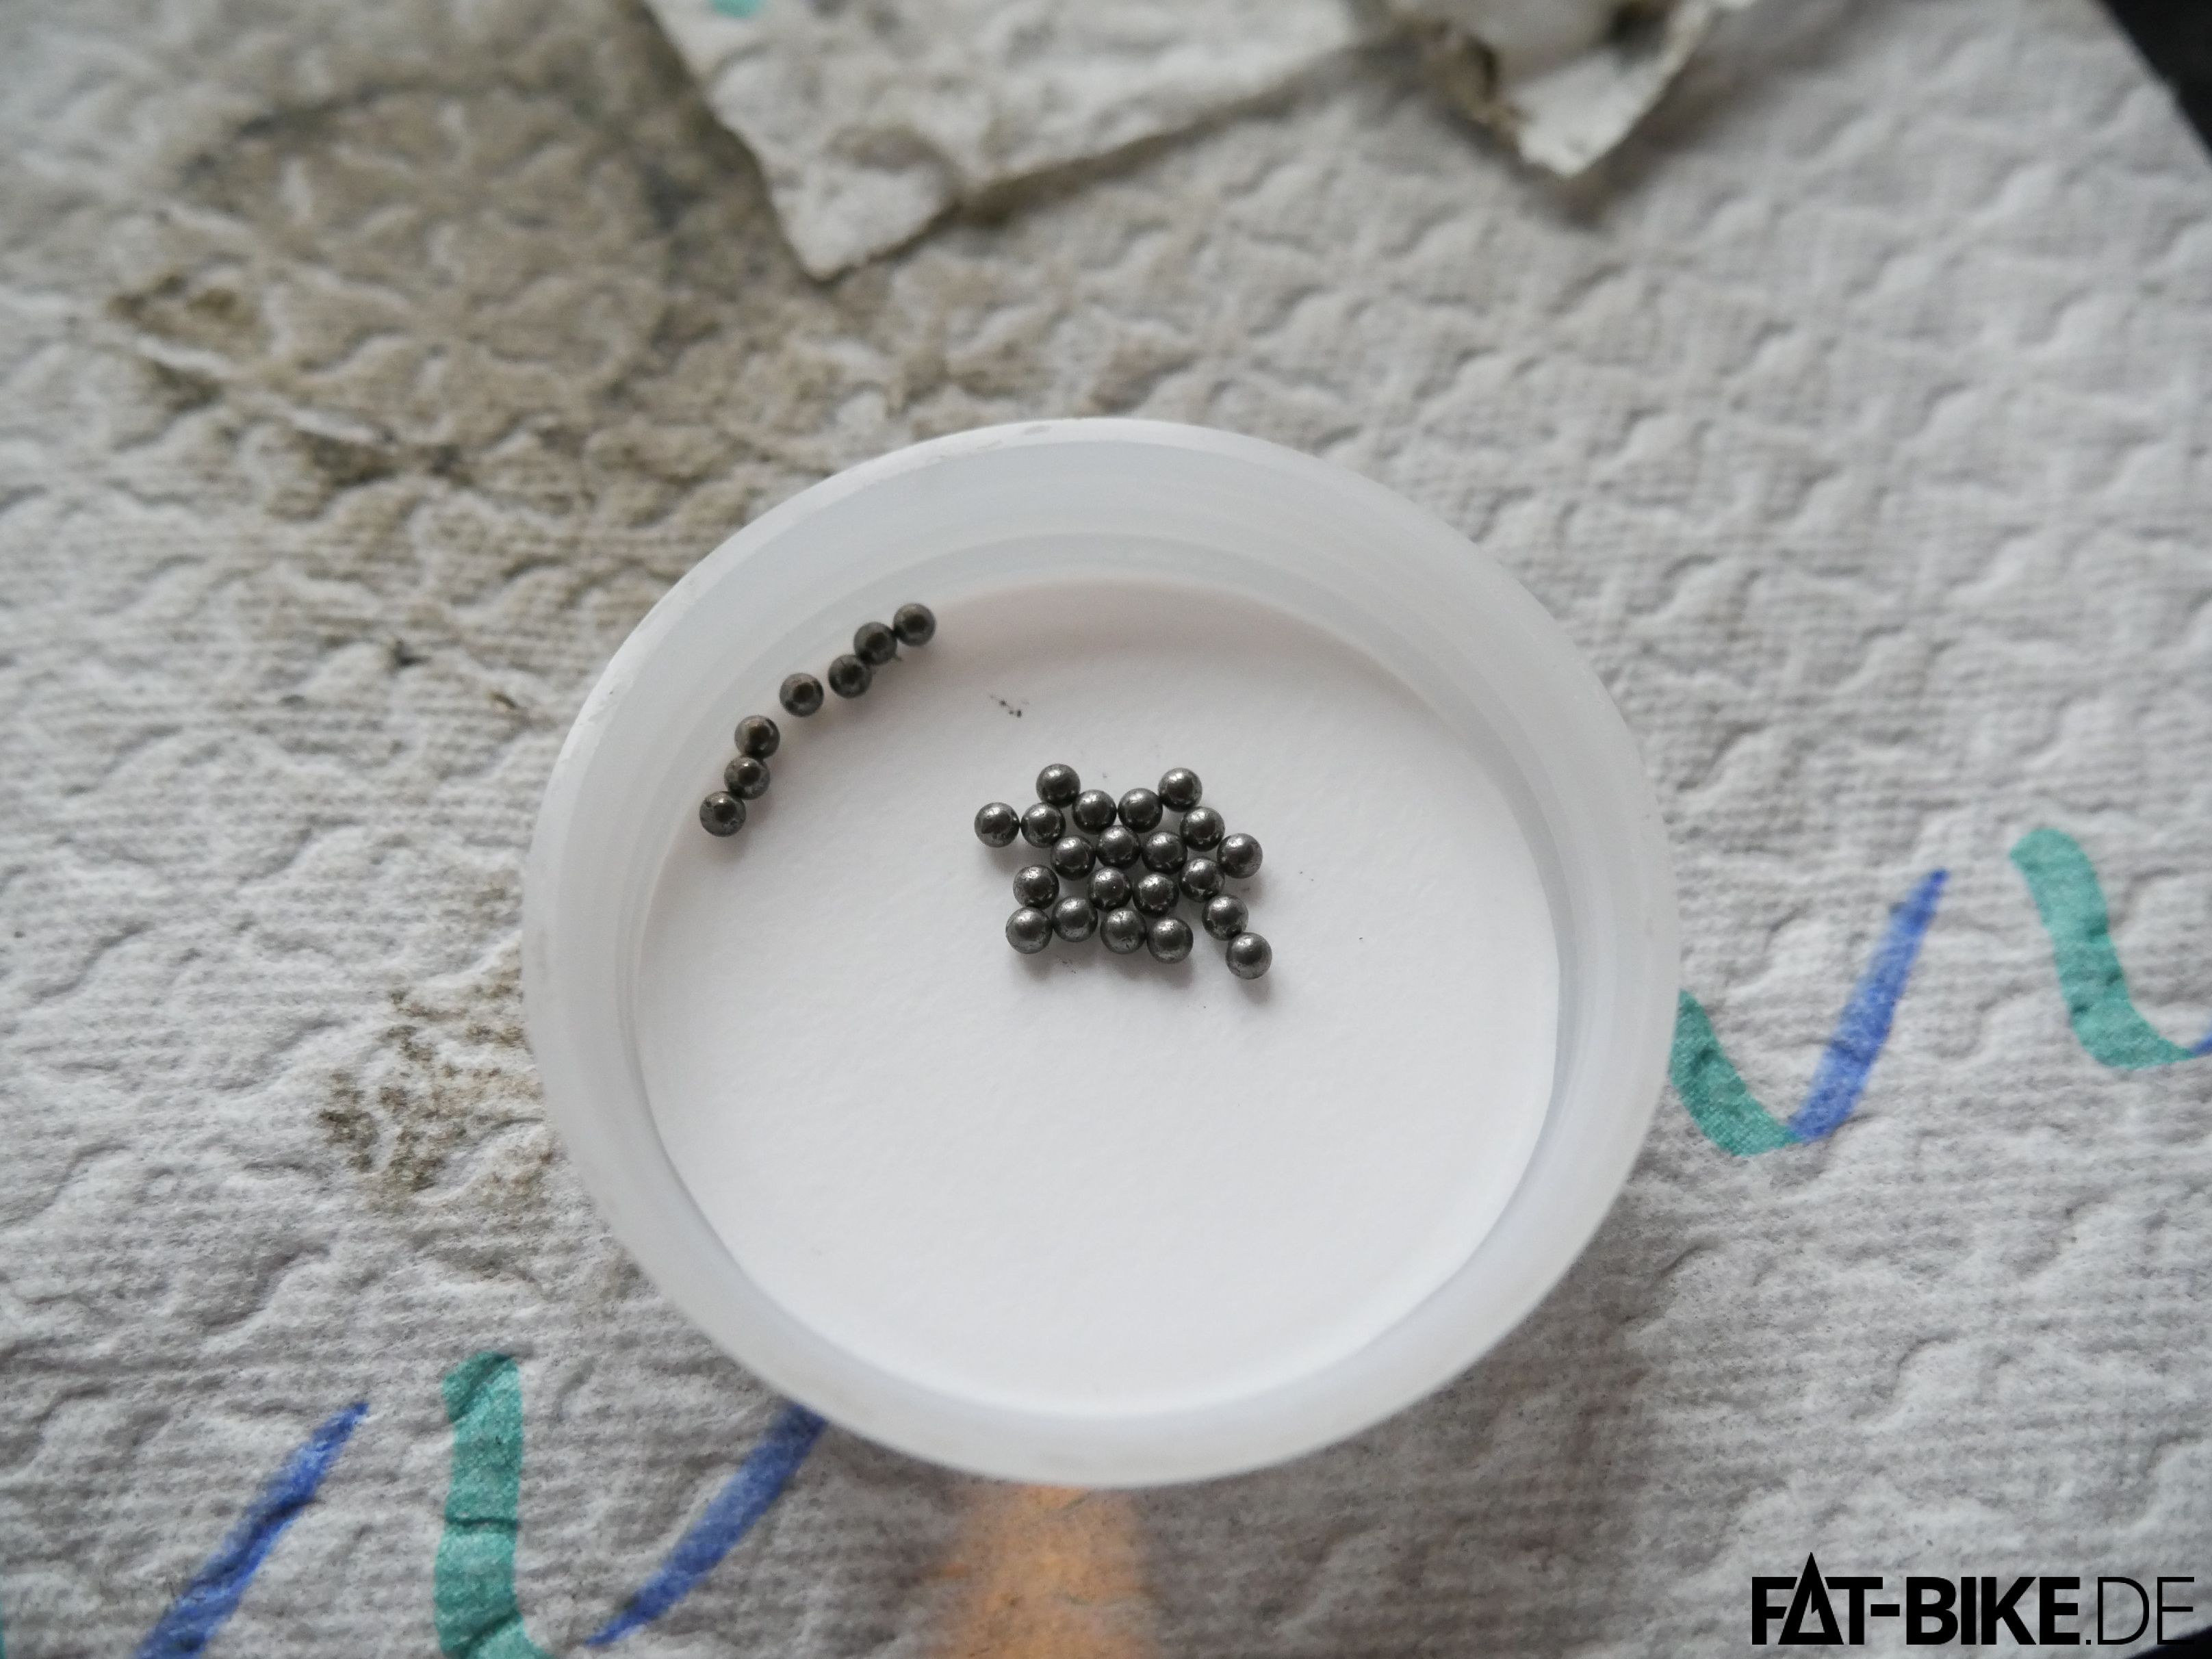
Step 12: do so with the balls, too. Make sure there is no rust left on their surfaces.
Step 13: clean the seal. As said it's made of metal. If you bend it, make sure the level it afterwards.
Step 14: clean the bearing surface. On the picture you see it still attached to it's plastic holder. You may pry it off with a screw driver to remove any debris. Do this in case you suffer from clicking noises whilst pedaling.
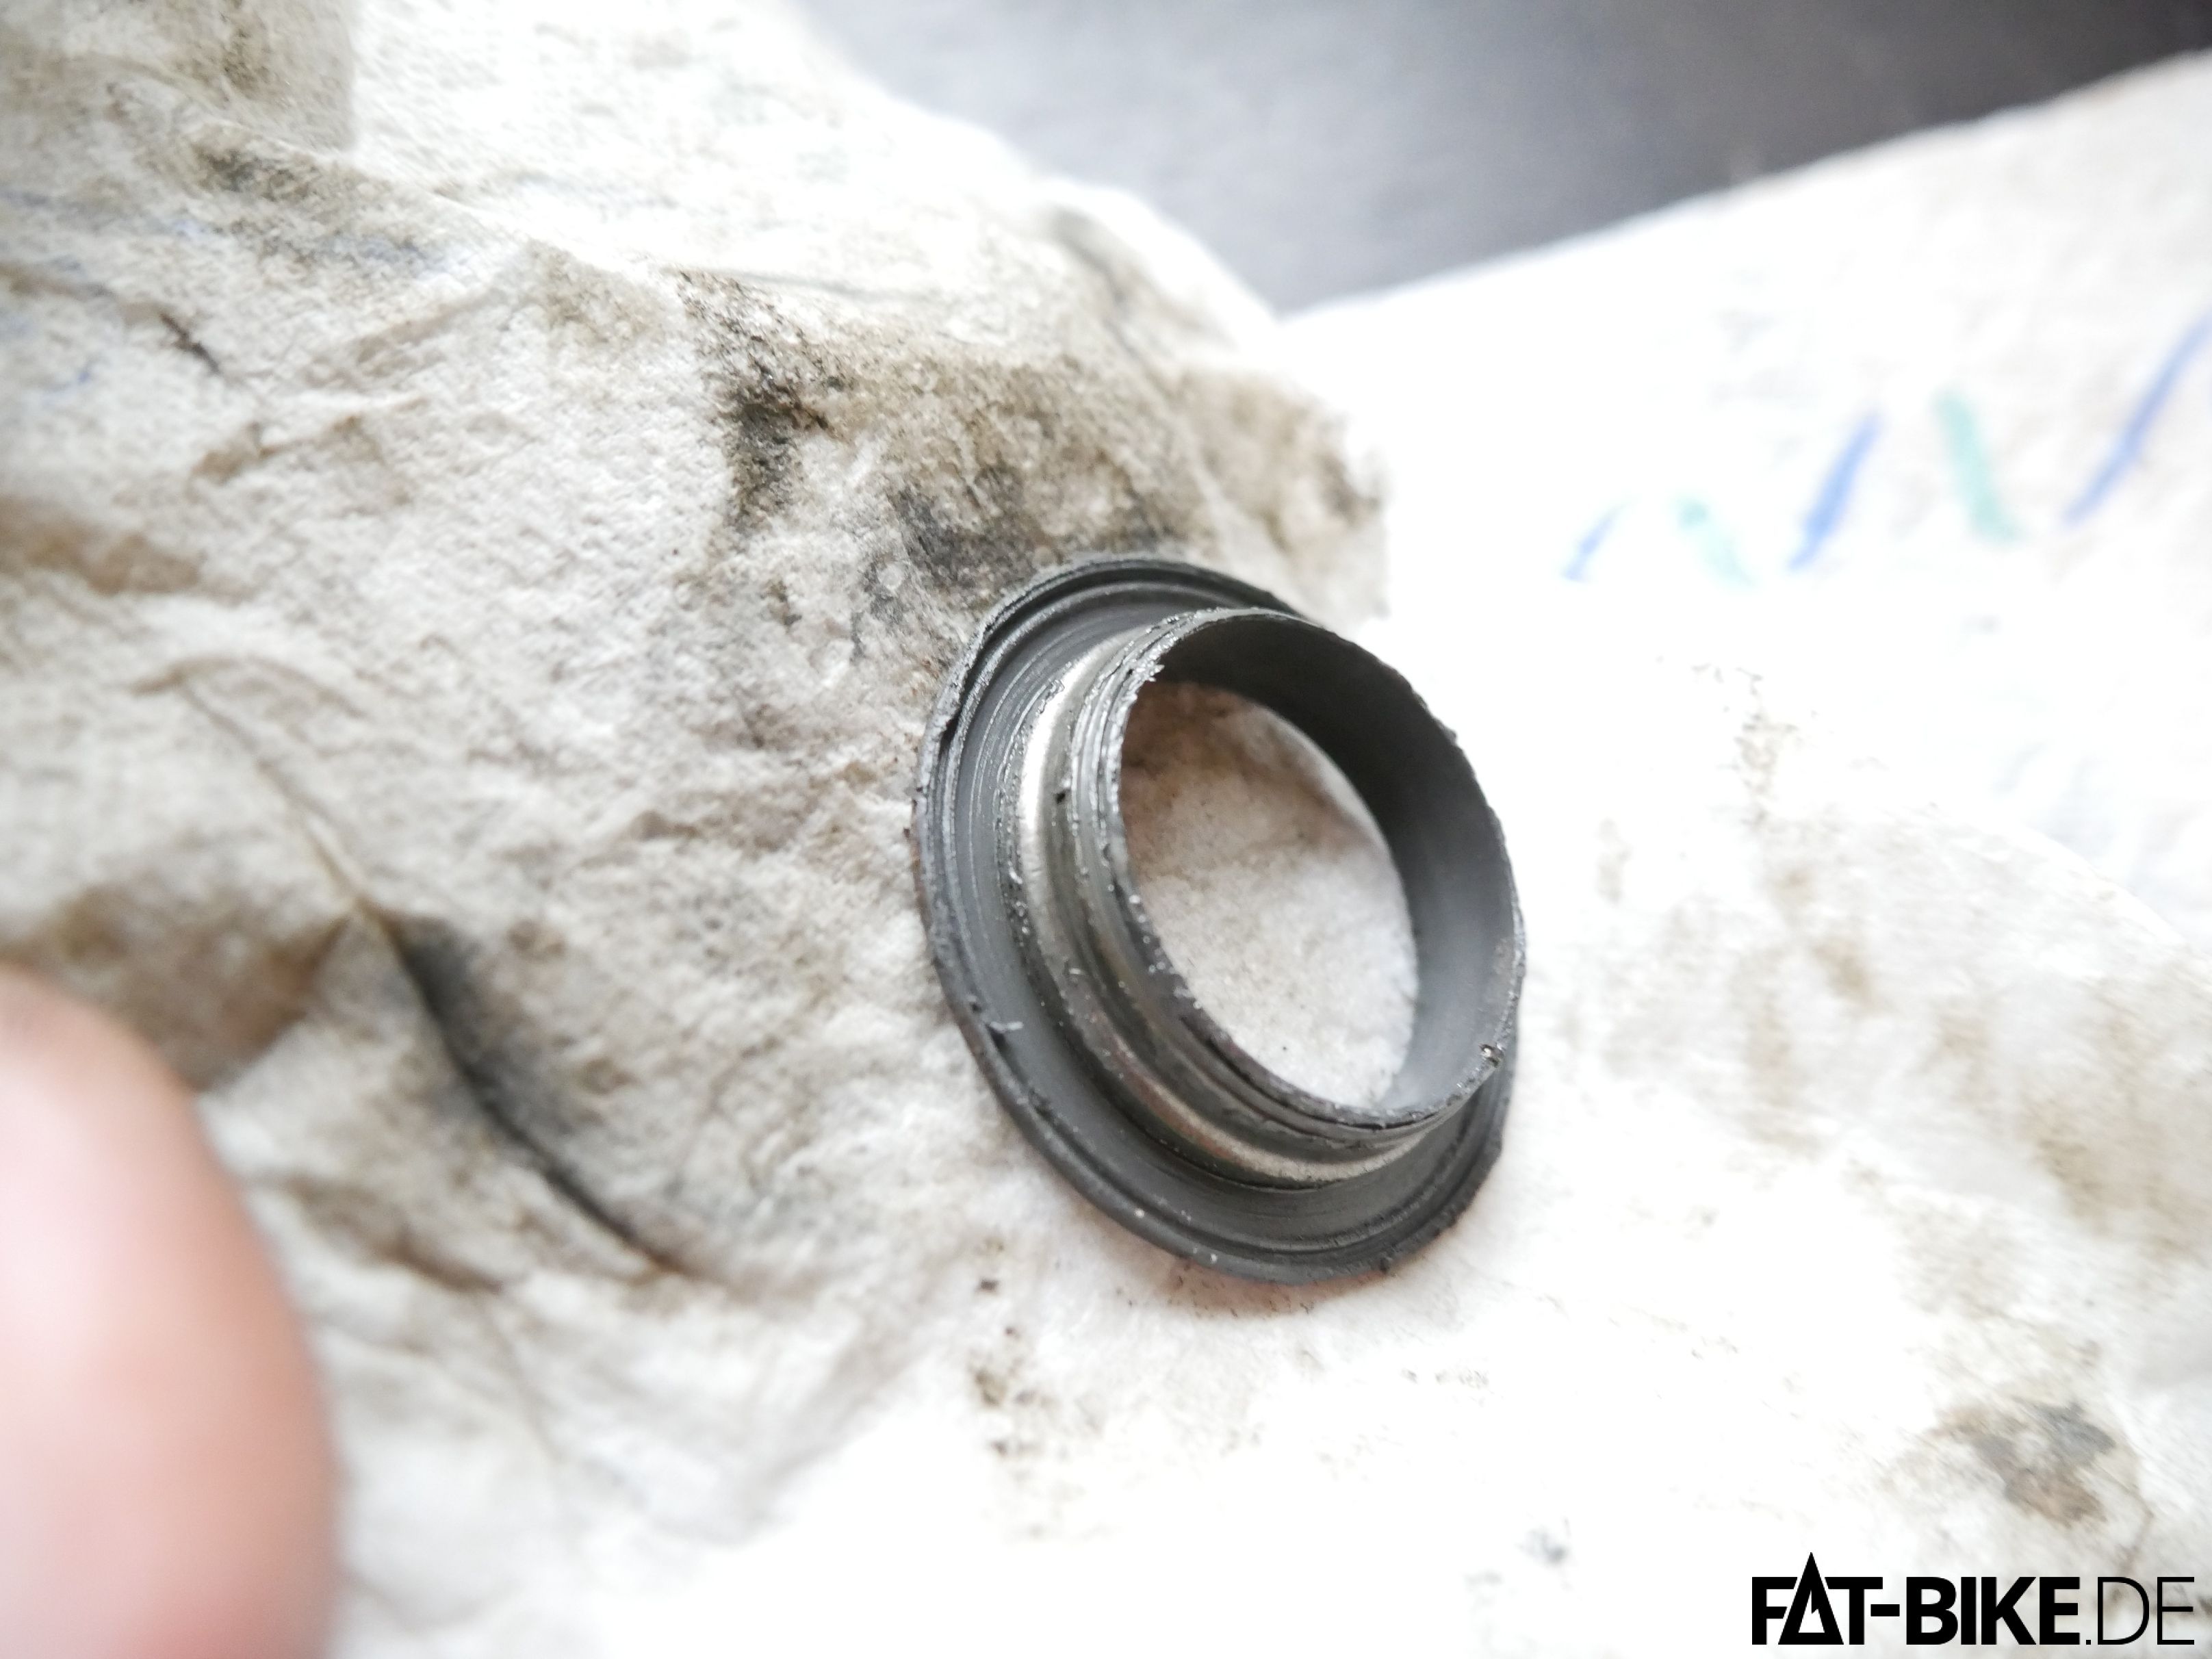
Here see the cleaned surface. Worn as well, but still okay to go for another round…
Step 15: don't forget to clean the spindle as well. In case you intend to clean/remove/replace your chainrings – this is your chance now!
Step 16: apply fresh grease to the plastic holder ring. This will make the next step much easier.
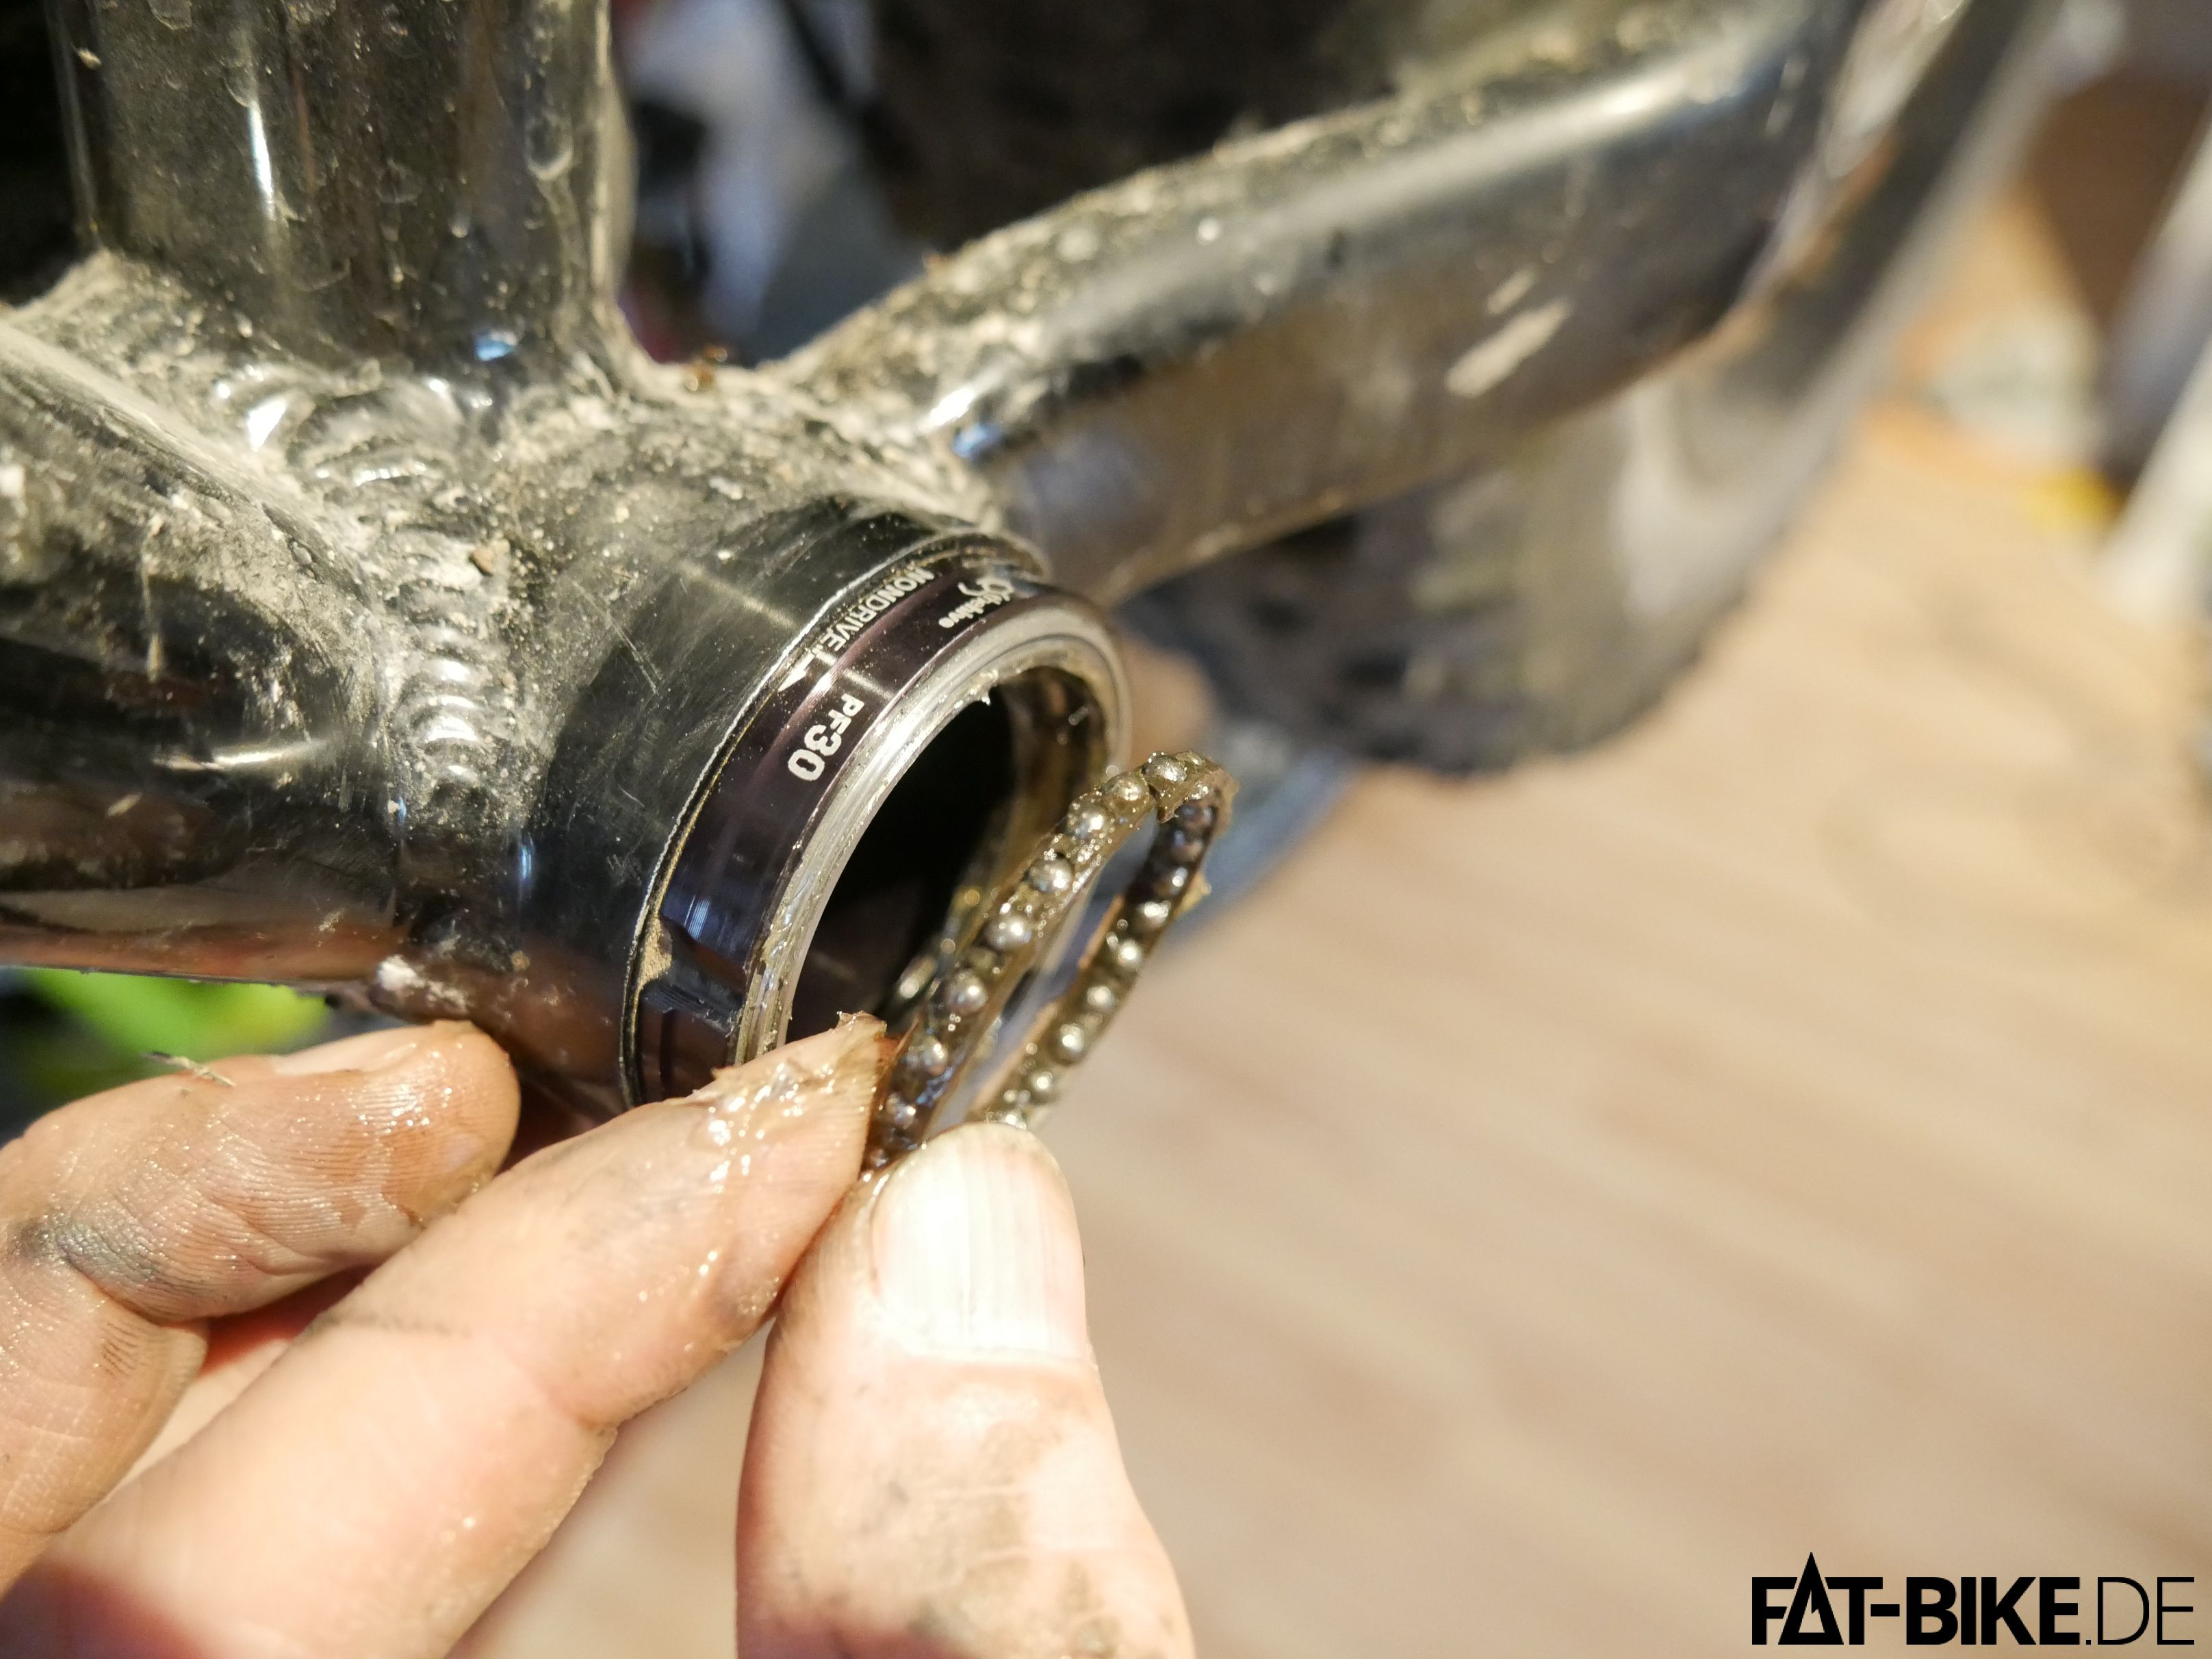
Step 17: place the balls into the holes. The grease will hold them in place.
Step 18: liberally apply fresh grease to the inner bearing surface.

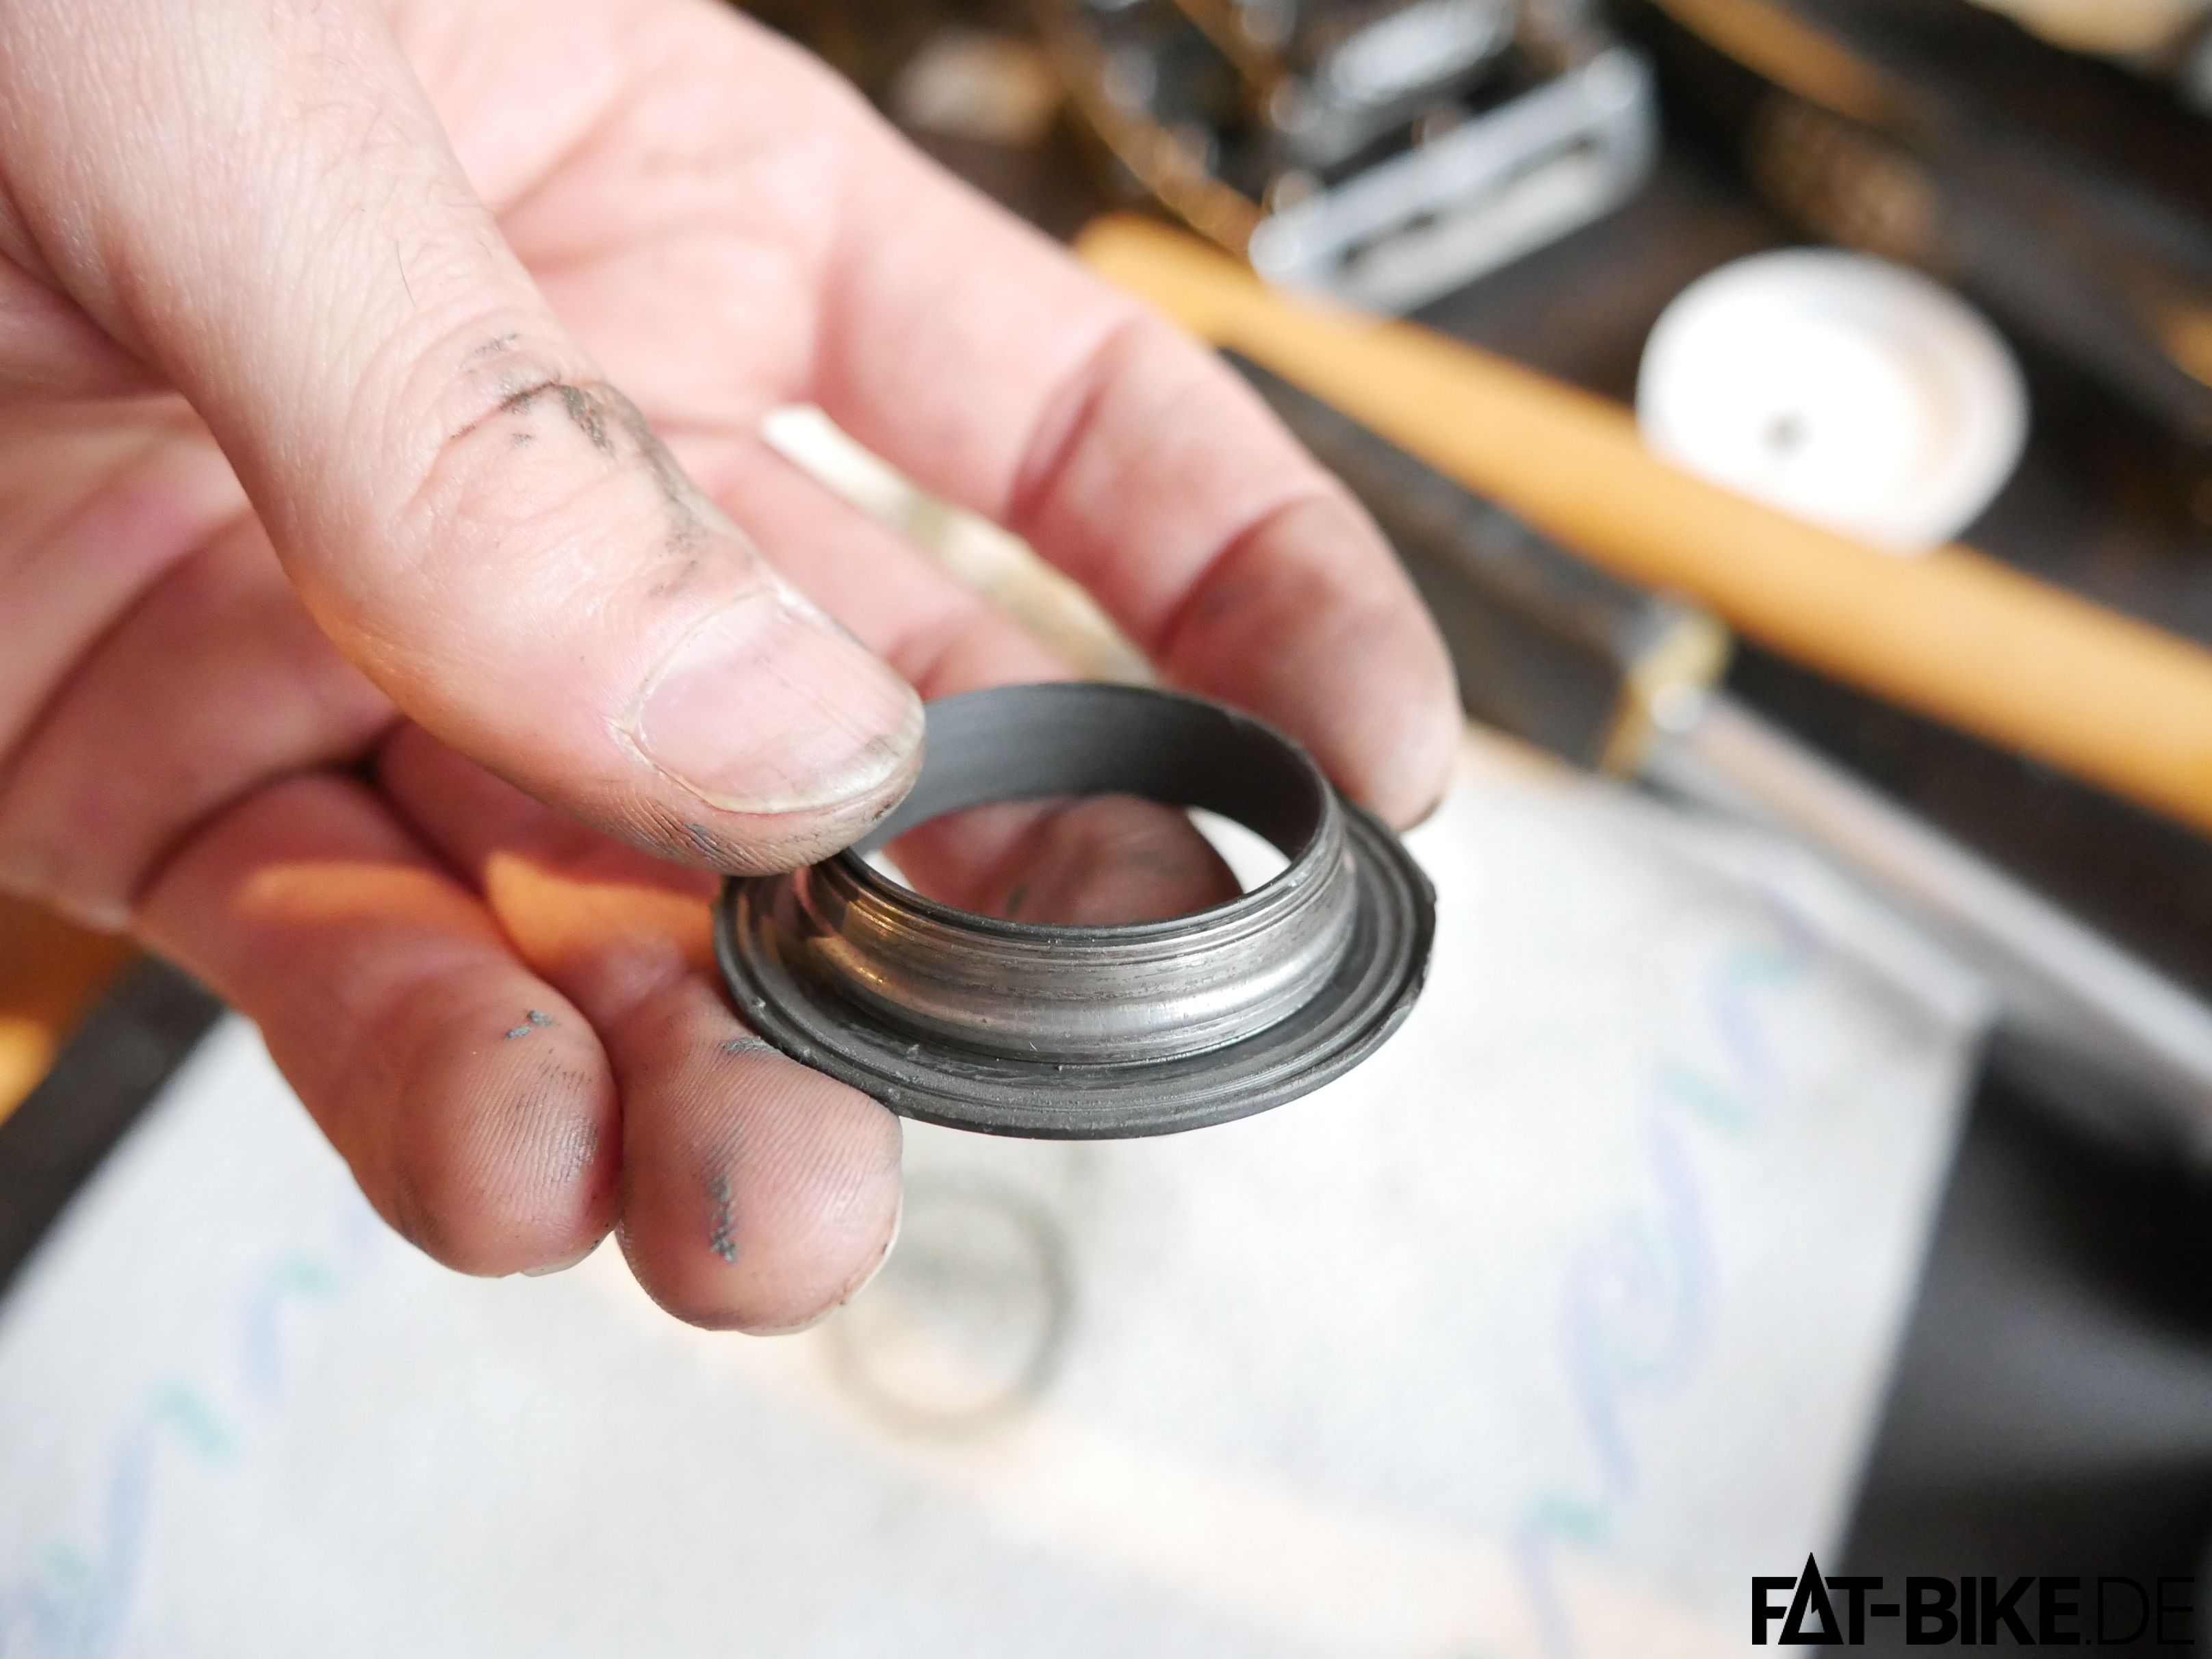
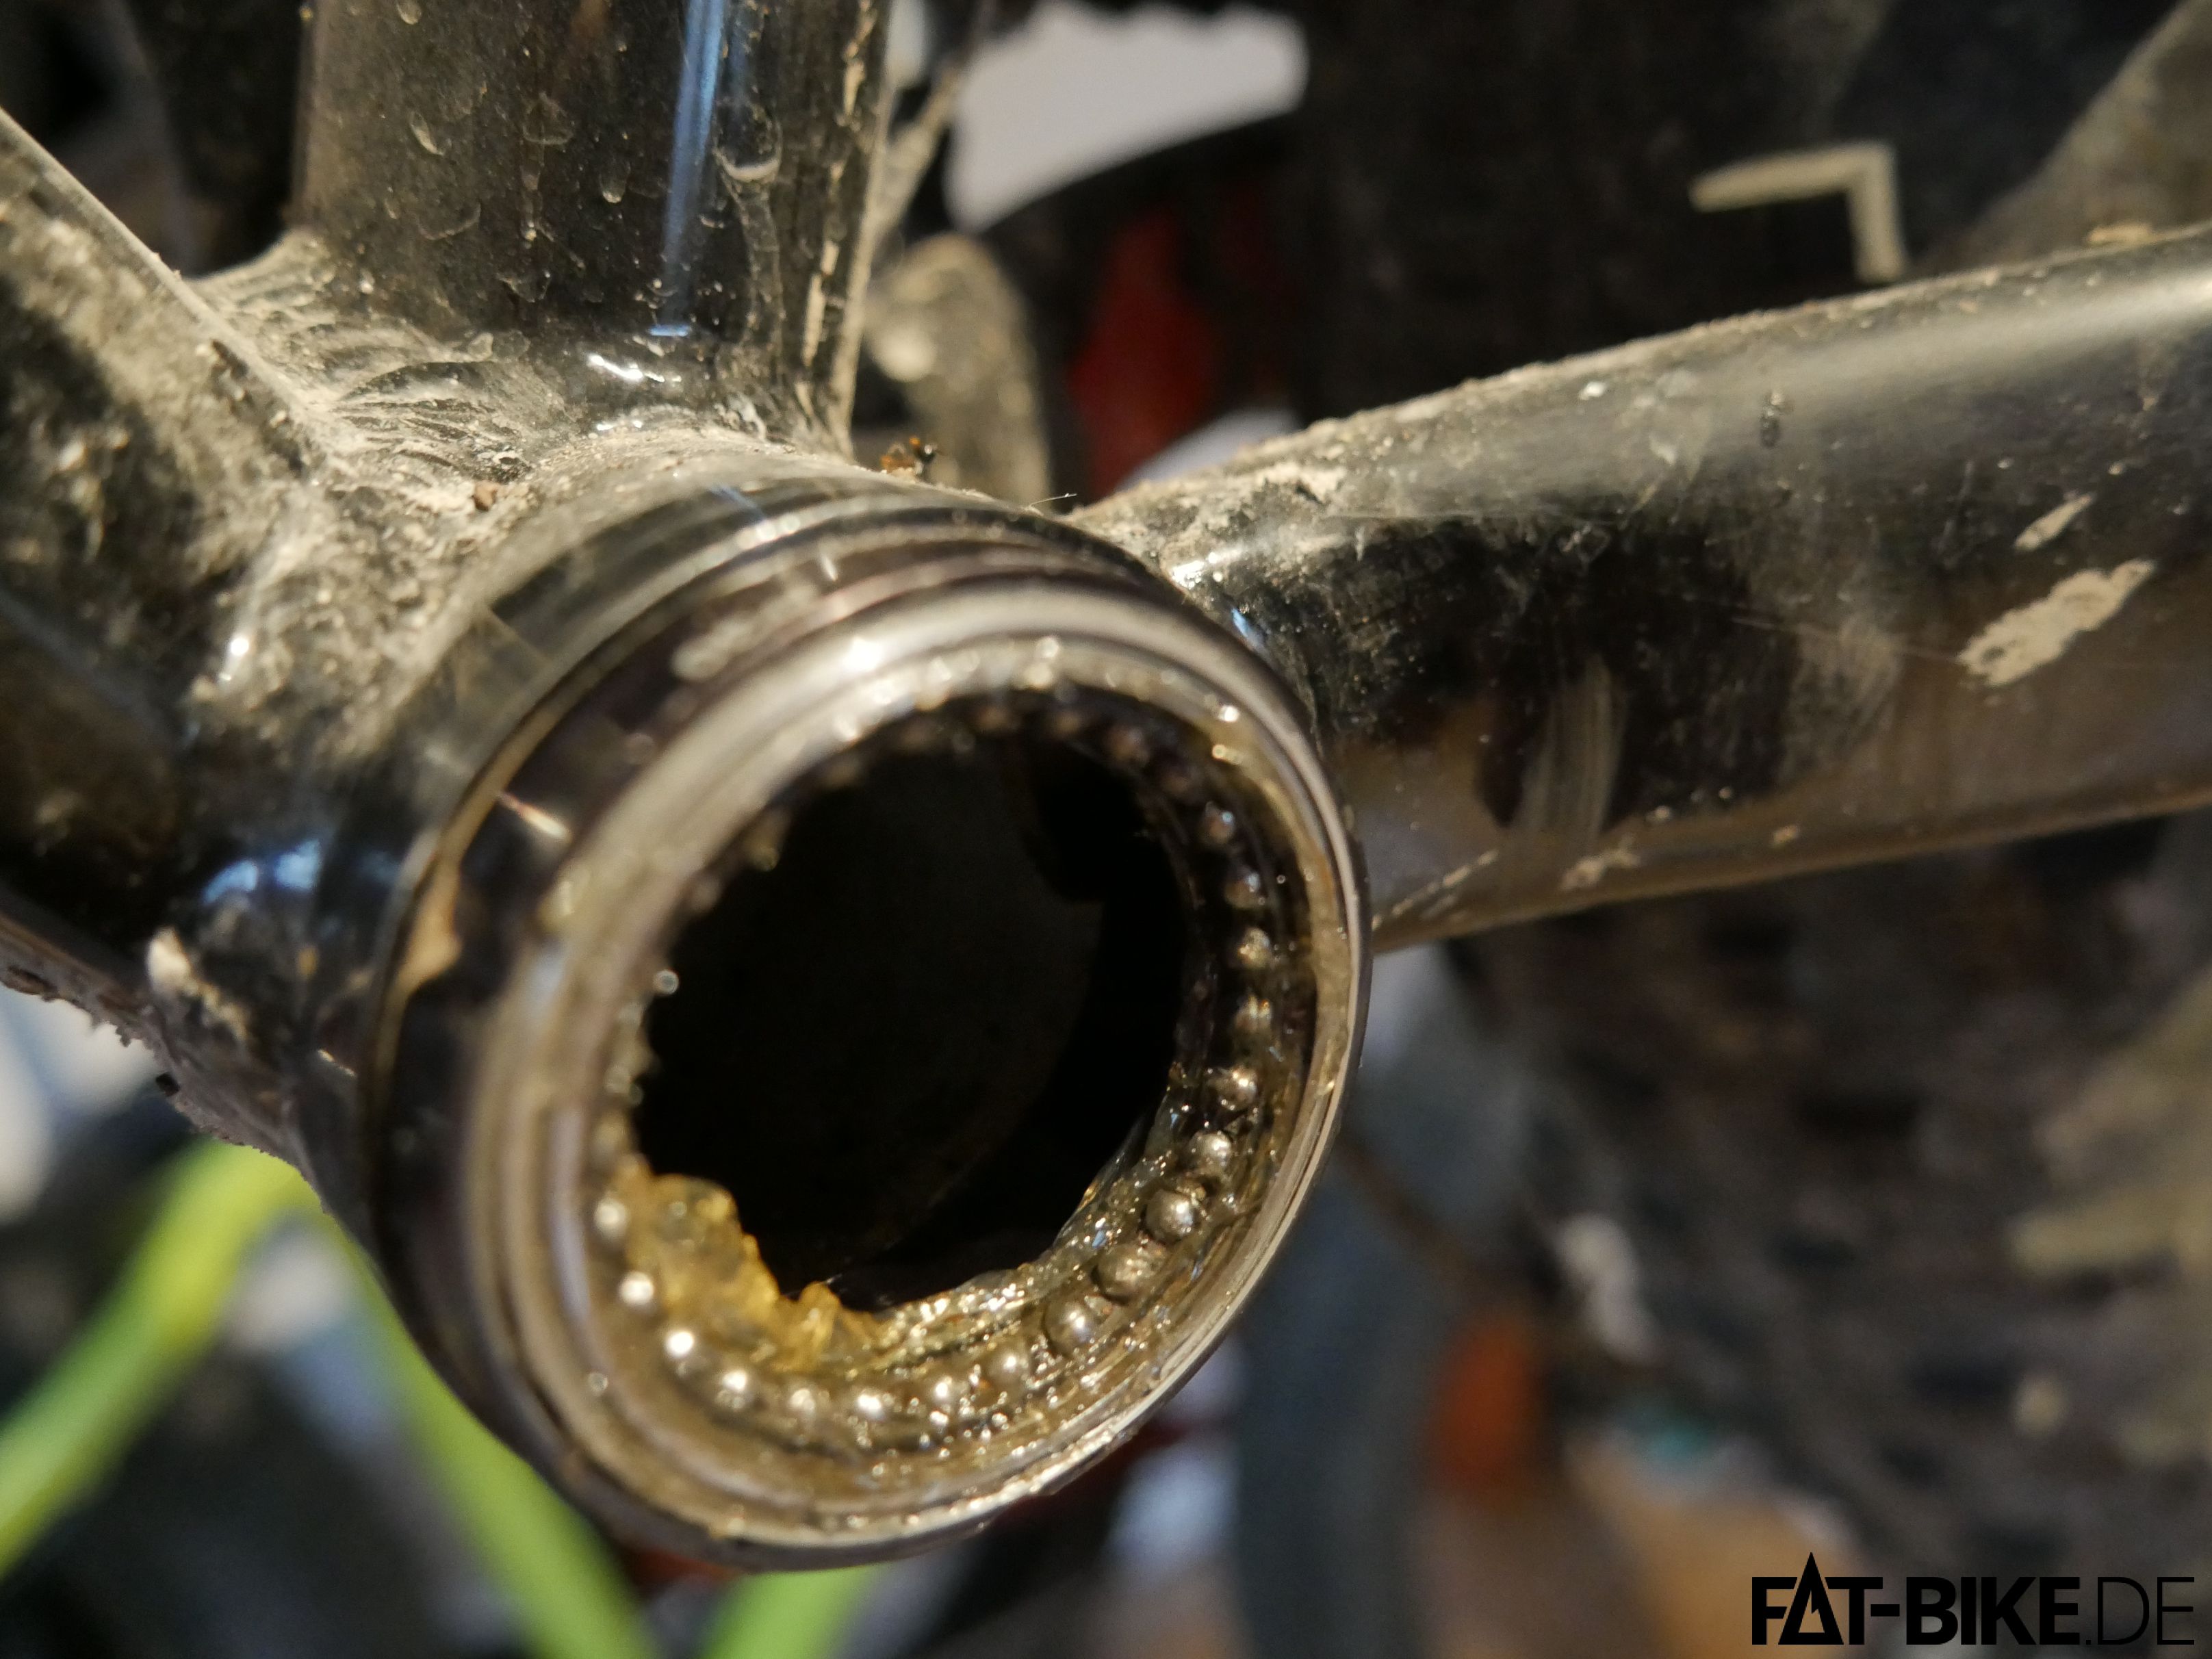
Step 19: put the bearing in place. Make sure not to flip it. The slightly wider end marks the outside!
This is how it should look like. Add some more grease now.
Step 20: carefully pry in the seal. Don't worry if it doesn't fit perfectly well. It does a poor job anyway.
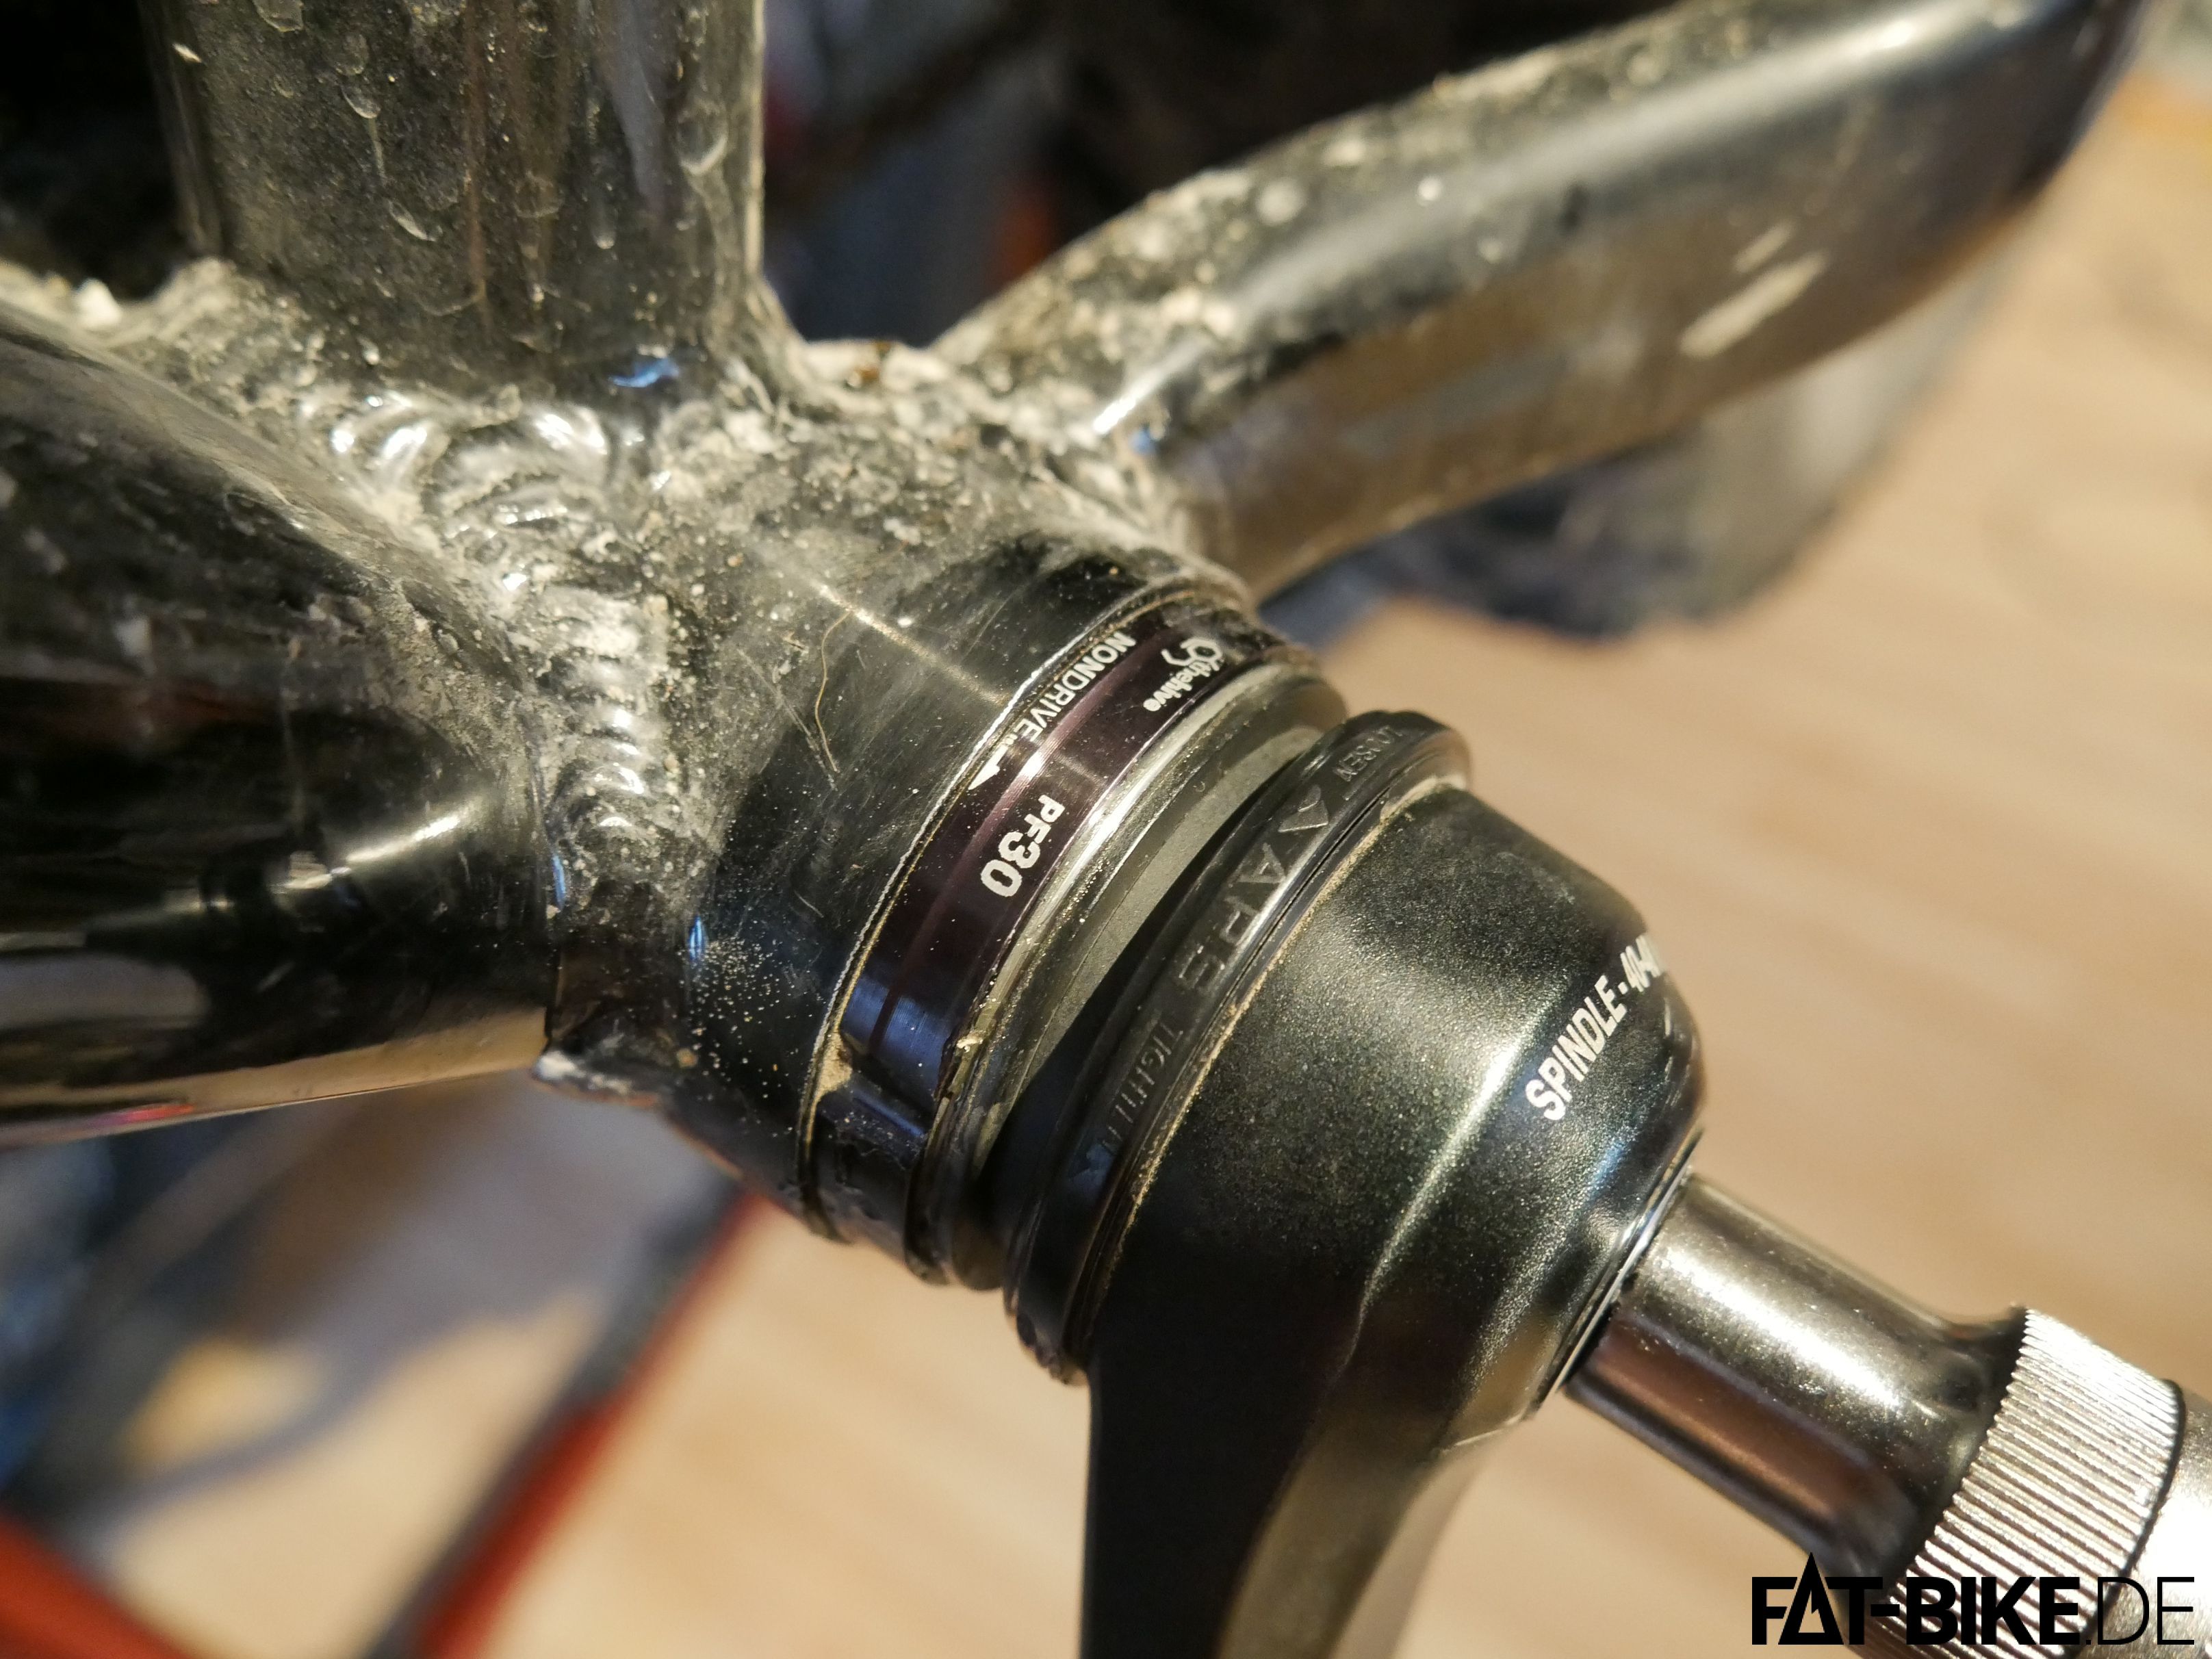
Step 21: reset the clearance adjustment ring. Clean it before you do so. This thing has an inner and outer ring which are linked by a thread. Screw them in to have maximum clearance.
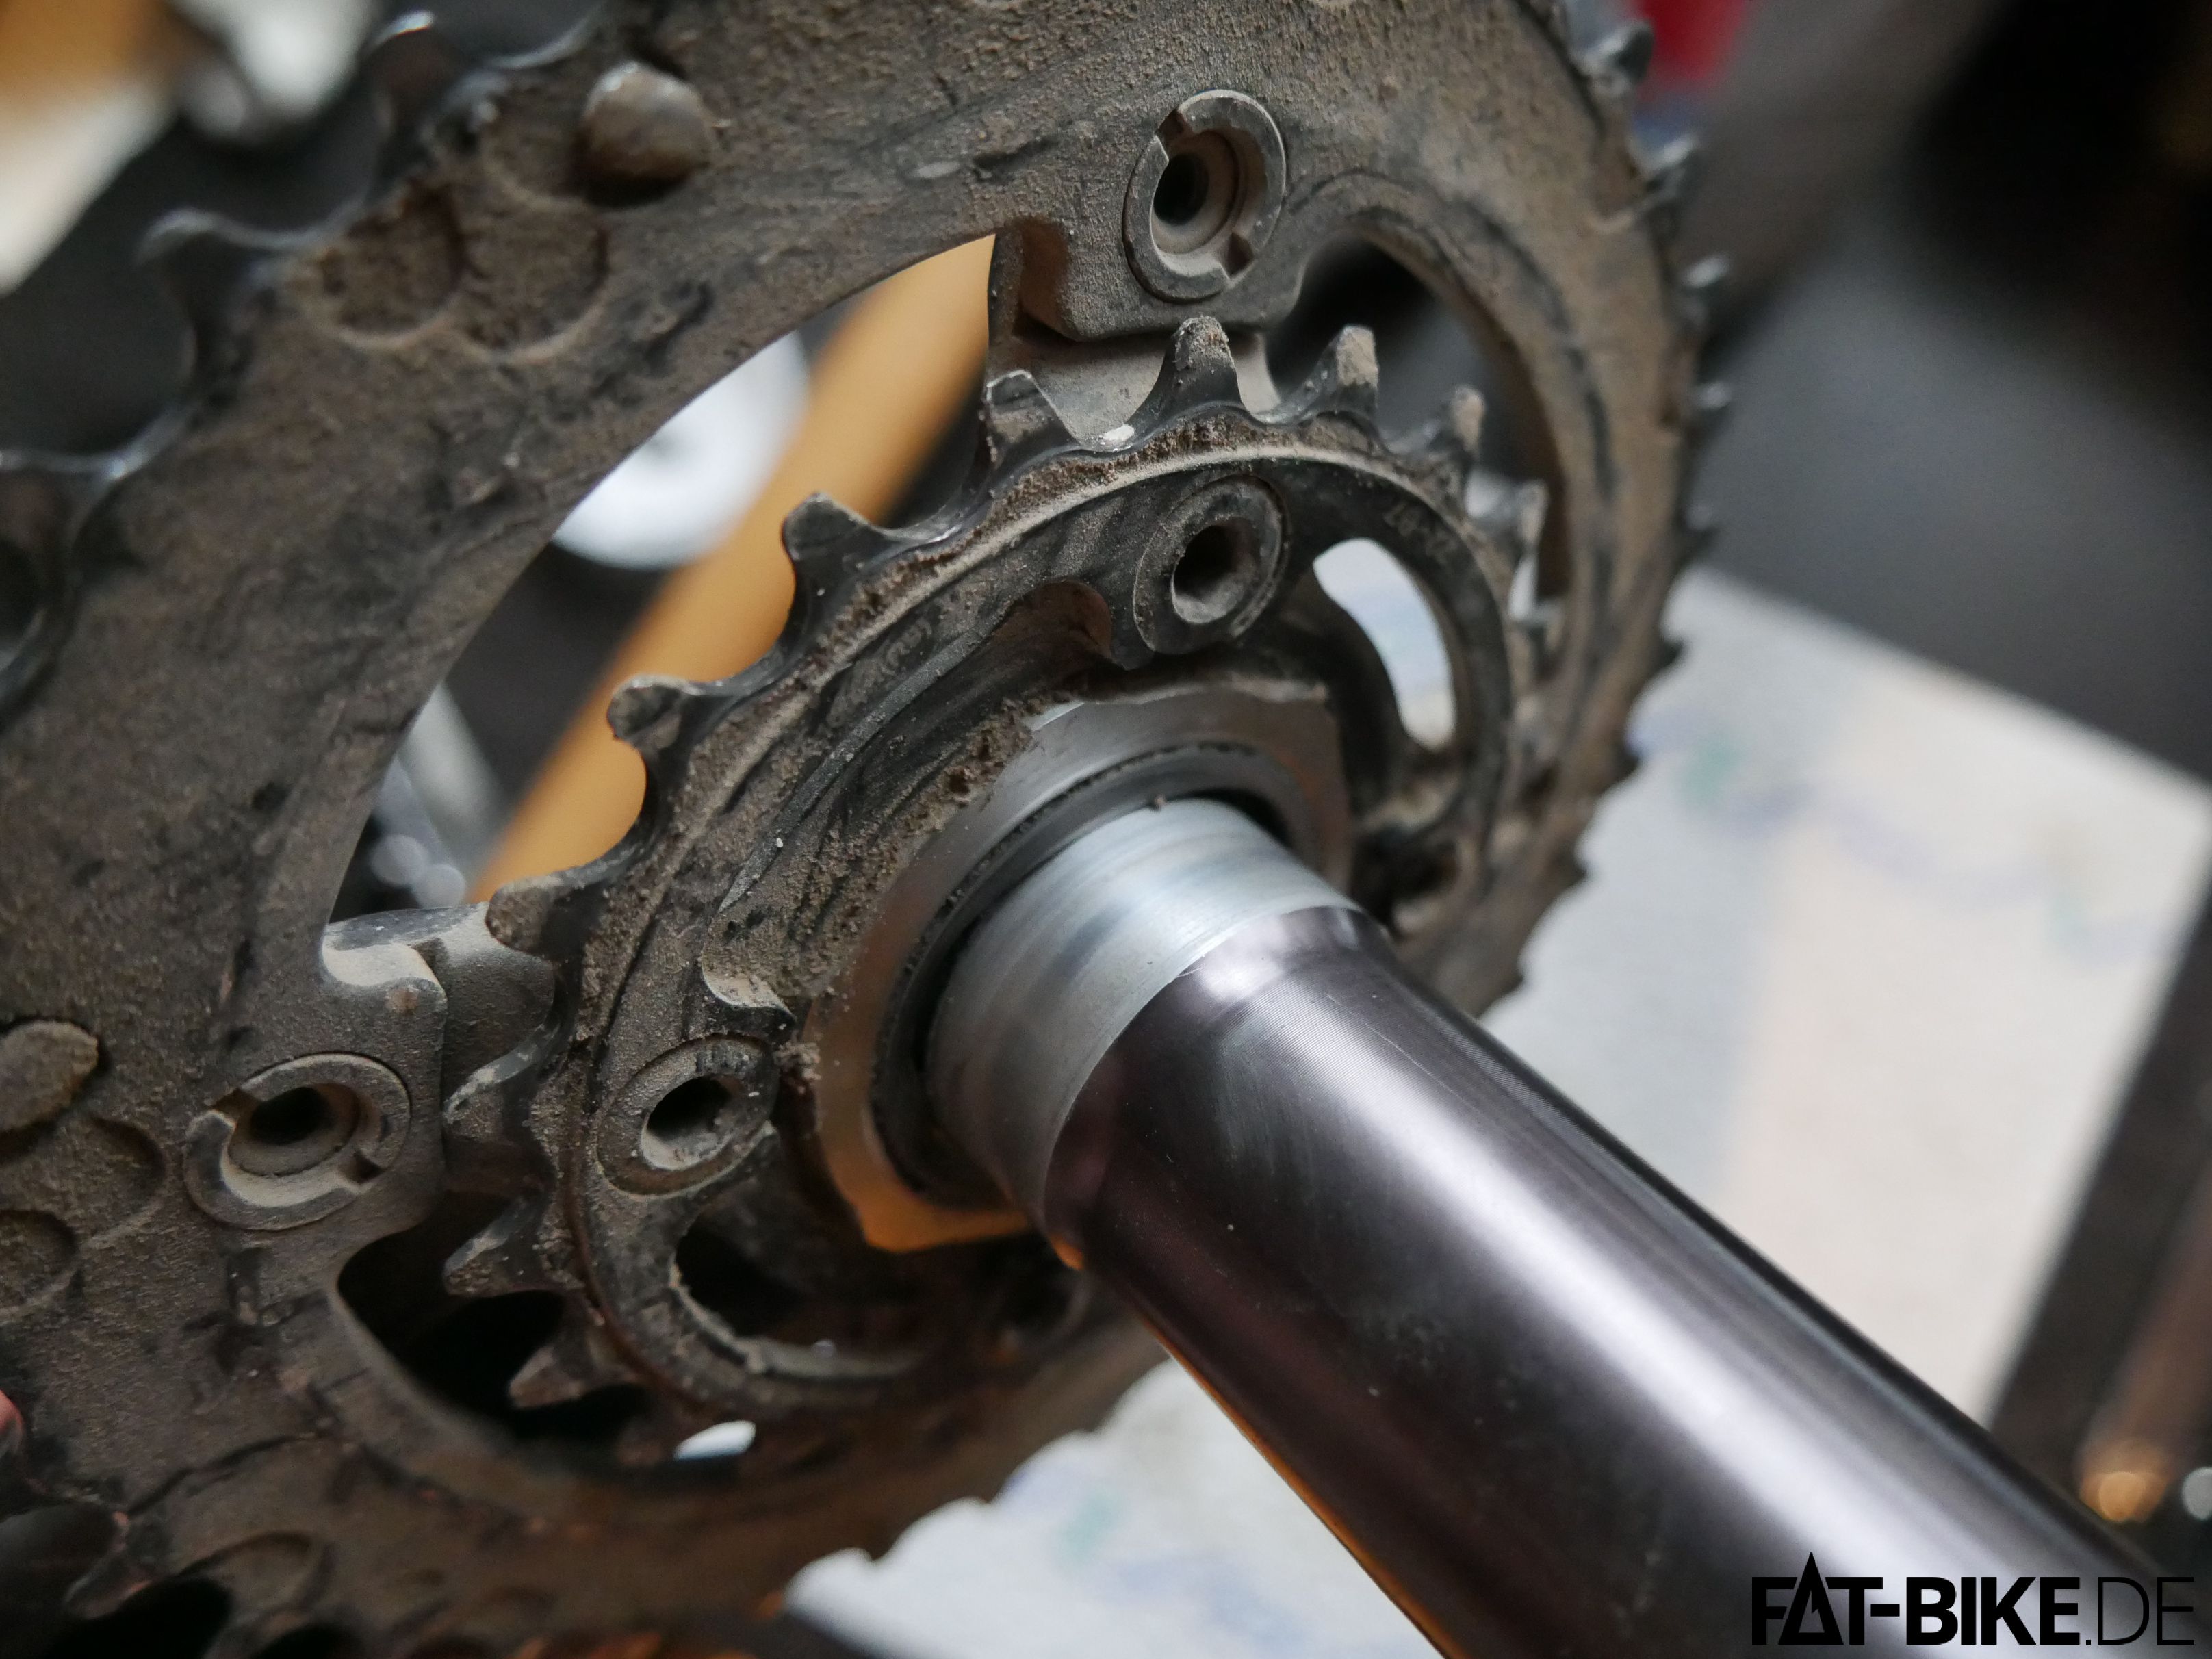
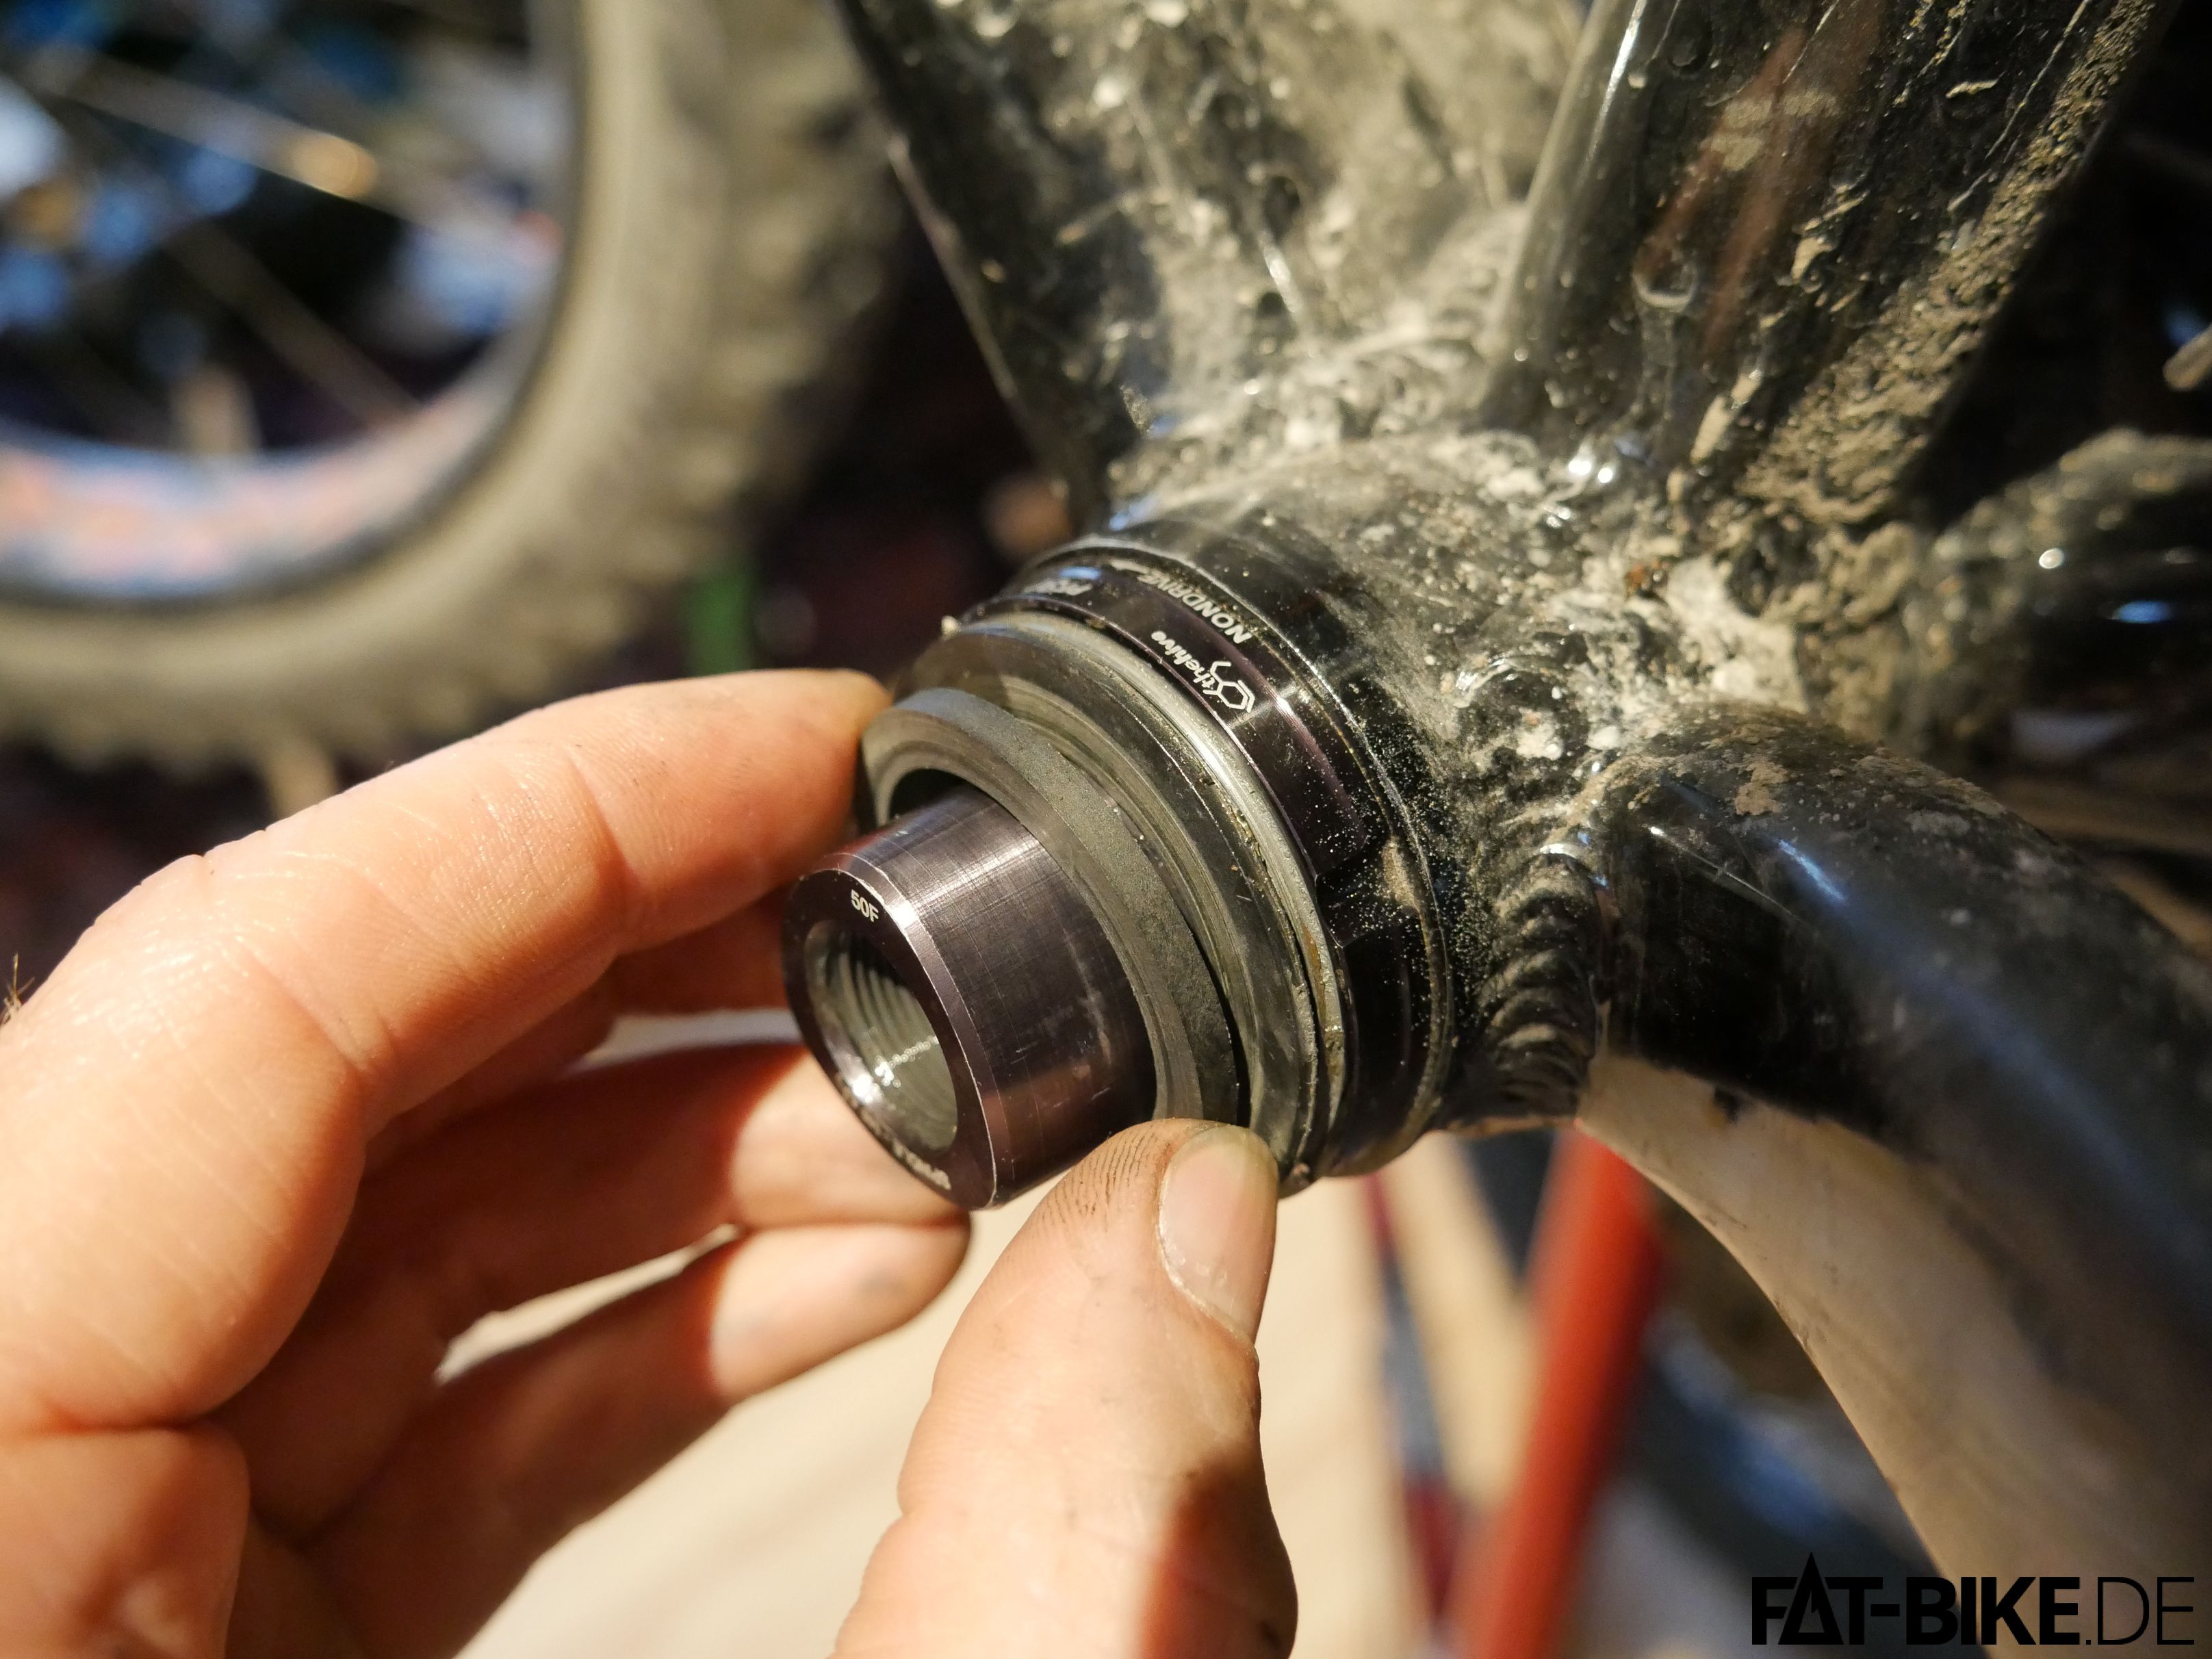
Step 22: fit the spindle. Make sure that both sides of your bottom bracket are prepared as we described above!

Step 23: add the non drive side outer bearing surface with it's holder. Wipe any access grease off the spindle.
Step 24: mount the plastic spacer.
Step 25: with the clearance adjuster set to minimum mount the left crank.
Step 26: tighten the puller screw with a hex 8 wrench. Check for free crank rotation and movement from time to time.

Step 27: adjust clearance. This step might have to be done several times as usually the final clearance can only be assessed after step 28. Our recommendation: with the crank fastened hand-tight leave appr. 1mm of clearance so the crank has room to settle during final fastening.
It may also happen, that even with your clearance adjuster set to minimum position the crank will hardly or not move. In this case we carefully ground 0.1 – 0.2 mm off the plastic spacer (see step 24) to gain some extra clearance.
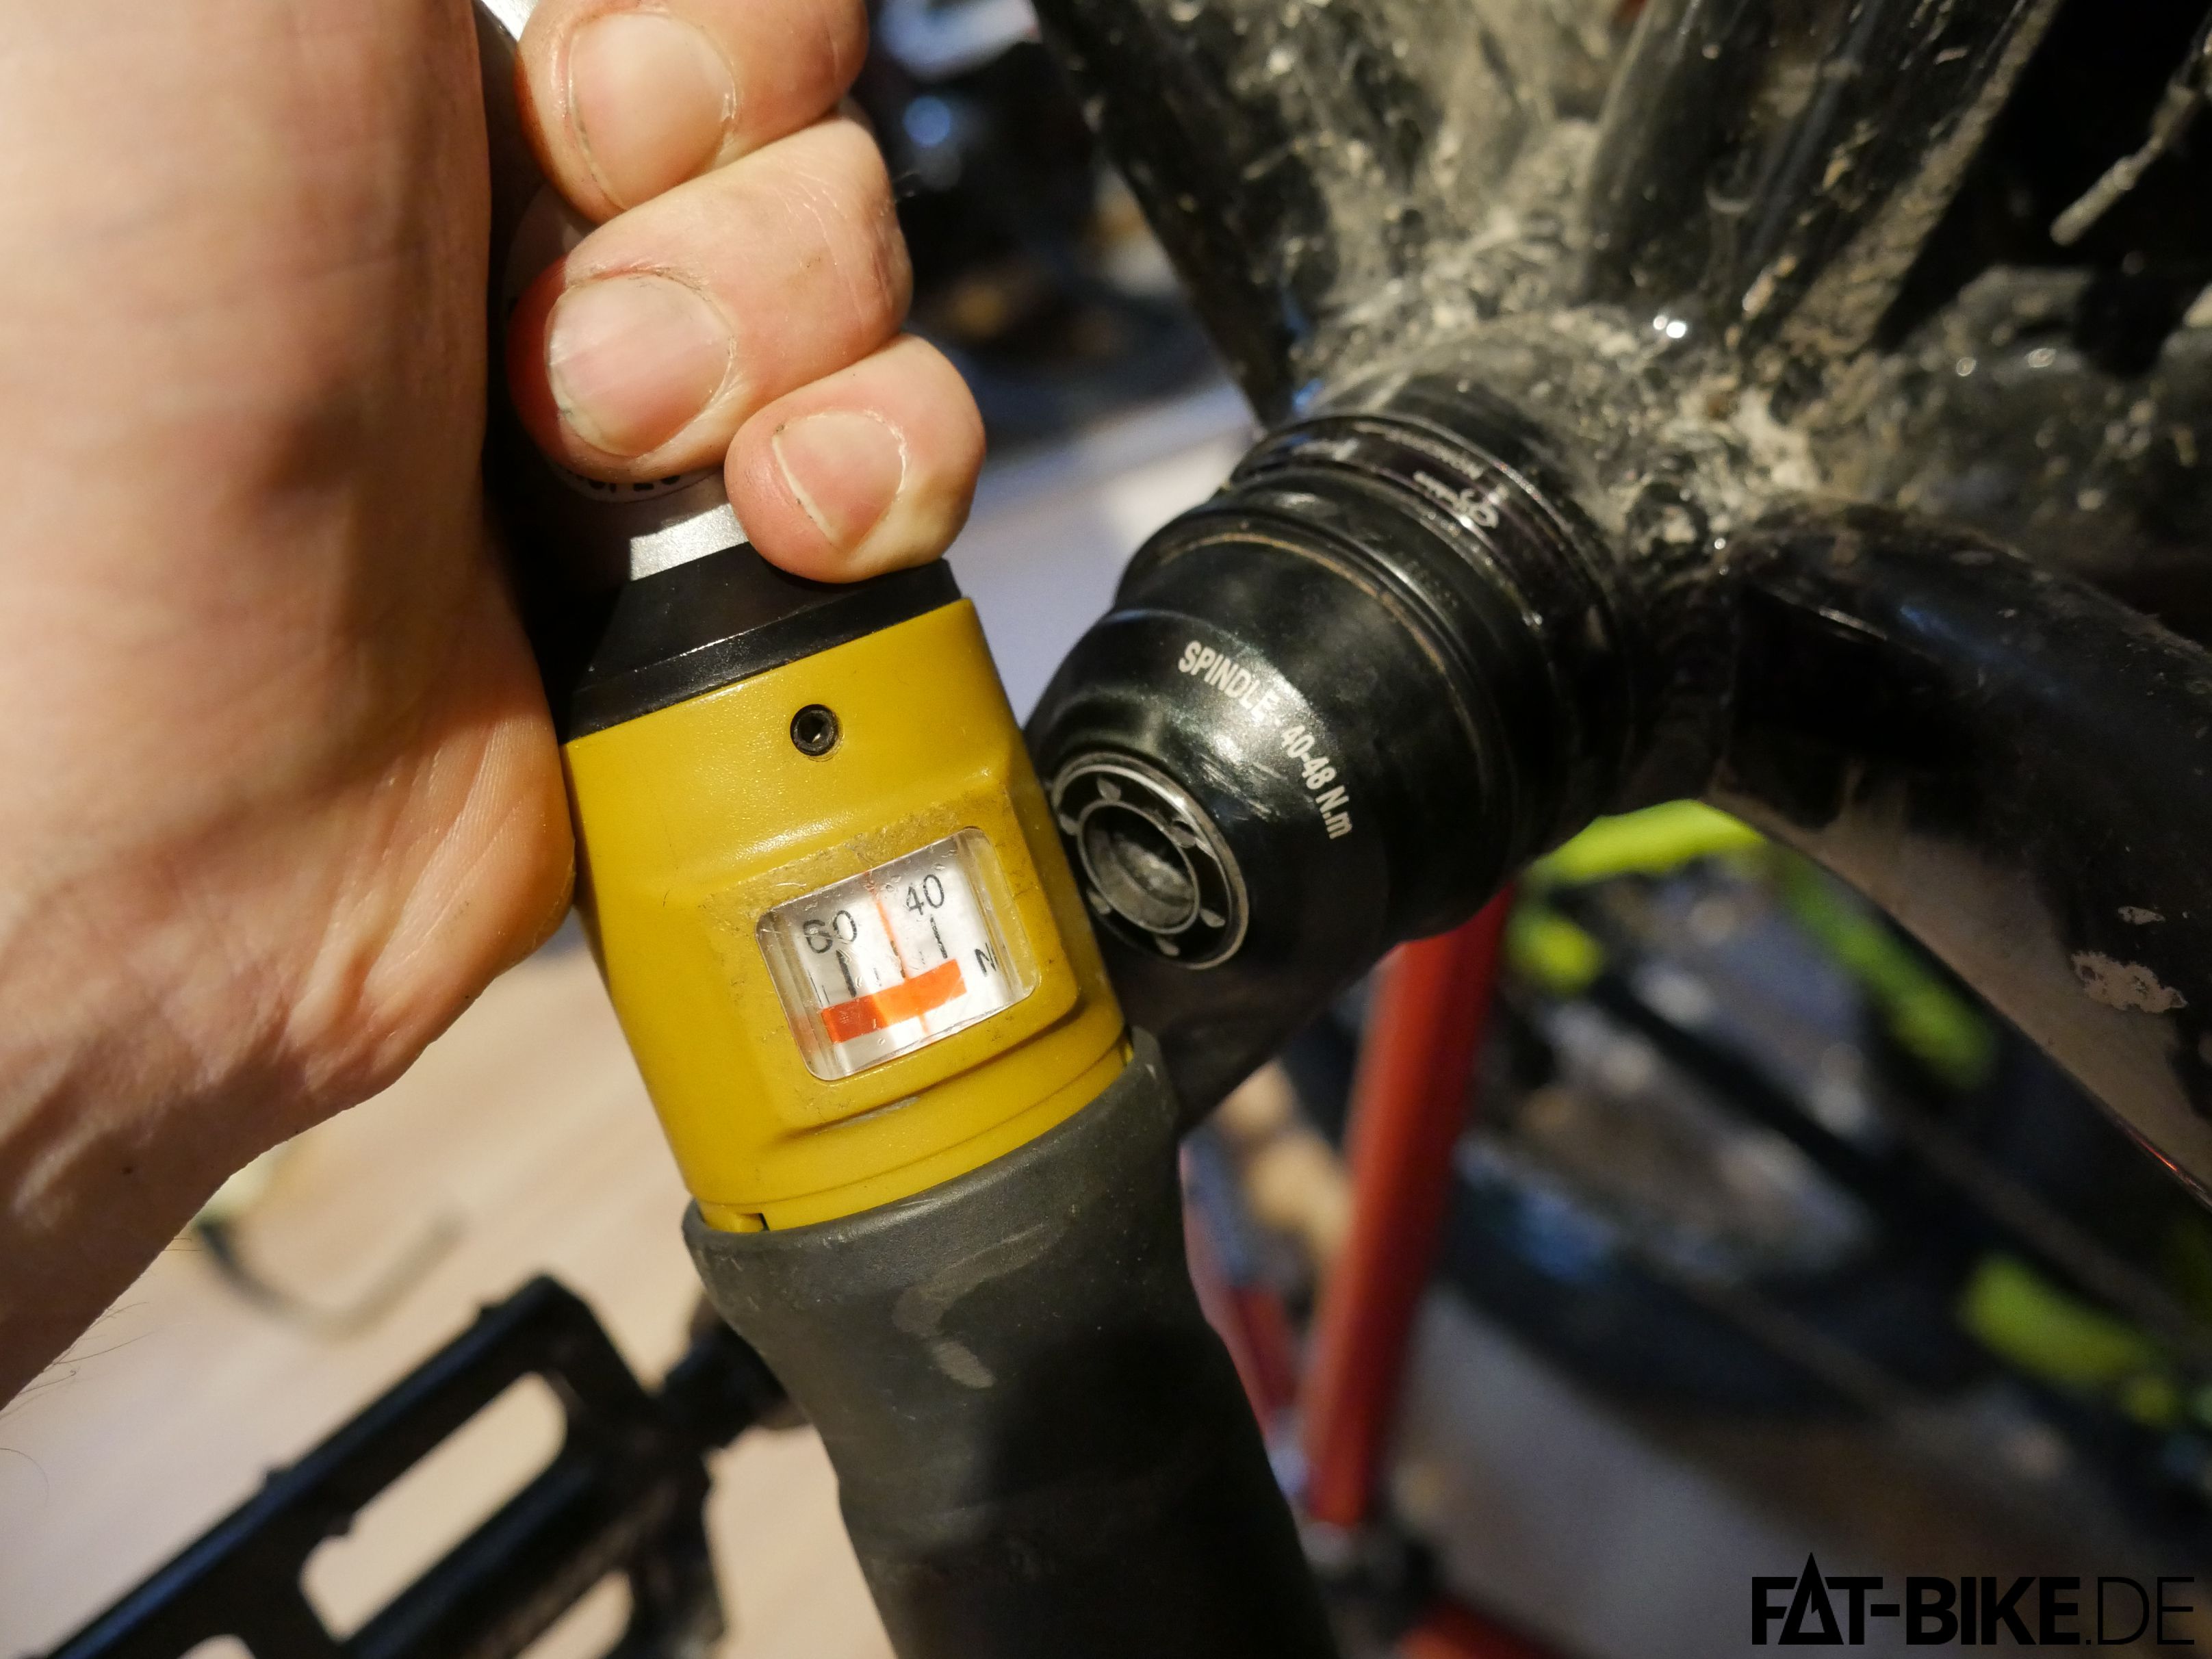
Step 28: fasten the crank with suggested torque of 48Nm. You will need a torque wrench here and we highly recommend to really use one… Check for free spindle movement and assess clearance. In case of issues go back to step 27 and do it again. And again. And again. This sucks, but you should be precise here to get a perfect result for your E13 cranks repair.
So what?
We nearly forgot step 29: congratulations! You're a proud bastard now! Have a beer and celebrate your success!
And if you don't like the result: go back and search for any potential mistake or error. And in case you found out that your E13 FATBike cranks are a piece of finest rubbish you may wish to read this.
danke, Teile sind schon unterwegs.
Den komplett Umbau spare ich mir, budgetmässig, noch ein bisschen auf.
erstmal danke für die interessanten beiträge. ich schau immer wieder gerne bei euch vorbei.
hab mal eine frage an euch. bei meinem fatboy sind samox kb und ritzel komplett durch, so schlimm hab ich das noch nie geschafft, vor allem nicht in einem jahr.
werde nun ritzel, kette und kettenblätter tauschen gegen eine komplette shimano reihe
4-loch kettenblätter XT 24/38 und 11-36 ritzel.
spricht da aus eurer erfahrung was dagegen?
was würdet ihr empfehlen?
sonstige tipps?
danke für eure hilfe
mario
Hi Mario,
danke für Deine Anfrage. Nein, gegen eine XT spricht garnichts. Ich habe selbst eine (fast, bis auf die Kurbel) komplette Deore XT an meinem FatBoy Expert. Checke den Lochkreis vorher, ich bin nicht sicher, welches Maß die Samox Kurbeln haben. Ggf. lohnt sich gleich die Aufrüstung auf Race Face, da die Samox Kurbel insgesamt sehr einfach aufgebaut ist.
Ansonsten solltest Du problemlos umrüsten können.
Wenn Du nach einem konkreten Tipp fragst, dann denke vielleicht darüber nach, die XT incl. Shifter und Schaltwerk/Umwerfer zu verbauen. Funktion und Haltbarkeit sind so optimal.
FATte Grüße
Matt